Cura Vase Mode: Slicer settings you need to know
Here’s everything you need to know about the vase mode Cura offers, including the slicer function’s capabilities and applications, how to optimize print settings for increased strength, and more.

Last updated on 27 Mar, 2024. 12 minutes read
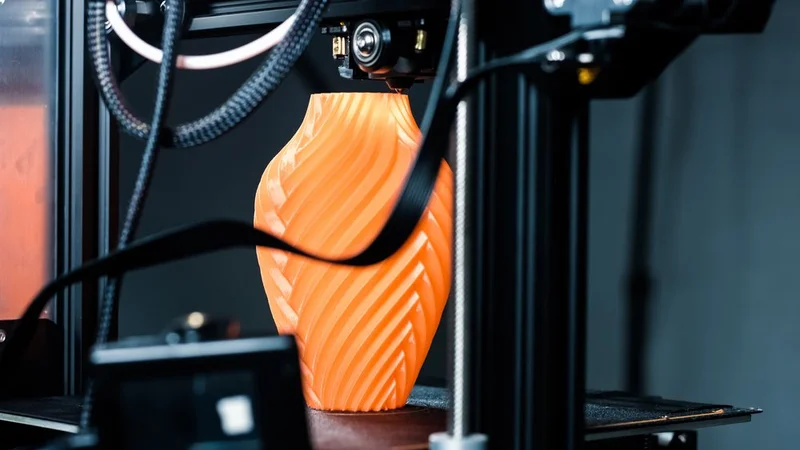
Vase mode is a great option for printing aesthetic models like vases, light fixtures, pencil holders, and more
Whether you’re a beginner to FFF 3D printing or a more experienced maker, you’ll have heard of—and probably even used—UltiMaker Cura. The software, which has been around since 2014, is a slicing program used by millions of people around the world to prepare 3D models and fine-tune print settings. While the software is intuitive, it’s also jam packed with features and functionalities, which means you may not be using it to its full potential. For instance, Cura features many different infill options, with variables that can influence printing time, part strength, and more. In this article, we’ll be looking specifically at the vase mode Cura software features, which provides an easy shortcut for those looking to print vases, containers, light fixtures, and other hollow objects.
What is Vase Mode?
First thing is first: what is vase mode? Vase mode refers to a special slicer setting that transforms a solid 3D model into a vase-like structure, with a solid bottom, a hollow interior, and no top layer. You might be asking yourself how vase mode differs from other slicer settings—like simply removing infill and the top layer. There are a couple key differences.
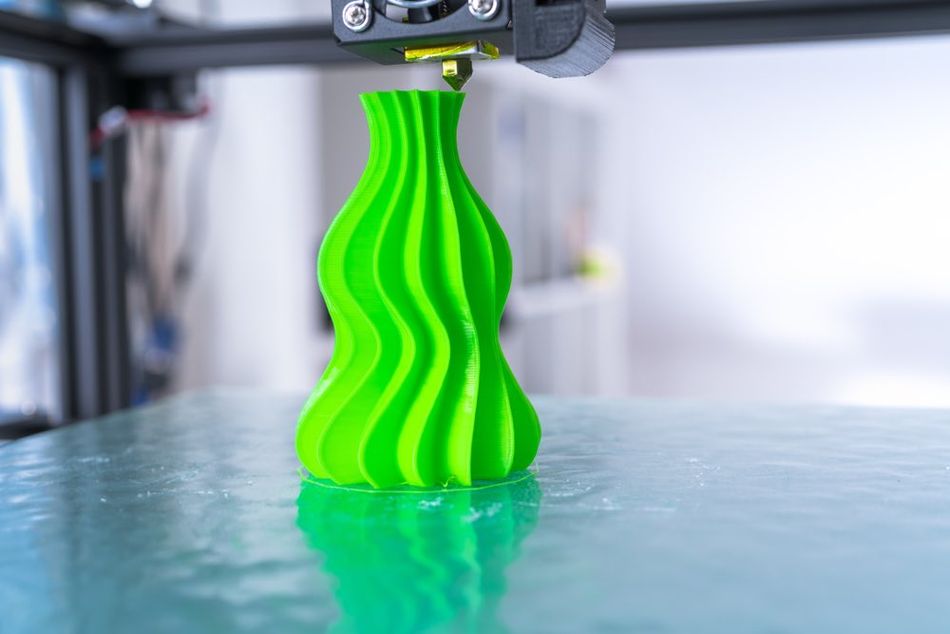
First, vase mode prints using a different extrusion pattern. Traditionally, print heads deposit an entire layer before moving upwards, and then printing another layer. With vase mode, however, the slicer generates g-code that makes the print head move continuously, raising gradually as it prints in a spiral-like motion.
Second, vase mode only prints models with a single layer wall thickness. This means that vase mode parts have a solid base, but thin walls. You can change your slicer settings to increase wall line width (more on that later), but it isn’t possible to actually increase the number of walls. This has both advantages and disadvantages. On the one hand, vase mode parts print quickly and use less material than regular print settings. On the other hand, it is difficult to print strong parts using vase mode, since the outer wall is only made up of one layer.
Since we’re looking specifically at vase mode in UltiMaker Cura, it’s worth noting that the feature isn’t actually called “vase mode” in the slicer program. Instead, the function is called “Spiralize Outer Contour.” Spiralize Outer Contour can be activated by going to Cura Print Settings, and then Special Modes.[1] Keep reading for a step-by-step guide to using Cura’s vase mode settings.
Recommended reading: Cura infill patterns: What they are and when to use them
How to Use Cura Vase Mode, Step by Step
In this section, we’ll walk through the different steps involved in implementing vase mode in UltiMaker Cura software.
Accessing vase mode
The first step is to import the STL file of the model you are using into Cura. When choosing a 3D model, it’s a good idea to opt for a shape that would work well as a vase: such as a cylindrical model or models with a rounded form. It’s also possible to print models with more complex outer geometries, such as the model below. The important thing is that the printhead is able to move continuously, and isn’t interrupted by bridges or steep overhangs.
Typically, the 3D model will start out as a solid object in your slicer program. (That said, it is possible to turn an existing vase design into a “vase mode” model.) To create the hollow form and base characteristic of a vase, you need to activate the “Spiralize Outer Contour” feature in Cura. You’ll find this setting under Print Settings -> Special Modes. Once you’re there, select Spiralize Outer Contour and slice the 3D model. The resulting shape should be a hollow shell with a base and no lid.
When you use the vase mode Cura offers, it’s worth pointing out that the setting automatically changes the model’s wall thickness to one layer. Because this setting prints in a single continuous line, rather than layer by layer, it isn’t possible to reinforce the shell with additional walls. In practice, this means that the walls of your printed model may have limited strength.
Strengthening vase mode
Fortunately, it is possible to increase the thickness of your vase’s outer walls by tweaking print settings. First, head into Cura Quality Settings to change the Line Width. If you’re using a standard 0.4 mm nozzle size and the line width is set at 0.4 mm, you can increase it fractionally (to about 0.6-0.7 mm) to ensure that the printed layer is slightly wider than the nozzle. (Alternatively, you can use a larger nozzle with a wider diameter to increase the wall thickness.)
If you have increased the line width so that it is bigger than the nozzle diameter, there are a few other settings you’ll have to adjust to ensure the best results. First, slowing your 3D printer’s print speed to between 15-40 mm/s will enable the print head to deposit the thicker line width more easily and reduce the risk of errors like blobs. Second, increasing the flow of filament (you’ll find this under the Material tab) by up to 50% can also help thicken the deposited layer.[2] Finally, boosting your printer’s nozzle temperature by 20-50 degrees will facilitate the faster slow of filament and ensure the plastic is melting rapidly enough to extrude.
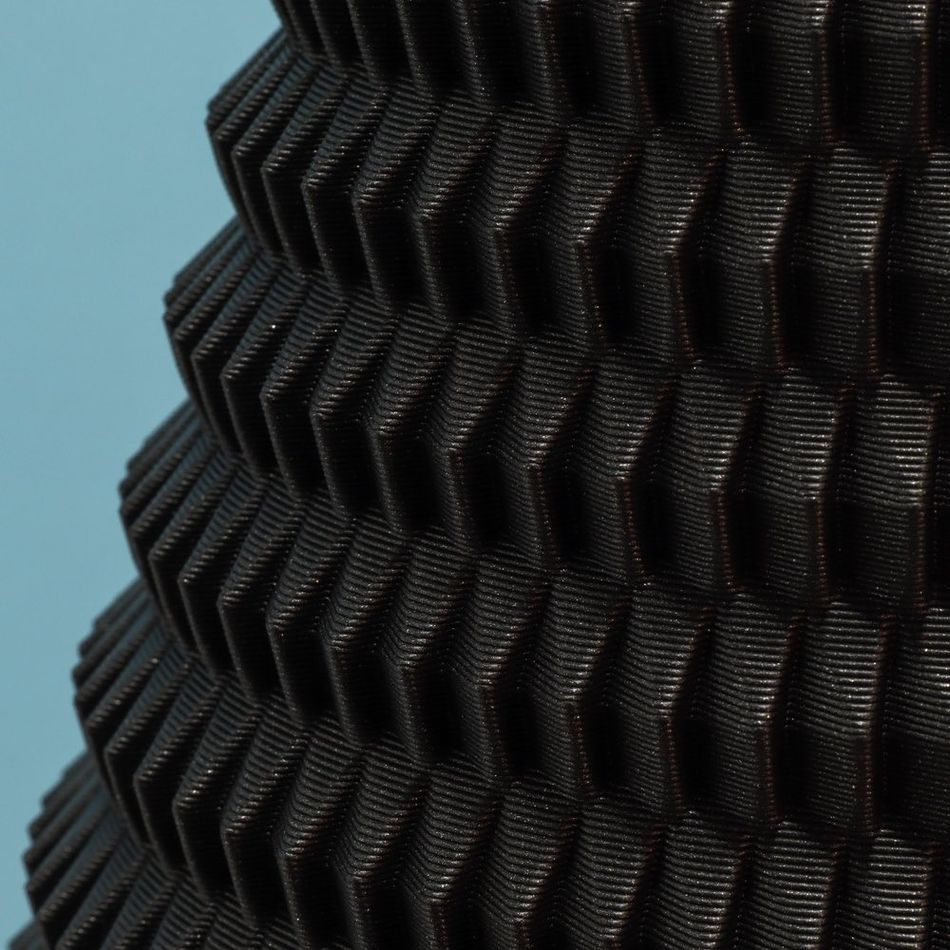
You can also strengthen your 3D model using design techniques. While a simple, smooth-sided geometry will be fairly bendy when you take it off the build platform, a more complex perimeter, with angles and curves can increase part strength and resistance. There are tons of intricate vase designs on Thingiverse, with spiral, hexagonal, and organic-inspired geometries that are both beautiful and functional.
There is no hard and fast rule to getting the best Cura vase mode results. The above tips can put you on the right track, but be prepared to play around with settings and conduct some test prints. The good news is that vase mode doesn’t take long to print and doesn’t use much material, so you can print test models fairly painlessly.
Recommended reading: Nozzle diameter and layer height explained
Alternatives to Vase Mode
If you’re concerned that the single-wall thickness of vase mode won’t be strong enough for your project, there is another way to create a model with no infill or top layer that has multiple wall layers.
Start by uploading your 3D model into the slicer program. Then go into Print Settings -> Top/Bottom to set the Top Layer value to 0. From there, go into Infill settings and lower the Infill Density to 0%. When the model has been sliced, you should be left with a cup-like shape, with a base and hollow interior. To thicken the external structure of the vase, you can simply increase the number of wall lines. These additional layers will reinforce the outer shell and result in a stronger, more rigid vase.
The downside to this method, and why makers often turn to vase mode, is that it doesn’t use the same continuous approach as the Spiralize Outer Contour setting. Instead, it uses the conventional layer by layer movement, in which the print head completes one layer, moves up a layer, and prints the subsequent layer. This method tends to result in a visible seam along one side of the print, where each layer starts and stops. If the model in question is angular, the seam can be more easily hidden, but in rounded shapes, it can be obtrusive. With vase mode, there is no seam to speak of, since the print head moves continuously in a single line, gradually raising.
Pros and Cons of Cura Vase Mode
As with any special slicer settings, there are both advantages and disadvantages to using vase mode. Let’s take a quick look at the pros and cons of using vase mode.
Pros of Cura Vase Mode
Faster print times: Since vase mode uses a single continuous path and only prints one wall with no infill, models tend to print very quickly, saving users time.
Less material usage: By the same token, vase mode objects use less material than container shapes with multiple wall layers.
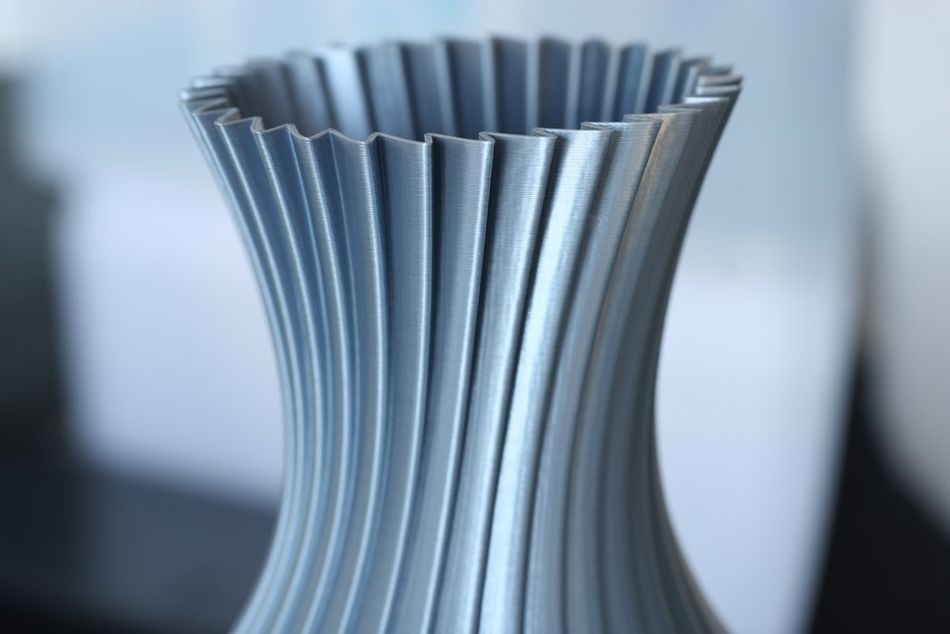
No z-axis seam line: Due to the continuous spiral deposition pattern characteristic of vase mode, printed models do not bear any seam lines and are generally high in aesthetic quality.
Cons of Cura Vase Mode
Fragile parts: With vase mode enabled, printed models have thin external walls, composed of only one layer. This limits how strong the printed shapes can be.
No batch printing: With conventional layer-by-layer printing, it is possible to print many different models in a single build. With vase mode, however, only one print can be made at a time, due to the continuous motion of the print head.
Not suitable for all designs: While vase mode is a good fit for several types of 3D models, it does not work with all geometries, particularly when the design includes features like overhangs or bridges.
When to Use Vase Mode
While vase mode is versatile, it isn’t universally applicable. Generally speaking, this slicer function is best reserved for printing literal vases, lightweight containers, decorative objects, lamp fixtures, or other aesthetic prints. It is less practical when printing functional parts that require stiffness or strength.
You may also notice that Cura’s Spiralize Outer Contour function may not work with some 3D models you upload. This is because the feature is limited in terms of the geometries it can accommodate. Vase mode only works with models that have a continuous outer structure. It can handle curves and angles along the x/y axes, providing that the part has no bridges or overhangs. Any models with holes in the design also won’t be compatible with vase mode. This is because the printhead extrudes continuously, spiraling around the perimeter of the object. Vase mode is also incompatible with supports.
All that said, there are cases where more experienced makers have experimented with vase mode to push the limits of possible designs. For example, people have leveraged the function’s inability to print flat surfaces to integrate holes into their design, and have turned overhangs into dynamic loops by exploiting vase mode’s inability to print supports.[3] In other words, there’s a lot of fun to be had if with vase mode, if you’re feeling up for some trial and error.
The design of the 3D model's base is also an important consideration when using vase mode. A well-designed base provides a stable foundation for the print, prevents warping, and ensures proper adhesion to the print bed. Here are a few things to think about when designing a model for vase mode:
Create a base that is wide enough to support the model and prevent tipping. A good rule of thumb is to make the base diameter at least 50% of the model's height.
Consider adding a slightly flared or chamfered edge to the base to improve adhesion. This helps to increase the surface area in contact with the print bed and reduces the risk of warping.
Ensure that the base is level and flat to promote even contact with the print bed. Any unevenness or irregularities in the base can cause the model to detach or warp during printing.
It might seem obvious, but model orientation is also important: the object should be oriented vertically, so that the opening is facing upwards and the base is in contact with the build platform. This will ensure a level base and eliminate the need for supports.
Materials for Vase Mode
When it comes to materials for 3D printing with vase mode, you have many options at your disposal. Cura’s vase mode setting doesn’t limit what filaments you can use: you can print vases successfully using a wide range of classic materials, like PLA, ABS, and PETG, or specialty filaments like TPU, silk PLA, and more.
For many vase mode applications, visual appearance is a key factor. In this case, it’s worth remembering that PLA and PETG filaments are available in a wide range of colors and finishes, from matte to glossy, allowing you to create vases and hollow objects that suit your personal style or match your decor. For example, there are filaments available in metallic or pearlescent finishes, as well as translucent materials that have light-diffusing properties, which can be helpful for light fixtures.
Material properties can also be an important consideration, however it’s worth re-emphasizing that since vase mode prints a single wall, vase mode prints are not really intended for rigorous use or load bearing. If strength is a priority, though, filaments with higher tensile strength, such as PETG or Nylon, may be more suitable than PLA. Elongation at break, which measures the material's ability to stretch before breaking, is another important property to consider, especially for flexible filaments like TPU that can create unique, bendable designs.
Ease of printing is another important consideration when selecting a filament for vase mode. PLA is known for its forgiving printing properties, with a low printing temperature (180-220°C) and minimal warping, making it a great choice for beginners. PETG is also relatively easy to print, with good layer adhesion and resistance to warping, but requires slightly higher temperatures (230-250°C). TPU, on the other hand, can be challenging to print with, requiring careful adjustment of settings like retraction distance (1-3 mm) and speed (10-20 mm/s) to prevent stringing and ensure good layer adhesion.
Preparing Your 3D Printer for Vase Mode
Before using Cura’s vase mode, it’s important to properly set up your 3D printer. This doesn’t involve any special steps, so if you are already in the habit of doing these things before printing, skip ahead. If not, follow these steps before starting to print your model.
Ensure the 3D printer is properly calibrated.
Level the 3D printer bed using automated settings or manual processes.
Check that the nozzle is clean, and if not, clean the hotend.
Load your filament of choice and ensure the right temperature settings.
If needed, prepare the build surface for optimal first layer adhesion (with adhesive or PEI sheet).
Turn on vase mode settings in Cura slicer software and adjust print speed and layer height based on preferences.
Recommended reading: 3D Printer Bed Adhesion: 8 Ways to fix 3D Print Not Sticking to Print Bed
Conclusion
Vase mode, known in Cura as Spiralize Outer Contour, is a special slicer function that gives makers a shortcut for creating hollow container shapes. As we’ve seen, vase mode also introduces a new approach to printing, which instructs the printhead to follow a continuous path rather than take a layer-by-layer approach. This has benefits, like no Z-axis seam lines on prints, and less material usage, since prints only have one outer wall layer. Ultimately, vase mode is a good tool to have in your 3D printing arsenal, and can be particularly useful when printing objects like vases, pencil holders, ornaments, light shades, garbage pails, decorative items, and more.
Frequently Asked Questions (FAQ)
Q: What is vase mode in 3D printing?
A: Vase mode is a feature in slicer programs, such as Cura, that automatically turns a solid 3D model into a vase-like structure, with solid bottom layers, a hollow body, and no top layers. Vase mode also instructs the 3D printer to print objects using a continuous line, like a spiral, which ensures a higher quality finish with no visible seams.
Q: Where to find vase mode settings in Cura?
A: If you’re not having luck finding a “vase mode” option in Cura, that’s because the function goes by a different name. In Cura, go to Print Settings -> Special Modes. You should see an option called “Spiralize Outer Contour”. Click this to enable vase mode.
Q: What is 3D print slicing?
A: Before 3D printing, slicing is an essential step that converts an STL model into printable instructions for the 3D printer. In a way, slicer programs literally slice 3D models into layers, so that the 3D printer can understand how to construct the object. Slicer software also has many other features, such as vase mode, which let users make changes to the model’s structure and scale, as well as print settings, such as layer height and print temperature.
Q: What are the benefits of Cura vase mode?
A: There are a few key benefits to enabling vase mode. First, because the printer extrudes filament in a continuous motion, final prints do not bear any unsightly seam lines. Second, vase mode tends to print faster than traditional prints because models only have one outer wall. For the same reason, vase mode prints use less filament, which can be beneficial.
Q: What types of 3D models work with vase mode?
A: Vase mode works best with models that have a continuous outer structure. It can’t print parts with design features like bridges or overhangs or any geometries that require supports. This is simply because the printhead extrudes continuously, spiraling around the perimeter of the object.
Q: What materials work with vase mode?
A: Vase mode is compatible with any type of filament, such as PLA, ABS, PETG, TPU, and more. Just be sure to adjust print settings in your slicer program to match the material’s requirements.
References
[1] Special modes settings [Internet]. UltiMaker. November 2022. Available from:
https://support.makerbot.com/s/article/1667418049490
[2] ItsMeaDMaDe. Cura 5.0: 3 Ways to 3D Print Vases for Better Results [Internet]. Youtube. July 2022. Available from:
https://www.youtube.com/watch?v=BsK445swcZQ
[3] Nathalie Cheesmond. Vase Mode: Experimenting with Design and Settings [Internet]. 3D With Us. September 2021. Available from: https://3dwithus.com/vase-mode-designs-and-settings