3D Print Not Sticking to Bed? 8 Ways to fix 3D Printer Bed Adhesion
Here are eight tried and true methods for optimizing your first layer adhesion with FDM 3D printing.

27 Sep, 2023. 10 minutes read
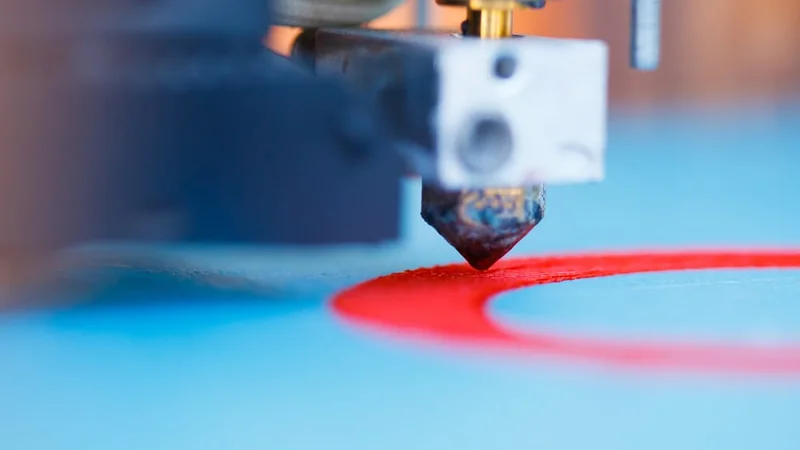
Good first layer adhesion is critical to ensuring a successful 3D print.
First-layer adhesion is critical to ensuring that your 3D print will be a success. But achieving good bed adhesion can be easier said than done. Corners unstick from the 3D printer’s build surface, warping occurs, and ultimately parts fail. Moreover, adhesion problems can be caused by a number of factors or any combination of issues, including bed leveling, bed temperature, extruder temperature, build plate deficiencies, slicer settings, and more. Fortunately, there are several steps you can take to resolve the problem of a 3D print not sticking to print bed. In this article, we’re looking at the importance of bed adhesion when 3D printing as well as several different methods you can use to improve adhesion and, ultimately, print results.
The Importance of Bed Adhesion
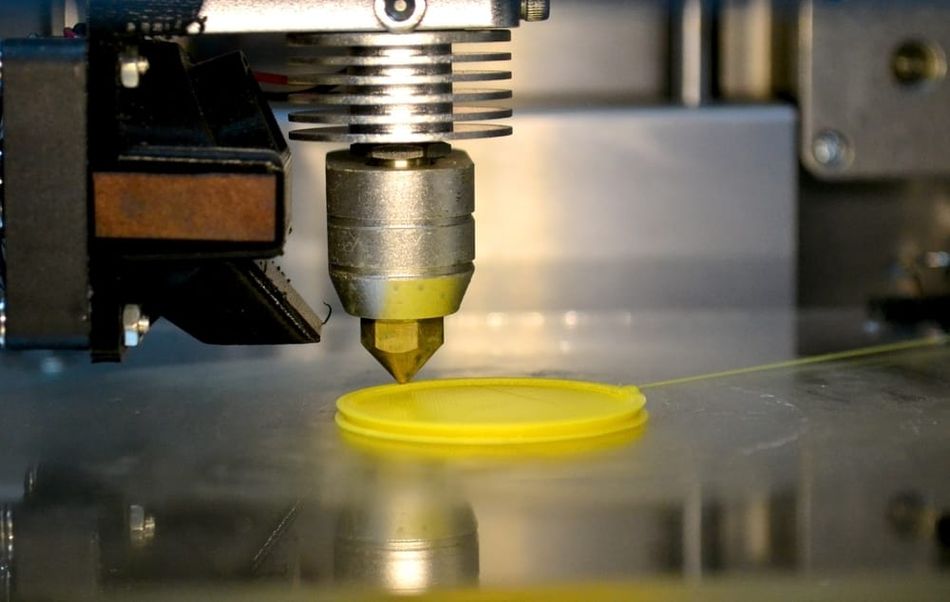
Bed adhesion plays a crucial role in the success of a 3D print. When the first layer of a print adheres well to the bed, it provides a solid foundation for the rest of the print. This foundation is essential for ensuring a print's structural integrity and dimensional accuracy as well as minimizing the risk of defects.
If good bed adhesion is not achieved, it can lead to a variety of issues, such as warping, curling, or part detachment of the print from the bed. In some cases, poor adhesion can even damage the printer itself, as detached prints may collide with the nozzle or other components. By understanding what factors influence bed adhesion, you can significantly improve the success rate of your 3D prints and minimize the risk of print failures due to poor bed adhesion.
Method #1: Level the Bed
One of the main reasons a 3D print may not stick to the print bed is poor bed leveling. If one side of your printer bed is even marginally higher or lower than the other side, it will affect the quality of your 3D print and how well the first layers of the print adhere to the build surface. In short, this is because the nozzle will be further away from part of the print bed and filament won’t be deposited evenly. When the nozzle is too close, it can cause the filament to be squished and spread out, resulting in thin layers and poor adhesion. Conversely, when the nozzle is too far away, the filament may not make sufficient contact with the bed, leading to weak adhesion.
Ensuring your 3D printed bed is level can solve adhesion problems. Depending on the 3D printer hardware you have, you might be able to level the bed automatically or you may have to do it manually. If you are adjusting the bed level manually, one of the most popular methods for leveling a print bed is to use a piece of paper.
Simply bring your 3D printer nozzle very close to the print surface and place a sheet of paper in between the nozzle and the build plate. Gradually raise the corner of the print bed using your machine’s leveling knobs until there is a bit of resistance when pulling the paper out. Repeat this on all corners of the print bed. You can also print a test skirt after using the paper method to check the evenness of the first print layers. This is also a good idea because it allows you to check the level of the print bed while the machine is hot.
Method #2: Change the Z-Offset
The distance between the 3D printer nozzle and the build platform, known as the Z-offset, may also be causing adhesion problems. In other words, if the nozzle is too close to the build surface, the first layer will be squished and won’t be evenly extruded; if it’s too far away, the filament extrusion also won’t stick to the build platform properly. The good news is that you can encourage good adhesion by positioning the 3D printer nozzle at the right distance.
The z-offset can be adjusted in slicing software by changing the measurement values. Once the value is set, the z-axis will align itself accordingly to the print bed. If you are having adhesion problems, changing the z-offset should be used as a last resort. Where this method is most helpful is in situations where you are working with a thick build plate or if you are printing on a substrate.
When experimenting with nozzle distance, make small adjustments and observe the results on test prints. Look for signs of proper adhesion, such as a smooth and even first layer, and adjust the nozzle distance accordingly until the desired adhesion is achieved.
Method #3: Clean the Print Bed
It is imperative that your print surface be clean before you start 3D printing. If there are any inconsistencies, like leftover glue or filament stuck to the print surface area, it can cause first layer adhesion problems. The best cleaning technique for a print bed depends entirely on the build plate material.
If you are working with a glass print bed that has filament or adhesive residue on it, start by removing the glass bed from the 3D printer and scraping the residue off using a dry scraper. From there, you can wash the plate with soapy water or window cleaner. It is also a good idea to give your glass build plate a final wipe using Isopropyl alcohol (IPA) or acetone. These cleaning products will help to remove any remnants of grease without damaging the glass surface. You can also follow these cleaning steps with a removable borosilicate glass print bed.
A PEI build plate can also be cleaned with water and soap or IPA to remove residue. To ensure the thermoplastic bed surface remains smooth in the long-term, you can also wipe it down with acetone once a month or so. It is important not to use acetone on a thermoplastic build surface too often as it can erode the material. Ultimately, a clean, smooth print surface can help the critical initial layer of a print to adhere.
Recommended reading: How to clean 3D printer beds: Glass, PEI, Adhesive
Method #4: Increase Bed & Nozzle Temperature
Temperature settings play a big part in the final quality of a 3D print. Thermoplastic filaments like ABS and PETG harden as they cool, but if printed layers cool too quickly, the materials can also shrink, which causes layers to pull away from the print bed and warp. Using a heated bed, especially for higher temperature materials, can therefore help to improve bed adhesion.
More than that, choosing the right bed temperature and nozzle temperature for different types of filament can also improve print outcomes. For example, ABS filament prints best with a build surface heated to between 90°C and 110°C and a nozzle temperature between 230°C and 260°C.[1] PLA, for its part, prints best with a heated bed of between 60°C and 80°C and with a nozzle temperature of 190°C and 210°C.[2]
Keep in mind that the optimal bed temperature may vary depending on factors such as the specific filament brand, bed surface material, and ambient room temperature. Therefore, it may be necessary to experiment with different bed temperatures within the recommended range to find the best setting for your specific setup. Another helpful tip to improve adhesion is to print the first few layers at a slightly higher temperature to ensure that they will stick. After those first layers, you can lower the bed temperature back to the recommended degree for the rest of the print.
Method #5: Use a Bed Adhesive
Another reliable way to improve your 3D printer bed adhesion is to apply an adhesive directly to the build platform before you start printing. There are a number of adhesive products developed specifically for 3D printing, such as Magigoo and Stick Stick. Some of these dedicated adhesives are even designed with specific materials in mind. For example, Magigoo sells adhesive sticks tailored to polycarbonate (PC) and nylon (PA).[3]
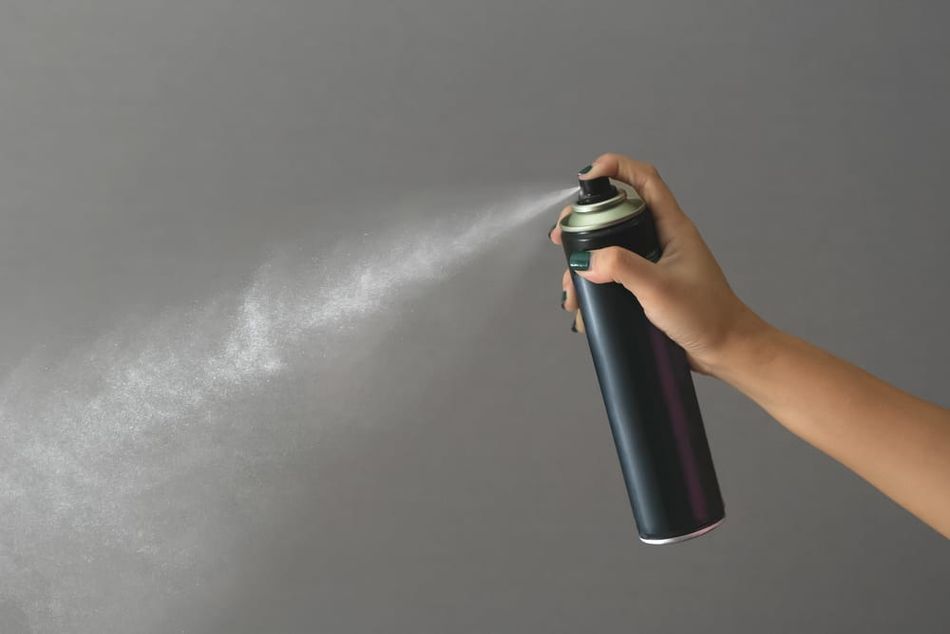
However, there are also several DIY solutions for bed adhesives: many makers have found glue sticks to be a reliable option, while others use hairspray or blue painter’s tape (best for PLA filament) or Kapton tape (best for ABS filament) to create a grippier print surface. If you do decide to use an adhesive coating on your 3D printer’s build plate, it is important to apply them evenly and in moderation to avoid excessive buildup and to always clean your build surface after the print is complete, otherwise you risk glue buildup and an uneven print surface.
Method #6: Adjust Speed and Cooling Settings
If your 3D print isn’t sticking to the print bed, tweaking your print speed or cooling settings in slicer software can often help fix the issue. For example, setting the print speed for the first layer of your print to be slower than the rest of the build can promote better adhesion. A slower deposition rate for the first thin layer of a 3D print will help the filament to bond with the build surface.
Cooling settings can also influence print bed adhesion and are particularly important for materials that are sensitive to temperature changes, such as PLA. Proper cooling can help prevent the material from warping or curling as it cools, which can lead to poor adhesion. However, excessive cooling can cause the material to cool too quickly, resulting in weak bonding between layers. For PLA, it is generally recommended to use a cooling fan at 100% speed after the first few layers have been printed. For materials like ABS, which are more sensitive to shrinking, a lower fan speed or no cooling may be more appropriate.
For the best results, feel free to experiment with different settings and observe the results on test prints, making incremental adjustments until the desired adhesion is achieved. Keep in mind that the optimal settings may vary depending on factors such as the specific filament brand, printer model, and ambient room temperature.
Method #7: Use a Raft or Brim
There are also other slicer settings that can be implemented to improve bed adhesion, such as rafts and brims. Rafts and brims are features 3D printed alongside your part to improve stability and reduce the chance of warping. They increase the footprint of the printed model to encourage adhesion, which is particularly valuable when printing parts with a smaller base.
A raft essentially acts as a base to your 3D printed part and ensures that your print adheres to its surface, rather than the build platform directly. A brim, for its part, consists of a 3D printed border that connects to and extends from the edges of a 3D printed component. Brims are effective at anchoring the edges of a build to the 3D printed bed and are typically easier to remove than rafts. Most slicer programs, like Cura and Simplify3D, offer automated raft and brim features.
If you are using a raft or brim, it’s important to keep in mind that these 3D print features do require additional post-processing for removal. In some cases, the removal process is easy and can be done by hand, in other cases, you might need additional tools like cutters to remove the part from the structure.
Recommended reading: 3D Printing Rafts vs Brims vs Skirts: How to Get Started
Method #8: Change the Build Plate
Another method for improving first layer adhesion is to change your 3D printer build surface. Some desktop FDM 3D printers have a removable plate meaning that you can swap out the build plate for a new one should the original be damaged. But even if your print bed is in fine condition, it could be worthwhile to think about using different build surfaces depending on the material you are printing with.
A glass bed is a popular choice for 3D printer bed surfaces due to its smooth, flat surface and excellent thermal conductivity. The smooth surface allows for easy removal of prints once cooled and can result in a glossy, mirror-like finish on the bottom layer of the print. However, glass beds can sometimes struggle with adhesion, especially with materials like ABS, which are prone to warping. For this reason, many makers also use additional build surfaces like PEI sheets or Buildtak to improve first layer bonding. These can be applied directly to the existing build plate and are particularly effective for high-temperature filaments like ABS and PETG. Both PEI and Buildtak sheets provide a textured surface that promotes strong bonding between the filament and the bed, reducing the likelihood of print failures due to poor adhesion.
To maintain BuildTak and PEI sheets, clean them regularly with isopropyl alcohol or a similar cleaning solution to remove any residue or adhesive buildup. Inspect the sheets for signs of wear or damage, such as scratches, gouges, or delamination, and replace them as needed to maintain optimal print adhesion. When removing prints from the bed, use a spatula or a putty knife to gently lift the print without damaging the sheet.
Recommended reading: 3D Print Stuck to Bed: What to do?
Conclusion
These eight methods can help you with troubleshooting your 3D printer adhesion problems. Sometimes a single method—like adding a layer of glue to your print surface—will do the trick. In most cases, however, making various adjustments will result in the best adhesion and high-quality prints. In sum, ensuring a level 3D printer bed and a clean build surface, as well as using adhesive aids, and having the right print settings and printing temperature will have the best print results.
Frequently Asked Questions (FAQs)
Q: What is the best bed surface material for 3D printing?
A: There is no one-size-fits-all answer to this question: the best print bed material depends on the type of filament being used and the specific printer setup. Common bed surface materials include glass, BuildTak, and PEI sheets. Glass works well with most filaments but can benefit from additional adhesives. PEI sheets and BuildTak are also compatible with most filaments and can offer superior adhesion for common materials like ABS.
Q: How often should I level my 3D printer bed?
A: The frequency of bed leveling depends on your printer's usage and the stability of its components. It is recommended to check and adjust the bed level regularly, especially before starting a new print or after making any adjustments to the printer's components.
Q: Can I use household items as adhesive solutions for bed adhesion?
A: Yes, some household items, such as glue sticks and hairspray, can be used as adhesive solutions to improve bed adhesion. However, it is essential to apply them evenly and in moderation to avoid excessive buildup or uneven adhesion.
Q: How can I prevent prints from warping or curling during printing?
A: To prevent prints from warping or curling, ensure proper bed adhesion by optimizing bed leveling, bed temperature, nozzle distance, print speed, and cooling settings. Additionally, using appropriate bed surface materials and adhesive solutions can help minimize warping and curling. For materials that are more sensitive to temperature fluctuations, such as ABS, consider using a heated enclosure to maintain a consistent printing environment.
References
[1] Tractus 3D, 2020. “ABS Filament” [Internet] https://tractus3d.com/materials/abs/ [Accessed April 13, 2022]
[2] Tractus 3D, 2020. “PLA Filament” [Internet] https://tractus3d.com/materials/pla/ [Accessed April 13, 2022]
[3] Magigoo, 2022. “Magigoo Pro PA (Nylon)” [Internet] https://magigoo.com/products/magigoo-pa/ [Accessed April 14, 2022]
in this article
1. The Importance of Bed Adhesion2. Method #1: Level the Bed3. Method #2: Change the Z-Offset4. Method #3: Clean the Print Bed5. Method #4: Increase Bed & Nozzle Temperature6. Method #5: Use a Bed Adhesive7. Method #6: Adjust Speed and Cooling Settings8. Method #7: Use a Raft or Brim9. Method #8: Change the Build Plate10. Conclusion 11. Frequently Asked Questions (FAQs)12. References