Nozzle Diameter and Layer Height Explained
Nozzle diameter and layer height can both greatly affect the resolution, printing time, and appearance of 3D printed parts. They are also connected to each other in an important way.

Last updated on 31 Oct, 2023. 12 minutes read
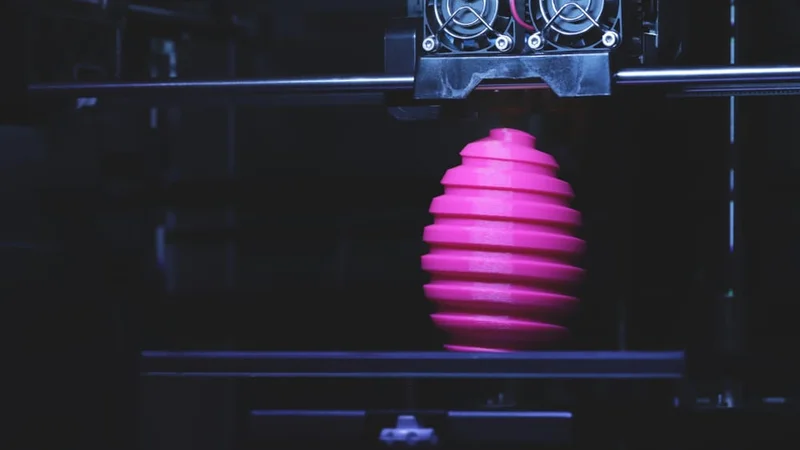
Nozzle diameter and layer height affect printing time and quality
When printing parts on an FDM 3D printer, adjusting the layer height is one of the easiest ways to strike a balance between print quality and print time. In simple terms, thin layers produce better Z-axis resolution, while thick layers reduce total printing time.
A printing parameter less talked about is nozzle diameter. Because most printers are equipped with a .4 mm nozzle as standard, and because this kind of nozzle will suffice for most print jobs, many users never consider swapping out their standard nozzle for one with a narrower or wider diameter. But doing so can open up new printing possibilities: small nozzles can produce much finer details on the X-Y plane, while big ones enable faster printing speeds.
The relationship between layer height and nozzle diameter is important too. Although the two can be adjusted independently, layer height is partly determined by the size of nozzle fitted to the printer, and it can be helpful to consider both parameters at once.
So while .2 layer height .4 nozzle diameter might be your go-to configuration when it comes to FDM printing, there are many reasons why you might want to switch up both parameters. This article examines those reasons while taking a closer look at layer heights, nozzle diameters, and more.
Layer Heights
What are layer height, layer thickness, and layer resolution?
“Layer height” is a term used a lot in FDM 3D printing. For newcomers, however, it can be difficult to visualize how a part gets built in layers and how these layers can vary in size.
To understand layer height, it is important to understand that the majority of 3D printers only use two dimensions when they deposit material. That is, the printer squeezes out material in a 2D pattern on the X-Y plane (just like an inkjet printer does on a sheet of paper). But what makes a 3D printer unique is its ability to print additional 2D layers on top of the first, building up a part in this layer-by-layer fashion until it is finished.
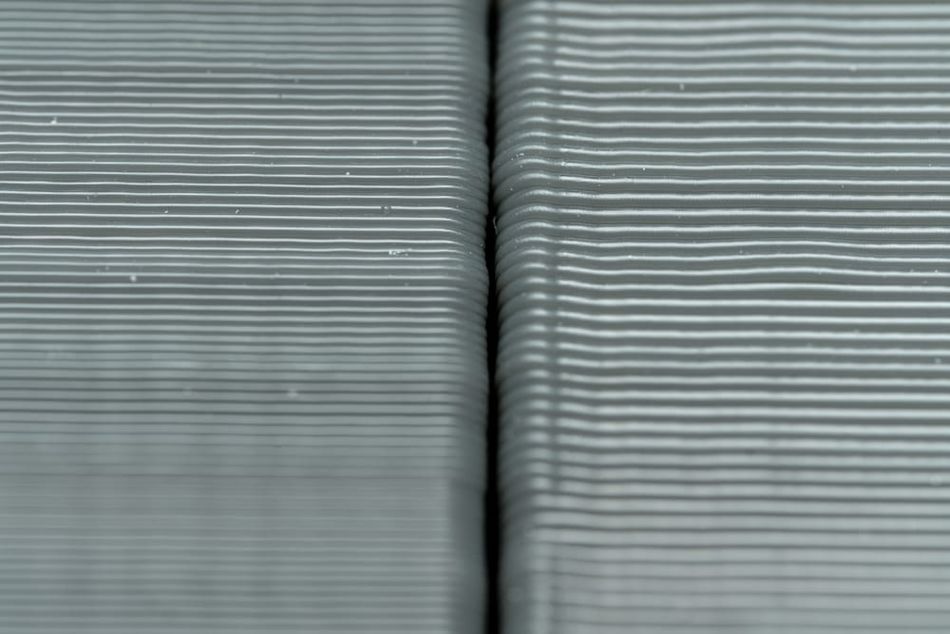
3D printing layer height — sometimes known as layer thickness, layer resolution, or Z-axis resolution — is a measure of the thickness of each extruded layer of material. Given in millimeters or microns, it shows the resolution of the part along its Z-axis: thinner layers allow for more detail.
Layer height is a user-controlled parameter that can be adjusted using 3D printer software, but the minimum and maximum layer height is limited by physical aspects of the printer, such as the nozzle diameter and the stepper motors that move the printhead up the Z-axis in fixed increments.
How layer height affects speed and printing time
The layer height of a print has a direct effect on the total print time. A lower layer height requires a greater total number of layers, and a print with more layers takes longer to print.
We can demonstrate the connection between layer height and printing time with an example. If a 3D model of a cube measures 100 mm in height and is printed with a layer height of 0.1 mm, then it will consist of 1,000 layers in total. This means that the printer must print 1,000 two-dimensional squares on top of one another. However, if the layer height is set to 0.4 mm, then the cube will only have 250 layers in total, and the printer will only have to print 250 squares, taking approximately ¼ of the time.
Layer height does not technically affect print speed, i.e. the speed at which the printhead moves along the X and Y axes, but in practice we might say that higher layer heights lead to “faster” printing due to the reduced total print time.
Recommended reading: 3D Print Speed: What It Is and Why It Matters
How layer height affects print quality
Adjusting a 3D printer’s layer height is one way to ensure high quality. A low layer height results in better Z-axis resolution, which is particularly important on curved objects: thick layers are more visible and produce a “stepped” effect rather than a natural curve. To print small-scale parts, curved parts, or parts with a high level of detail, it is generally better to use a low layer height.[1]
That being said, using thinner layers can actually have a negative impact on print quality by providing more opportunity for errors and artifacts. Some of the biggest problems occur on the first layer, as thin layers require precise calibration and bed leveling. However, this issue can be resolved by printing a thicker first layer and thinner subsequent layers.
In some cases, layer height will not affect print quality at all. Parts with a consistent profile along the Z-axis, or with straight sides, will have no noticeable difference in resolution when printed with a higher layer height. For such parts, it is better to use thicker layers, as printing time will be reduced without sacrificing quality.
How layer height affects part strength
3D printer layer height can affect part strength, but the setting has a far bigger impact on resolution and printing time. Factors that affect part strength to a much greater degree include printing material, printing temperature, number of perimeters, and infill settings — particularly infill pattern and infill density.
Researchers have come to contradictory conclusions regarding layer height and part strength. One group carried out three-point bending flexural tests on PLA parts and analyzed their mesostructure with scanning electron microscopy, noting that higher layer heights led to reduced strength.[2] However, others have reported increased strength with thicker layers.
Recommended reading: How Strong Is 3D Printed Plastic: A Comprehensive Guide
How to determine the best layer height for 3D printing
In the FDM 3D printing process, layer heights typically range between 0.05 mm and 0.4 mm. There is no single best layer height for 3D printing. Rather, the optimal layer height for a given print will depend on factors such as part size, detail level, required surface appearance, part shape, material, prioritization of printing time vs quality, post-processing options, and nozzle diameter. Choosing the layer height usually involves a trade-off between one factor and another.
In general, a lower layer height is better:
When part detail, resolution, and quality is a high priority
When surfaces must be smooth
When printing small, intricate parts
When printing parts with curved sides (to avoid visible layer lines)
Conversely, a higher layer height is better:
When a shorter printing time is a priority
When printing parts with straight sides
When post-processing techniques like smoothing can be used to reduce the appearance of layer lines
3D Printer Nozzles
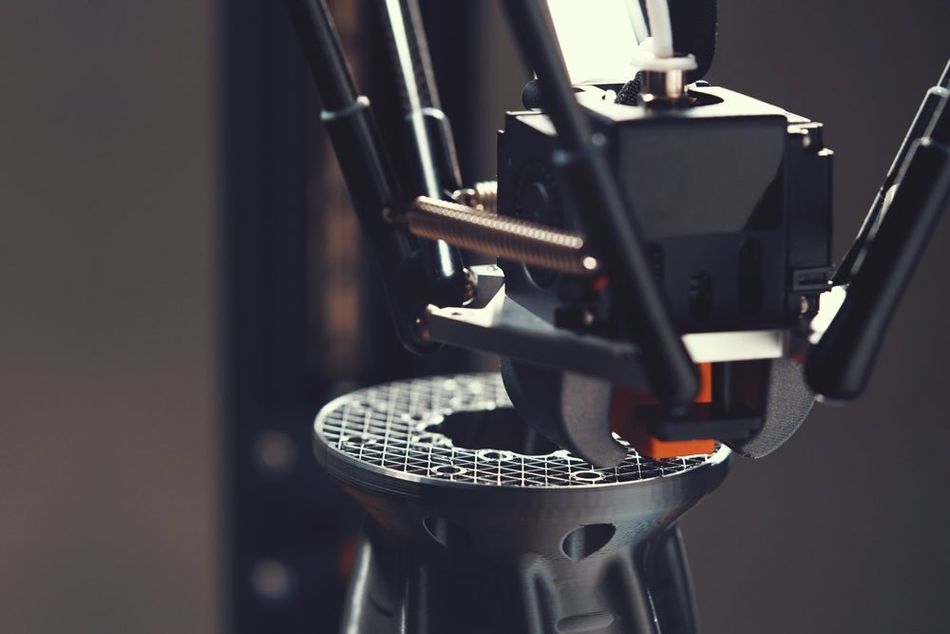
The nozzle of a 3D printer is the part of the hotend through which melted filament passes onto the print area. The 3D printer nozzle is removable and comes in various diameters in order to produce thinner or thicker lines.
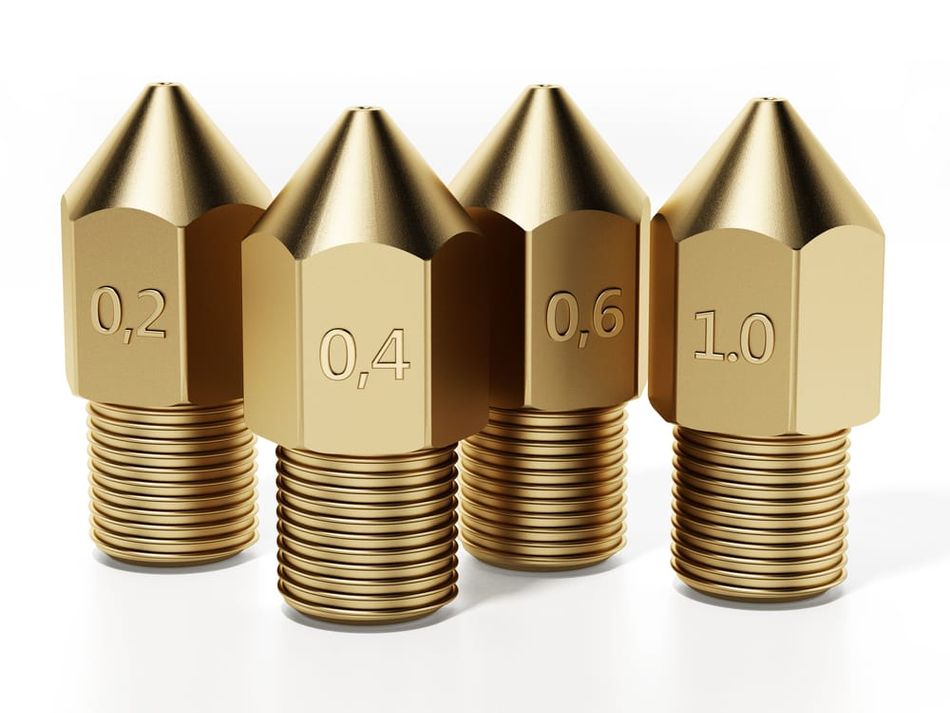
Nozzle diameters
The standard bore diameter for an FDM 3D printer nozzle is 0.4 mm [5]. However, nozzles can be swapped out for those of a different size; small-diameter nozzles are useful for fine details on the X-Y plane, while large-diameter nozzles can deposit more material at once, leading to faster printing.
At the low end, the smallest feasible nozzle diameter is 0.1 mm, but such nozzles can be susceptible to material blockages, especially with flexible filaments or composites filled with particles of non-plastic additives. At the other end of the scale are nozzles up to 2 mm in diameter, which can deposit large amounts of material very quickly but which require a lot of heat.
| Small nozzle diameter advantages | Large nozzle diameter advantages |
| Fine details along X and Y axes | Greater volume of material extrusion |
| Lower printing temperatures required | Shorter printing times |
| Can print ultra-thin, breakable support structures | Suitable for flexible and filled materials |
The most common nozzle diameters are:
0.25 mm nozzle
The most common nozzle with a narrower aperture than the standard 0.4 mm is the 0.25 mm nozzle (though 0.3 mm and 0.2 mm nozzles can also be found). Smaller nozzles enable higher resolution on the X-Y plane and are ideal for printing fine features (on miniatures, for example), text on the top of a part, overhangs, and ultra-thin support structures that can be easily removed.
Printing with a 0.25 mm nozzle has its drawbacks, however. The smaller aperture is more prone to clogging, and printing a fixed volume of material takes longer than it would with a standard 0.4 mm nozzle. Additionally, abrasive filaments such as filled composites may not print with a small nozzle size, as non-melting additives like ceramic particles cannot pass through easily.
0.4 mm nozzle
The 0.4 mm nozzle is standard for FDM printers and is suitable for a variety of printed parts, offering a balance between detail and printing time.
An obvious benefit of using the standard 0.4 mm nozzle is that most default slicer printing profiles are configured for it and some materials are developed with such a nozzle in mind, so it requires the least fine-tuning.
0.6 mm nozzle
Marginally wider than a standard nozzle, the 0.6 mm nozzle is still suitable for most prints but enables shorter print times, as it can deposit a greater amount of material at once. It is suited to medium or large-scale parts without fine details, and can reduce the likelihood of clogging — potentially making it easier to use a lower printing temperature.
The drawback of using a wider nozzle diameter is a lower X-Y resolution, making it less suitable for small or highly detailed parts, text and logos on the top of a print, or insoluble support structures.
0.8 mm nozzle
Although nozzle diameters can be as wide as 2 mm, a diameter of 0.8 mm offers significantly faster printing while remaining relatively practical and easy to use. Anything above 1 mm will pose challenges.
Advantages of using a larger nozzle include very fast material deposition and extreme resistance to clogging. Such a nozzle is suitable for parts requiring a minimal level of detail, with layers highly visible.
1.0 mm and above nozzles
Nozzles with a diameter of 1.0 mm or more can be considered experimental tools only really necessary for ultra-abrasive materials that could cause clogs in normal printer nozzles. An important consideration is the whether the printer hotend will be able to extrude enough material to pass through the larger nozzle; a specialist hotend like the E3D Volcano may be necessary to achieve full-speed printing with a large nozzle diameter.
Fine details are not possible, but ultra-large nozzle diameters can be good for printing smooth rounded corners.
Recommended reading: Ender 3 (Pro) Nozzle Size Guide
Nozzle materials
A 3D printer nozzle is part of the hotend. Not only is it exposed to very high temperatures, it must actively retain heat in order to prevent the filament from solidifying as it passes through.
This means nozzles must be made of thermally conductive metals in order to work properly. Nozzle materials include brass, stainless steel, and hardened steel, and the nozzles may also have copper or nickel plating.[3]
Some nozzles are made up of separate components made from different materials. These are called assembled nozzles, and typically have an internal surface made from a very hard material and a body made from a more thermally conductive material.
Brass
The standard material for FDM 3D printing nozzles is brass, which is an alloy of copper and zinc. It is suitable for nozzles because of its excellent thermal conductivity, heating up to a high temperature and keeping the filament in a flowable state.
A drawback of brass nozzles is poor wear resistance. Highly susceptible to scratches both inside and outside, brass nozzles should only be used for non-abrasive materials like PLA, PETG, and ABS. Abrasive materials will cause internal degradation of the nozzle, reducing its capacity to consistently deposit material.
Stainless steel
More robust than brass, stainless steel is a popular nozzle material for users working with slightly more abrasive materials than the likes of PLA and ABS. Stainless steel nozzles are also suitable for producing food-safe parts. On the other hand, steel is less conductive than brass and can therefore demand a higher printing temperature in order to work effectively.
Hardened steel
The toughest of common nozzle materials, hardened steel is suitable for the most abrasive 3D printing materials, including carbon fiber and ceramic-filled composites. Hardened steel nozzles have a long lifespan, but they are not especially thermally conductive and can have rougher internal surfaces, potentially leading to lower quality prints.
How Do Layer Height and Nozzle Diameter Relate?
Layer height and nozzle diameter are two closely related properties, as they both concern the dimensions of the extruded material.
The taxonomic difference between layer height and nozzle diameter is that layer height is a user-determined slicer setting that can be adjusted using the 3D printer slicer software to control the thickness of each layer, while nozzle diameter is a fixed value that can only be changed by physically removing the nozzle and replacing it with a new one. Importantly, nozzle diameter determines the minimum and maximum values for layer height and another user-determined print setting: extrusion width.
The practical difference between layer height and nozzle diameter is that layer height principally affects the Z-axis, while nozzle diameter principally affects the X and Y axes, and the two parameters can be adjusted (almost) independently. A lower layer height allows for better Z-axis resolution; a smaller nozzle allows for better X-Y resolution.
In practice, a user can select a minimum layer height of around 25% of the nozzle diameter (as long as the resulting value is not lower than the smallest possible increment for the stepper motor controlling Z-axis movement, typically around 0.04 mm) and a maximum layer height of around 80% of the nozzle diameter. As a rule of thumb, the standard layer height is around 50% of the nozzle diameter (.2 mm layer height .4 nozzle, for instance). Different layer heights produce different results, as shown in the first half of the article.
Extrusion width, sometimes called line width, refers to the width of the line of extruded material on the X and Y axes. It can be set between 60–200% of the nozzle diameter, but printing works best when this value is kept in the 100–120% range. To achieve finer or thicker lines, it is better to simply change to a different nozzle.
Nozzle diameter (mm) | Min. layer height (mm) | Standard layer height (mm) | Max. layer height (mm) |
0.25 | 0.06 | 0.13 | 0.2 |
0.4 | 0.1 | 0.2 | 0.32 |
0.6 | 0.15 | 0.3 | 0.48 |
0.8 | 0.2 | 0.4 | 0.64 |
It is important to note that, while nozzle diameter determines the range of possible layer heights, that range remains quite broad. It is possible to use a small-diameter nozzle (e.g. 0.25 mm) to print very fine details on the X and Y axes while still using a relatively high layer height (0.2 mm) so the print does not take hours and hours to complete. Such a configuration might be preferable when printing a straight-sided cube with text on the top face, for instance.
Researchers have found that a combination of low layer height and small nozzle diameter leads to a low level of surface roughness and improved mechanical properties.[4]
Recommended reading: Direct Drive vs Bowden Extruder for 3D Printing
Conclusion
Becoming familiar with layer heights is a great way to take control of your 3D prints. Adjusting this key printing parameter allows you to strike the right balance between Z-axis print resolution and printing time, which is useful when differentiating between quick prototypes and more intricate parts. And in some cases — straight-sided parts, for example — using a higher layer height won’t even reduce resolution.
Switching out your nozzle is something you won’t do as often as adjusting layer height, but this too is a great way to utilize your printer for different projects. Small-diameter nozzles can offer an exceptional level of detail on the X-Y plane and are great for printing breakaway supports for overhangs, while larger nozzles are ideal for quickly printing large objects. As long as you’re using the right printing materials for the kind of nozzle installed on the hotend, playing around with nozzle diameter can lead to excellent results.
Finally, it is important to understand that layer height is only partially dependent on nozzle diameter. While nozzle diameter determines the range of acceptable layer heights and extrusion widths, users can still choose between thick or thin layers to suit the print job at hand.
Frequently Asked Questions (FAQs)
What is the optimal ratio between nozzle diameter and layer height?
The optimal ratio between nozzle diameter and layer height is typically between 25% and 80% of the nozzle diameter. This range ensures proper extrusion and layer adhesion while maintaining a balance between print quality and speed.
Can I use a larger nozzle diameter for printing flexible materials?
Yes, using a larger nozzle diameter (0.6 mm or more) is recommended for printing flexible materials like TPU and TPE, as well as composites like glass-filled ABS. This helps prevent clogging and ensures proper extrusion.
How does layer height affect print strength?
Layer height can affect print strength, but researchers have drawn differing conclusions on the matter. Layer height principally affects resolution and print time, with print strength largely determined by other factors.
Does nozzle material matter?
Standard brass nozzles are suitable for most prints, regardless of the nozzle diameter, but some abrasive filaments such as filled composites require nozzles made from harder materials such as steel.
References
[1] Polak R, Sedlacek F, Raz K. Determination of FDM printer settings with regard to geometrical accuracy. InProceedings of the 28th DAAAM international symposium 2017 Nov (pp. 0561-0566).
[2] Kuznetsov VE, Solonin AN, Urzhumtsev OD, Schilling R, Tavitov AG. Strength of PLA components fabricated with fused deposition technology using a desktop 3D printer as a function of geometrical parameters of the process. Polymers. 2018 Mar;10(3):313.
[3] Lutz R. 3D Printer Nozzle Comparison Guide [Internet]. MatterHackers. 2017 [cited 2022Mar24]. Available from: https://www.matterhackers.com/news/3d-printer-nozzle-comparison-guide
[4] Fischer D, Eßbach C, Schönherr R, Dietrich D, Nickel D. Improving inner structure and properties of additive manufactured amorphous plastic parts: the effects of extrusion nozzle diameter and layer height. Additive Manufacturing. 2022 Jan 6:102596.
[5] ISO/ASTM 52900:2021. *Additive Manufacturing — General Principles — Fundamentals and Vocabulary.* International Organization for Standardization, Geneva. https://www.iso.org/standard/74514.html