Cura Infill Patterns: What They Are and When to Use Them
3D printer slicing software Cura lets users choose from a range of infill patterns. But what are the differences between patterns like Grid, Cubic, and Zig-zag, and how do you choose between them?

Last updated on 13 Apr, 2024. 9 minutes read
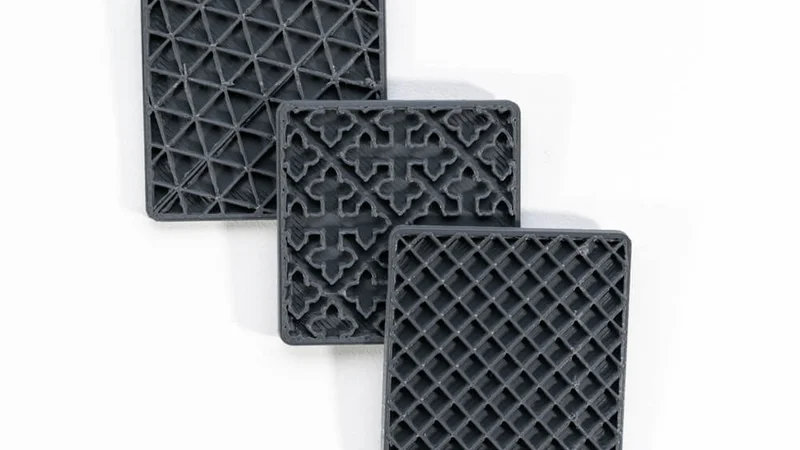
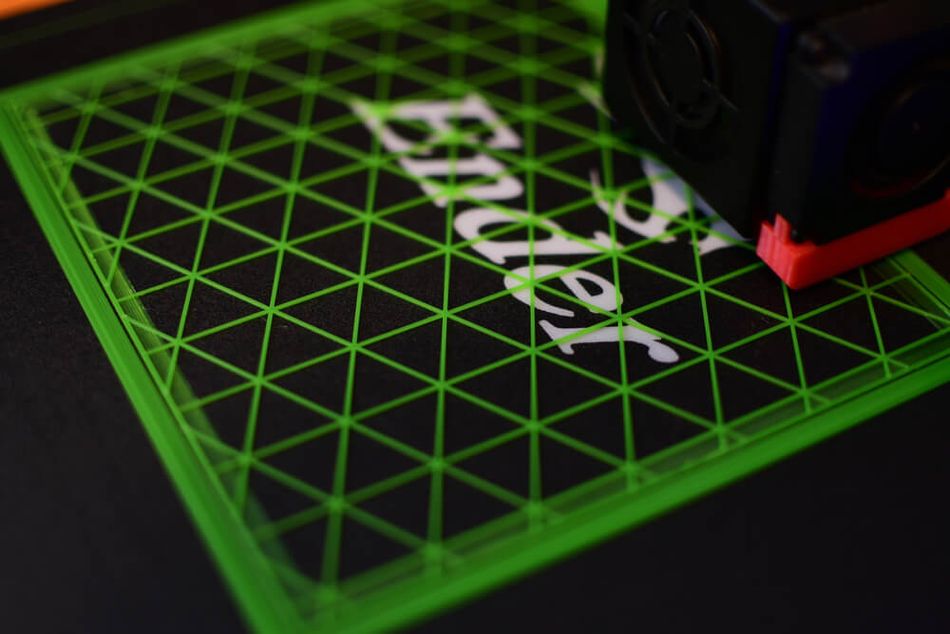
Triangles, Cross, and Grid infill patterns
Cura, a free slicing application for FDM 3D printing, is one of the most popular pieces of 3D printing software. Now maintained by UltiMaker, the slicer has over a million users, catering for most types of extrusion printers.
Part of the reason for Cura’s popularity is its range of printing parameters, from advanced travel settings like Z-hop to special printing modes for molds and spiralized outer contours. The slicing software also has a broad range of infill settings covering infill density, infill line direction, and infill pattern.[1]
This article looks at the 14 different standard infill patterns available in Cura (plus a handful of experimental patterns) as of 2024, noting their advantages and disadvantages and suggesting when they might be used.
What are Infill Patterns in 3D Printing?
An FDM 3D printer works by extruding and depositing filament in successive layers until a solid 3D object has been built. However, most 3D printed parts aren’t completely dense. Instead, their interior is usually a mixture of solid plastic and empty space.
The ratio of plastic to space is defined as a print’s infill density: close to 0% means the part is mostly hollow, while close to 100% means it is mostly solid. Most prints are around 30–50% dense.
But the geometrical structure of the internal plastic is just as important as the density, and this is where infill pattern comes in. The inside of a print can be made up of lines, grids, triangles, and many other 2D or 3D patterns. Not only does the chosen pattern affect print times and material usage, it can also have a big impact on the printed part’s strength, weight, and flexibility.
Recommended reading: Infill 3D printing: All you need to know
What Types of Infill Patterns are Available in Cura?
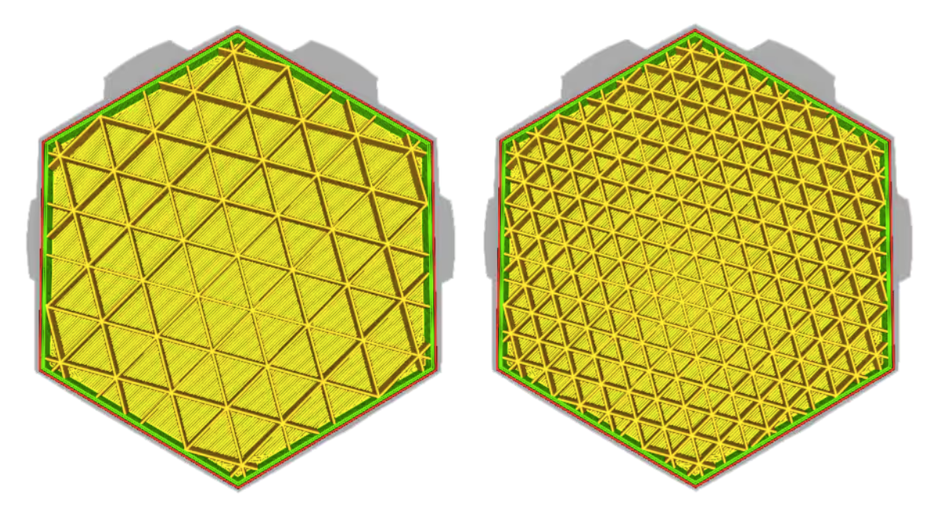
As of Spring 2024, UltiMaker Cura lets users choose between 14 default infill patterns.[2] The most notable omission from the list is Honeycomb infill, which is available in Slic3r and other applications but has historically been unavailable to Cura users.
However, the CuraEngine Tiled Infill Generation plugin, launched by UltiMaker in November 2023, introduces four extra infill patterns (including Honeycomb) as well as the potential to use custom patterns.
Grid
Strong 2D infill
Cura’s Grid infill pattern is a strong 2D infill that creates a grid on each layer of the print. The Grid pattern resembles the Lines pattern, but there is a major difference: the Lines pattern only prints in one direction per layer, adding perpendicular lines in the subsequent layer, and so on. By contrast, each layer of the Grid pattern has lines going in two directions.
The Grid pattern is used on everyday prints that require a moderate amount of strength and is Cura’s strongest infill pattern in the vertical direction.
Lines
Quick 2D infill
The Lines infill pattern is a fast-printing pattern that uses minimal material. It is suited to visual prints like decorative models.
Sometimes known as rectilinear infill, this pattern prints unidirectional lines on each layer, changing direction 90 degrees for the subsequent layer. This makes a kind of disconnected grid in which layers one, three, five, etc. have lines along one axis, while layers two, four, six, etc. have lines along the perpendicular axis.
Triangles
Strong 2D infill
Cura users can select the Triangles infill pattern for everyday prints as an alternative to the Grid pattern. As its name suggests, the pattern is made up of triangles rather than the squares typical of a grid.
Shear-resistant and strong in every horizontal direction, its main drawback — one shared with Grid — is the interruption of flow at intersections.
Tri-hexagon
Strong 2D infill
The Tri-hexagon infill pattern is suitable for everyday prints. Like the Triangles pattern, it uses three sets of parallel lines. However, these lines are slightly offset, so rather than creating a grid of equally sized triangles, they create a mix of small triangles and large hexagons.
In terms of forces applied in any horizontal direction, this shear-resistant infill pattern is the strongest available in Cura.
Cubic
Strong 3D infill
Cura’s Cubic infill pattern is made up of 3D cubes standing on a corner. This orientation prevents overhangs and results in fairly high strength in all directions. Furthermore, because each cube is enclosed, long pockets of hot air cannot form, which reduces undesirable pillowing of the top layer.
The Cubic pattern is suitable for everyday parts or functional parts which require strength along all axes.
Cubic Subdivision
Strong 3D infill
A “smarter” version of Cubic, Cubic Subdivision is an algorithmically complex pattern designed to use less material and increase print speed while maintaining strength.
Cubic Subdivision features cubes of varying sizes, with the largest cubes (and consequently the least dense areas) placed at the center of the build. It is the best infill pattern for balancing strength with weight reduction and printing time. However, it can take a long time to slice.
Octet
Strong 3D infill
Cura’s Octet infill pattern is made up of tetrahedrons (triangular pyramids) and cubes, creating a very strong internal frame where the edges of these shapes meet. It is particularly suited to thin mechanical parts.
Although boasting high strength, the Octet infill can produce relatively poor top surface quality. This is due to the long required bridging distance: the space that needs filling between solid infill material in order to add the solid shell around the part.
Quarter Cubic
Strong 3D infill
The Quarter Cubic infill pattern comprises tetrahedrons and truncated tetrahedrons. Like the Octet infill pattern, it creates an internal frame to which loads can be dissipated.
It is ideal for very thin functional parts that require a high degree of strength, but top surface quality can suffer due to the long bridging distance.
Concentric
Flexible 3D infill
Cura’s Concentric infill pattern creates concentric rings that follow the shape of the outer walls. When printed at low infill density, it has very low strength in all directions and is therefore suitable for flexible parts, which are designed to bend. (A higher infill density will create a more rigid part.)
Conversely, this infill pattern actually produces the strongest prints at 100% infill, as the lines do not intersect and can evenly distribute loads.
Zig-zag
Quick 2D infill
The Zig-zag infill pattern is similar to the Lines pattern, except the lines are joined up, as the nozzle turns and goes back on itself when it reaches an outer wall (rather than starting a new line). Zig-zag is fast and suitable for visual-only prints.
One potential advantage of Zig-zag over Lines is that the nozzle does not have to retract filament and travel. This reduces the chances of oozing, particularly with low-viscosity filaments like PETG, although it does use fractionally more material.
Cross
Flexible 2D infill
Designed for printing flexible filaments with a low infill percentage, the Cross infill pattern creates a pattern without any long straight horizontal lines. This produces a high level of flexibility across all horizontal directions, with a minimal amount of strength throughout.
The Cross pattern does not require retraction, which prevents oozing of flexible materials. However, a disadvantage of the 2D pattern — for flexible parts, at least — is its relatively high strength along the Z-axis, making it less flexible in the vertical direction.
Cross 3D
Flexible 3D infill
The undesirable vertical strength of the Cross pattern is eliminated in the Cross 3D pattern — with the caveat of longer slicing times. Cross 3D is weak (and therefore flexible) in all directions.
Cura’s Cross 3D infill pattern is better than Cross or Concentric for part flexibility. Like Cross, it does not require retraction and is therefore resistant to oozing.
Gyroid
Strong 3D infill
The Cura Gyroid high-strength infill pattern creates wavy lines of alternating directions. It is shear-resistant and strong in all directions, but not stiff, making it suitable for some flexible materials (though its flexibility is lower than the three dedicated flexible infill patterns).
Many Cura users favor Gyroid for its aesthetics, especially with transparent filaments where the internal geometry is visible. However, Gyroid infill is algorithmically complex, so slicing the 3D model can be slow.
Recommended reading: Understanding the Gyroid Infill in 3D Printing
Lightning
Quick experimental infill
The newest Cura infill pattern, released in December 2021 as part of Cura 4.12, is a kind of topology optimization tool that generates jagged internal support structures with the sole purpose of supporting the top of the build.
Lightning infill uses minimal material, resulting in faster and more lightweight prints. It is suitable for low-strength parts like visual prototypes.
New Experimental Cura Infill Patterns
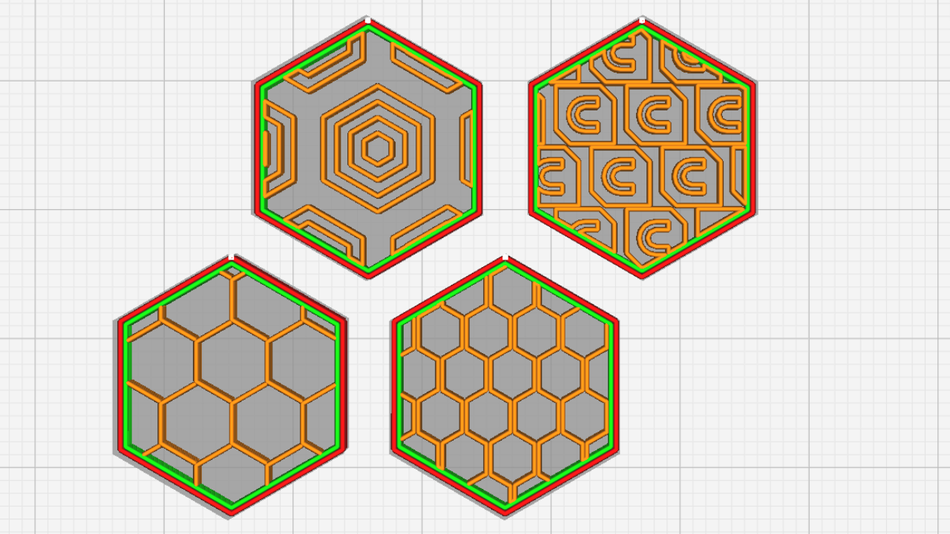
In late 2023, UltiMaker released the CuraEngine Tiled Infill Generation plugin, the work of contributor Jelle Spijker, which adds "new capabilities to the Infill section in UltiMaker Cura." The experimental plugin adds four ready-to-use infill patterns as well as the option to add custom infill patterns in the form of Well-Known Text (WKT) files.
Cura
This eponymous infill pattern demonstrates the new possibilities available through the plugin by using the Cura logo (the letter "C" within an off-kilter hexagon) as an infill pattern.
Fill
The evasively named Fill infill pattern uses concentric hexagons as infill.
Honeycomb
The long-sought-after Honeycomb infill is now available through the Tiled Infill Generation plugin. It uses hexagons as the infill patterns.
Continuous Honeycomb
This infill pattern resembles Honeycomb but allows the printhead to deposit material from one wall to another without stopping.
Others
Since the release of the plugin, four further patterns developed by user Cuq have been added to the list:
- Star
- Hexa Star
- Triangle Star
- Flower of Life
Custom
Cura users have used the new plugin to demonstrate custom infill patterns such as this recognizable novelty design. This tutorial demonstrates how to make a WKT file for a custom infill. Alternatively, this online tool enables the quick conversion of SVG vector files into WKT files.
How Infill Pattern Affects Part Strength
Infill patterns affect part strength because not all geometries are equally strong. A triangle, for instance, is more stable than a square, because it is the only rigid polygon: two sides always support the other. Recent peer-reviewed tensile tests show that cubic and gyroid infills outperform grid and line infills at 20 % density, while offering comparable weight and print time.[5]
A 2019 academic study measured the yield strength of printed PLA using Grid, Tri-hexagonal, and Concentric infill patterns. The researchers found Concentric to have the highest yield and ultimate strength at all densities, with Grid outperforming Tri-Hexagonal at 25% and 50% density and Tri-Hexagonal outperforming Grid at 75% density.[3]
In 2020, another study carried out low-velocity impact testing and compression testing of 60% density PLA, using the Triangles, Grid, Quarter Cubic, and Tri-hexagon infill patterns. It found that Triangles exhibited the highest stiffness (668.82 N/mm) and could absorb the most energy in the impact testing, while Grid exhibited the highest compressive strength (72 MPa).[4]
Choosing the Best Infill Pattern
Finding the right infill pattern for a build depends on the purpose of the 3D printed part, in addition to factors like material and part geometry. These are the best infill patterns for certain priorities:
Print speed: Zig-zag, Lines, Lightning
Least amount of filament: Lightning
Toughness: Gyroid
Stiffness: Tri-hexagon, Cubic
Strength by weight and printing time: Cubic Subdivision
Strength in vertical direction: Grid
Strength in horizontal directions: Tri-hexagon
Strength at 100% density: Concentric
Flexibility: Cross 3D
Top surface quality: Zig-zag, Grid
Conclusion
Cura’s 14 default infill patterns provide users with a great deal of flexibility in terms of print speed, material usage, and fine-tuning the mechanical properties of a part. Fast, visual-only prints are suited to patterns like Zig-zag, functional parts are best served by 3D patterns like Cubic Subdivision, while flexible parts benefit from infill patterns such as Concentric.
Frequently Asked Questions (FAQ)
What is the strongest Cura infill pattern?
The best Cura infill pattern for strength depends on the direction of the required strength. The Grid pattern provides excellent vertical strength (can resist forces from above), while the Tri-hexagon pattern provides excellent horizontal strength (can resist forces from the sides).
What is the most flexible Cura infill pattern?
The most flexible Cura infill pattern is Cross 3D, making it a good choice for prints in flexible materials like TPU.
Why is there no Cura honeycomb or hexagon infill?
While honeycomb infill is available in other slicers like Slic3r and PrusaSlicer, it prints much more slowly than other patterns with similar mechanical performance, hence its omission from the main Cura list of patterns. However, the pattern is available through a plugin released in late 2023.
Can I make my own Cura infill pattern?
Users can create their own Cura infill patterns in the Well-Known Text (WKT) format. Vector graphics can be converted into WKT files using this tool.
References
[1] Infill settings [Internet]. UltiMaker Support. UltiMaker; 2020 [cited 2022 Feb 23]. Available from: https://support.ultimaker.com/hc/en-us/articles/360012607079-Infill-settings
[2] Ghostkeeper. Settings Guide [Internet]. GitHub. 2019 [cited 2022 Feb 23]. Available from: https://github.com/Ghostkeeper/SettingsGuide/blob/master/resources/articles/infill/infill_pattern.md
[3] Rismalia M, Hidajat SC, Permana IGR, Hadisujoto B, Muslimin M, Triawan F. Infill pattern and density effects on the tensile properties of 3D printed PLA material. Journal of Physics: Conference Series. 2019 Dec;1402:044041.
[4] Aloyaydi B, Sivasankaran S, Mustafa A. Investigation of infill-patterns on mechanical response of 3D printed poly-lactic-acid. Polymer Testing. 2020 Jul;87:106557.
[5] Akande S. O., Ekundayo P., Jewell R. “Effects of Infill Patterns on the Tensile, Flexural and Impact Behaviour of 3D-Printed PLA.” *Materials* 14 (22): 6804, 2021. https://doi.org/10.3390/ma14226804