Ender 3 (V2, Pro, S1, Neo) Bed Leveling: A Comprehensive Step-by-Step Guide
The Creality Ender 3 Pro offers good value for money but lacks an automatic bed leveling feature. Fortunately, Ender 3 Pro bed leveling can be painless with the right tools and preparation.

25 May, 2023. 12 minutes read
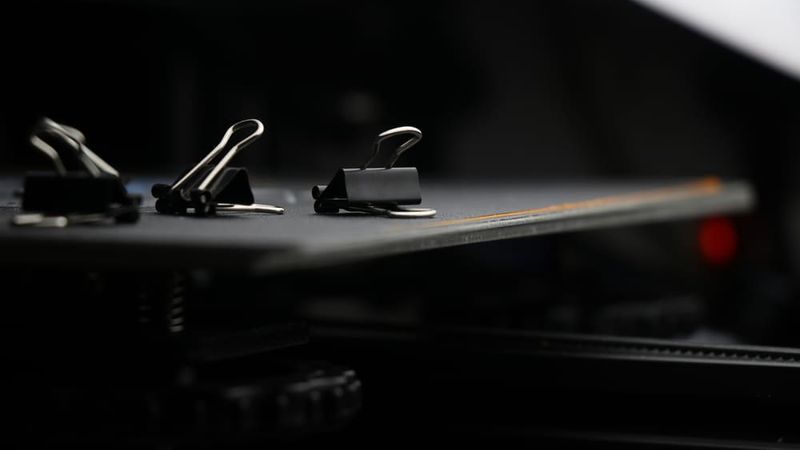
Ender 3 Pro bed leveling results in better prints
The print bed plays a hugely important role when it comes to the success or failure of 3D printed parts. Bed leveling, the process of calibrating the printer bed to be parallel to the movement of the extruder, ensures that the initial layers of your print adhere uniformly to the bed, which is vital for the stability and overall quality of the print.
Keeping a level bed can be achieved in different ways depending on the printer. Many newer models offer automatic bed leveling, but older and simpler printers require manual adjustment. The Creality Ender 3 Pro, a model appreciated by both beginners and experienced users alike in the 3D printing community, does not have automatic bed leveling, instead relying on hand-turn screws for manual adjustment. This manual bed leveling can pose challenges, especially for beginners.
However, with a comprehensive understanding and correct approach, these challenges can be overcome. This article aims to provide you with a comprehensive guide to understanding and mastering Ender 3 Pro bed leveling.
Why Bed Leveling Matters
During FDM 3D printing, the first layer of filament is crucial, which makes bed leveling a “critical component” of quality prints.[1] When the first layer adheres correctly to the printer bed, it allows the subsequent layers to align properly, leading to an accurate print. This initial layer needs to be flat and even, a condition directly influenced by whether the print bed is level.
If the printer bed is not level, the distance between the print nozzle and the bed will vary across the print area. This variation can lead to issues such as poor adhesion where the first layer of filament doesn't stick to the bed properly. In severe cases, it could lead to a scenario known as "air printing," where the print head is too far from the bed, leading to filament extruding into the air.
Problems can also occur in areas where the nozzle is too close to the bed. The extruded filament might not have enough space to exit the nozzle properly, leading to clogs or incomplete lines. Furthermore, if the nozzle is too close, it might scrape and damage the build surface.
Bed leveling is crucial for larger prints that span a substantial area of the print bed. In such cases, even a slight discrepancy in the bed level can result in a noticeable variation in the print quality across different regions of the print.
Getting to Know the Ender 3 Pro Bed
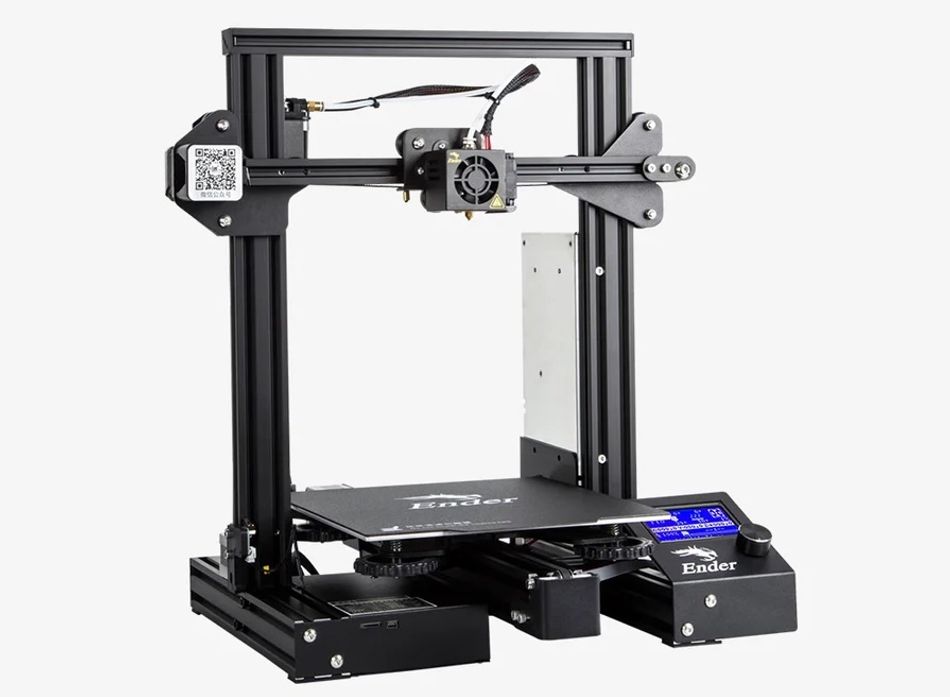
Although it lacks an automatic leveling feature, the Ender 3 Pro print bed is no slouch. Consisting of an aluminum plate and removable build surface, the heated bed can quickly heat up to its maximum temperature of 110 °C, allowing it to handle most standard filaments, such as PLA, ABS, and PETG.
The Ender 3 Pro bed comes with a BuildTak-like magnetic build surface that can be easily detached from the metal plate underneath. This textured surface promotes fairly good print adhesion, reducing the chance of print warping or detachment. After printing, this BuildTak-like surface can be removed and flexed to easily pop off prints, reducing the risk of damage to the print during removal. Although sufficient for most prints, the Ender 3 build surface is arguably inferior to more durable surfaces like BuildTak, and it requires careful manual alignment with the metal plate underneath.
For bed leveling, the Ender 3 Pro is equipped with large hand-turn screws at each corner. The size of these screws makes the leveling process fairly simple, as slight adjustments can be made without difficulty.
It is worth noting that although the Ender 3 Pro does not come with an auto-leveling feature, an upgrade with a BLTouch auto-leveling sensor can be easily added. This option is discussed later in the section on assisted bed leveling.
3D printer model | Ender 3 | Ender 3 Pro | Ender 3 V2 |
Build surface | Polypropylene | BuildTak-like | Tempered glass |
Ender 3 Pro Bed Leveling

Ender 3 Pro bed leveling is an important calibration procedure that ensures the quality and accuracy of the 3D printed object. The leveling process revolves around adjusting the height of the printer bed in relation to the nozzle to maintain a consistent distance between bed and nozzle right across the X-Y plane.
The leveling process for Ender 3 Pro involves manual adjustments through the large hand-turn screws located at each corner of the 3D printer bed. These screws move the bed closer to or further from the extruder nozzle. The goal is to reach a point where a standard piece of paper can slide between the nozzle and the bed with a slight resistance.
Recommended reading: Best Ender 3 (Pro) Cura settings: temperature, speed, retraction, more
Tools Needed for Bed Leveling
Ender 3 Pro’s onboard hand-turn screws
Piece of printer paper
For bed leveling on the Ender 3 Pro, only a few tools are needed, most of which come with the printer kit itself. The primary tool required is the large hand-turn screws located at each corner of the bed. These screws are designed to be easily turned manually, allowing for the adjustment of the bed's height in relation to the nozzle.
A standard piece of A4 printer paper, usually measuring 0.1 mm thick, is also needed. The paper is used as a gauge to set the correct distance between the nozzle and the bed. The objective is to adjust the bed such that the paper can slide between the nozzle and the bed with slight resistance. This ensures that the nozzle is neither too far to hinder proper filament adhesion nor too close to squash the filament or cause nozzle clogging.
Pre-leveling Preparation
The initial pre-leveling steps set the stage for an effective leveling process, ensuring that the mechanical aspects of the Ender 3 Pro are well-aligned. Before embarking on the bed leveling process, it's crucial to check the assembly of the 3D printer. Start by verifying that the X-axis gantry is level. The X-axis gantry holds the print head and moves up and down the Z-axis. Any skew in this assembly can cause uneven extrusion, a problem that may appear like an unleveled bed.
To check if the gantry is level, lower it to the Z-axis end stop and measure the distance from the gantry to the top frame at both ends using a ruler. If the distances are unequal, you need to manually turn the left or right Z-axis lead screw to adjust the gantry until both measurements are equal.
It's also essential to ensure that the bed itself is clean and free of debris. This involves removing any residual filament and wiping down the bed's surface. For the Ender 3 Pro, with its BuildTak-like surface, a wipe down with isopropyl alcohol is enough. It's recommended to avoid using any abrasive material that may damage the surface.
Lastly, the printer should be situated in a stable location. The 3D printing process involves moving parts that can create vibration, so placing the printer on an uneven or unstable surface may indirectly affect bed leveling. Choose a flat, stable surface that is not prone to vibrations or movement. The nozzle and bed should also be at room temperature to prevent any thermal expansion effects.
Manual Bed Leveling Step by Step
Manual bed leveling for the Ender 3 Pro involves adjusting the bed's position relative to the nozzle across different points on the print bed, typically the four corners and the center. The goal is to achieve a uniform nozzle-to-bed distance.
1. Home and disable steppers
First off, auto home the printer using the printer’s LCD menu, which moves the nozzle to the home position in the corner of the bed.
PREPARE > AUTO HOME
Now, disable the stepper motors through the LCD menu, enabling free movement of the print head.
PREPARE > DISABLE STEPPERS
2. Lower bed
Once this is done, turn all four hand-turn screws clockwise about two full turns, enough to create a visible gap between the bed and the nozzle. This isn’t the distance you’ll end up with, so don’t worry about the exact distance or whether it looks level yet.
3. Position hotend and insert paper
With a gap created between nozzle and bed, gently move the hotend so the nozzle is positioned above one of the hand-turn screws. Slide a piece of standard printer paper, approximately 0.1mm thick, between the nozzle and the bed.
4. Adjust one corner
Slowly adjust the hand-turn screw counterclockwise, moving the corner of the bed upward until there is just the tiniest amount of resistance if you move the paper. If the paper moves totally freely or cannot move at all, the bed level needs adjustment.
5. Adjust other corners
Slowly move the hotend to one of the adjacent corners (not diagonally across). If the nozzle is going to make contact with the bed before it reaches the corner, lower the bed slightly in the corner you are about to adjust so the printhead can reach its destination.
6. Repeat process for all four corners
Once you have adjusted all four hand-turn screws, go over all four again, as adjustment of one corner can sometimes cause the other to misalign.
Finally, check the center of the bed. If the center is significantly off compared to the corners, this may indicate a warped bed. In this case, compensations may need to be made during slicing or a replacement bed might be necessary.
Using a Dial Indicator
An optional but useful tool for manual bed leveling is a dial indicator, an instrument used to measure very small distances and angles. When fitted to the 3D printer printhead, a dial indicator helps to measure the bed's flatness across its entire surface, offering a more accurate and visual representation of any uneven areas that need adjustment.[2]
Though not mandatory, it can simplify the leveling process and allows for a more precise adjustment, which is especially beneficial for those planning to print larger objects that span the entire print surface.
Thingiverse contains a few 3D printable models of attachments that can be used to attach an indicator to the Ender 3 Pro print carriage.
Using Assisted Leveling Features
Ender 3 Pro bed leveling can be made simpler and faster by the integration of a bed leveling sensor, like the BLTouch, CR Touch (made by Creality), or EZABL Pro.[3] These devices automate the process of measuring the distance between the nozzle and bed across multiple points. Using a small, motor-actuated probe, they gather measurements by touching the bed and retracting upon contact. This data is then used to create a virtual map of the bed's surface that the printer's firmware uses to adjust the Z-axis during printing, effectively compensating for any unevenness.
Installing a BLTouch on the Ender 3 Pro involves attaching the device to the print head, connecting it to the mainboard, and updating the printer's firmware to accommodate the new hardware. Once installed, you activate the auto bed leveling feature through the printer's LCD menu. The BLTouch then moves across the print bed, taking measurements at designated points. These points, usually in a 3x3, 5x5, or 7x7 grid depending on the firmware settings, ensure a comprehensive assessment of the bed level.
Another assisted leveling feature involves using software solutions like manual mesh leveling. This method uses the printer's firmware to compensate for bed irregularities. After manually measuring the bed level at multiple points (similar to the manual bed leveling process), the measured values are inputted into the printer's firmware. During a print, the firmware then adjusts the nozzle's Z-height in real-time according to this mesh.
Troubleshooting Common Bed Leveling Issues on Ender 3 Pro
Poor Adhesion
If you have leveled the Ender 3 Pro bed but are still experiencing poor adhesion — where the print is not sticking properly to the bed — the first course of action is to check the bed's cleanliness. Any dust, oil, or other residues can impede the filament's ability to adhere properly. Cleaning the bed using isopropyl alcohol or a similar solution can often resolve this issue.
If cleanliness isn't the issue, the bed temperature might be too low; raising it slightly may improve adhesion. For example, for PLA filament, a bed temperature range of 60–70 °C is recommended.
If your bed is level but the nozzle is not squishing down the filament enough, it is possible that you used too thick a sheet of paper during the bed leveling process, creating too large a gap between bed and nozzle. The paper should be no thicker than 0.1 mm; high-quality paper or cardstock may be much thicker than this.
Can’t Find PREPARE Menu
A common Ender 3 Pro bed leveling issue is when the printer’s LCD screen doesn’t offer the “PREPARE” menu, making it impossible to carry out the auto home and disable steppers commands. This is a firmware issue and can be resolved by downloading the latest firmware from the Creality website.
Corners Level but Center Dips
Many Ender 3 Pro users find that, even after they have followed bed leveling instructions, the bed is still not completely flat, often dipping or rising in the center. Unfortunately, since there is no screw for adjusting the center of the bed, this may mean replacing the existing build surface with a new one.
The bed of the Ender 3 Pro can become warped over time. Installing a glass plate build surface can be a good solution to this issue because the glass has very little flexibility and stays flat. The Ender 3 V2 comes with a glass surface as standard, but you can buy one for the Ender 3 Pro for under $20.
Recommended reading: Solving the Ender 3 V2 bed size conundrum
Maintaining a Level Bed on Your Ender 3 Pro
Maintaining a level bed on your Ender 3 Pro is an ongoing process that contributes significantly to the quality of your prints. It begins with being proactive about leveling and not waiting until problems appear.
Routine Checks and Adjustments
Frequent checks and minor adjustments are integral to maintaining a level bed. Bed leveling should be part of the pre-print checklist. Checking the level before each print may seem excessive, but it can prevent issues that may arise during printing. Regular checks help to catch any minor shifts before they become problematic, ensuring a well-calibrated setup.
Handling the Bed Carefully
The manner in which you handle your 3D printer can also affect bed level. Avoid bumping into the machine or moving it roughly, as these actions could knock the bed out of level. When removing prints, try to apply an even pressure across the bed rather than pulling at one corner. Forceful or uneven removal can cause the bed to shift, requiring recalibration.
Upgrading to Stiffer Bed Springs
Investing in stiffer springs for the bed can also help maintain a level bed. The Ender 3 Pro comes with relatively soft springs that can compress over time, affecting the bed level. Upgrading to stiffer springs will provide better resistance and can help maintain the bed level over a longer period. The spring stiffness is often measured in pounds per inch (lbs/in), with stiffer springs having a higher value.
Periodically Recalibrating the Z-Axis Endstop
The Z-axis endstop's position can drift over time, affecting the nozzle's starting height and the bed's level. Therefore, it's essential to recalibrate the Z-axis endstop periodically. The goal is to set the endstop position so the nozzle is just touching the bed when the Z-axis is at zero. This will ensure the first layer adheres properly to the bed and the subsequent layers are printed at the correct height.
Conclusion
The process of bed leveling on the Ender 3 Pro 3D printer can take a long time at first but becomes simpler with experience. Successful bed leveling not only increases the quality and consistency of printed parts but also prolongs the life of the printer by reducing the chances of the nozzle scraping against the build surface. With a combination of careful manual leveling, assisted leveling features, and proactive maintenance, users can expect to achieve optimal print results consistently.
FAQs
What is the importance of bed leveling in 3D printing?
Bed leveling ensures the first layer of filament adheres properly to the build platform, which is crucial for the stability and accuracy of the entire print. An unlevel bed can lead to poor adhesion, causing the print to shift or warp, which results in a failed print.
How often should I level my Ender 3 Pro bed?
The frequency of bed leveling depends on your usage and the specific characteristics of your printer. However, as a general guideline, it's good practice to check the level before each print, especially for long prints or prints that cover a large portion of the bed. Additionally, any time the printer is moved, the bed should be rechecked for levelness.
Why is my Ender 3 Pro bed leveling not holding?
Several factors could contribute to the bed level not holding on the Ender 3 Pro. These can include printer movement, vibrations during printing, loosening of the adjustment knobs, and degradation of the bed springs over time. It could also result from uneven or excessive force used while removing prints from the bed.
What is the function of the Z-axis endstop in bed leveling?
The Z-axis endstop defines the home position of the printhead and determines the point at which the printhead stops moving towards the bed. If the Z-axis endstop is set too high, the nozzle won't be close enough to the bed for the filament to adhere properly. If it's set too low, the nozzle will scrape against the bed, possibly damaging the print bed or the nozzle.
What are the signs of a poorly leveled bed?
Signs of a poorly leveled bed can manifest in different ways. They include poor first layer adhesion, prints not sticking to the bed, warping of the printed object, or uneven layers. In extreme cases, the nozzle might dig into the print bed, leading to potential damage.
References
[1] Hernandez DD. Factors affecting dimensional precision of consumer 3D printing. International Journal of Aviation, Aeronautics, and Aerospace. 2015;2(4):2.
[2] Arief RK, Sukindar NA, Hilmy I, Adesta EY. Analysis of the Adjusting Bolts System’s Contribution to Levelling Error of the Heated Bed in FDM 3D Printer. InProceeding of 5th International Conference on Advances in Manufacturing and Materials Engineering: ICAMME 2022, 9—10 August, Kuala Lumpur, Malaysia 2023 May 14 (pp. 313-319). Singapore: Springer Nature Singapore.
[3] Chimene D, Deo KA, Thomas J, Dahle L, Mandrona C, Gaharwar AK. Designing Cost-Effective Open-Source Multihead 3D Bioprinters. GEN biotechnology. 2022 Aug 1;1(4):386-400.