3D Print Warping (PLA, PETG, ABS): 6 Simple Fixes
Warping is typically caused by poor bed adhesion and inconsistent printing temperatures. Here’s how to fix the 3D printing problem.

Last updated on 05 May, 2025. 15 minutes read
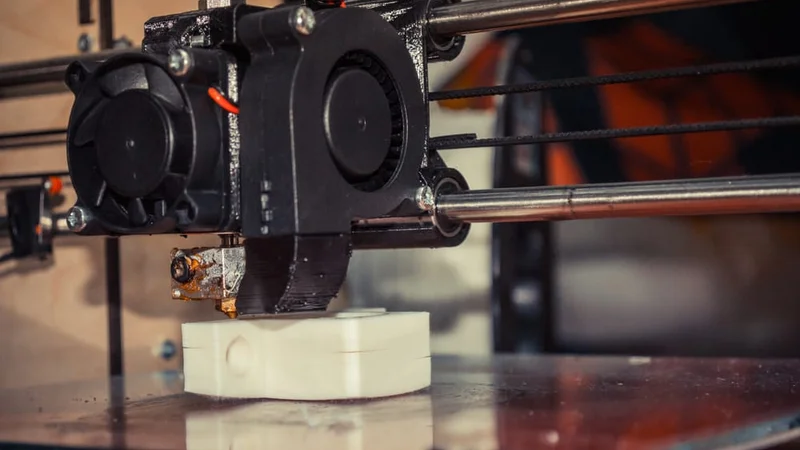
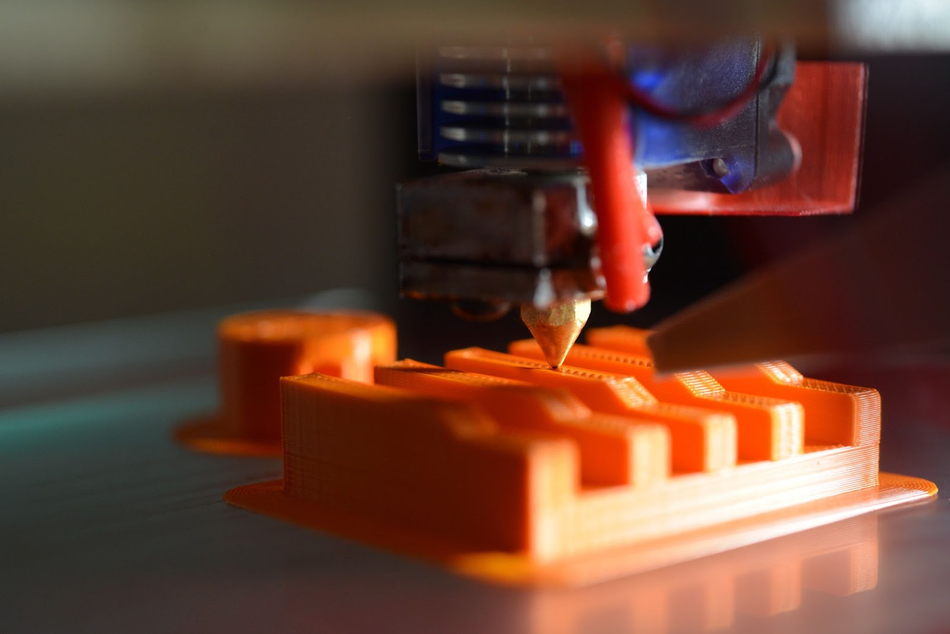
Warping occurs when 3D printed parts curl away from the build plate
Despite the incredible capabilities of 3D printers to create complex geometries and produce parts on demand, 3D print warping remains a common problem in fused deposition modeling (FDM) that causes parts to deform on the print bed. If you’ve ever noticed that the base of your 3D print is curling up and the corners are unsticking from the build plate, that’s warping. It’s a problematic phenomenon that not only results in less-than-perfect parts, it can also contribute significantly to wasted time, money, and materials. The good news is that there are several tips and tricks to prevent warping and improve your chances of a successful, warp-free 3D print. In this article, we’re exploring what causes are at the root of 3D print warping, what 3D printing materials are more likely to warp, what steps to take to prevent warping, and how warped prints can be fixed in some cases.
What causes 3D print warping?
3D print warping happens when layers of extruded filament on the 3D printer build plate cool too quickly and shrink [9]. This causes the plastic material to contract and pull away from the build plate, resulting in warping (or curling, as it is sometimes known).
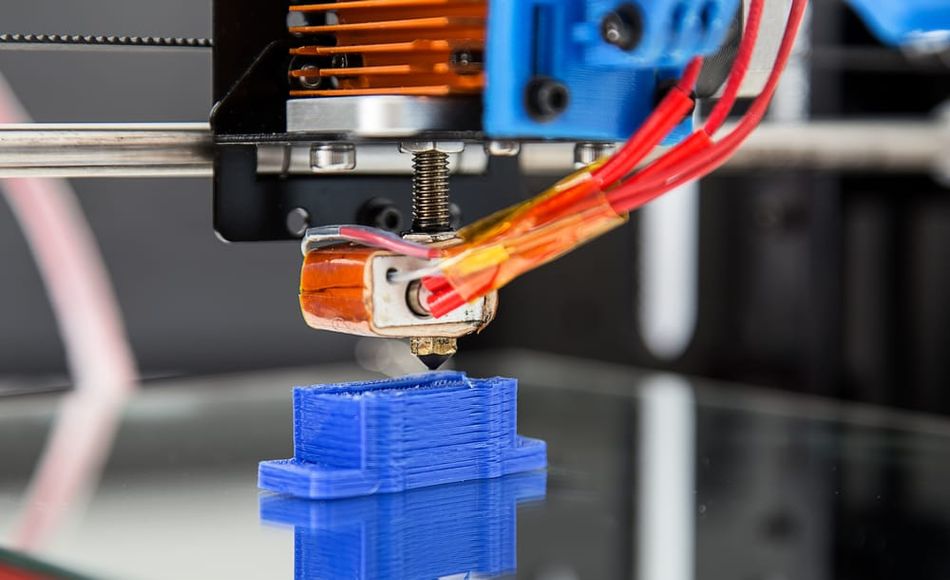
We can understand the problem of warping better if we zoom out a bit and look at the FDM process on the whole. In FDM 3D printing, a heated extruder deposits melted filament onto a print bed. This filament is made from a thermoplastic, a type of material characterized by its ability to melt when heated and resolidify when cooled. As thermoplastics are heated and cooled, they also expand and contract through a phenomenon called thermal expansion. This means that in the 3D printing process, as each layer of molten plastic is deposited, the heat-expanded filament not only hardens as it cools, it also contracts. This process is inevitable, but it can be controlled to avoid warping.
Warping occurs when the cooling process is not well controlled: in some cases the plastic cools too quickly on the build platform, or cools unevenly. This can cause 3D printed layers to shrink too quickly and pull on less solidified layers, ultimately lifting the first layers off the build platform and causing deformation.
Though it is possible to experience warping with any type of 3D printed part, it is more common when 3D printing larger parts or parts with a large surface area. This is simply due to the fact that the more plastic there is, the more unevenly layers will cool.
Risks of warping
Warping comes with several risks to final 3D printed models, particularly for end-use parts. For starters, it can significantly compromise the dimensional accuracy of 3D prints, resulting in deviations from the intended geometry. These discrepancies in size, shape, and tolerances can ultimately lead to issues with fit and functionality, particularly in applications requiring precise mating or assembly. For instance, interlocking components that have suffered from warping may not assemble properly or experience excessive friction and wear during operation.
Warping can also negatively effect the structural integrity of 3D printed parts by introducing weak points and stress concentrations inside the part. These areas of weakness can reduce the part's strength, load-bearing capacity, and overall performance, making it more susceptible to failure under mechanical stress. In functional applications, part failure due to warping can have serious consequences, jeopardizing safety and reliability.
Additionally, it goes without saying that warping can lessen the aesthetic appeal of 3D printed parts, resulting in an uneven surface finish, visible layer lines, and unsightly distortions. In applications where appearance is paramount, such as consumer products or architectural models, warped parts may not be usable, leading to increased costs as well as wasted time and materials.
What materials are prone to warping?
Certain 3D printing filaments are more prone to warping than others. As a general rule, materials with a higher printing temperature suffer more from shrinkage because the temperature variation as they cool is more extreme. In these cases, using an enclosed build chamber or a heated print bed can help keep cooling temperatures stable—we’ll cover more on that in the next section. For now, we’re looking at which 3D printing materials are most prone to warping and which materials are naturally resistant to the phenomenon.
3D printing materials that warp
ABS
Acrylonitrile Butadiene Styrene (ABS) is one of the most popular thermoplastic 3D printing filaments on the market today. Despite this popularity, ABS is also known for its tendency to warp on the build platform, which can cause headaches for 3D printing users. The reason for ABS’ warping is linked to the material’s high melting point and print temperature (220–250 °C). Because the filament is so hot when it is deposited on the build platform, it does not take much for the material to cool unevenly or too quickly, particularly when there is no heated bed or build chamber.
- ASA
Acrylic Styrene Acrylonitrile (ASA) is a tough filament that is similar to ABS in many ways, but offers superior mechanical properties and UV resistance. This makes it more suitable for outdoor applications. Due to its similar chemical makeup to ABS, ASA prints at a similar temperature and is also prone to warping. It’s therefore important to use the right bed temperature and cooling settings, as well as an enclosed build chamber to reduce the risk of warping with ASA.
Nylon
Also known as polyamide (PA), Nylon is a synthetic polymer that offers excellent strength, wear resistance, and flexibility. Despite these benefits, Nylon can be challenging to 3D print using FDM systems, due to its tendency to warp. Nylon has a high rate of shrinkage when it cools, which creates challenges. Fortunately, using proper temperature settings, an enclosed bed, and bed adhesives can help control the cooling process and reduce warping.
PC
Polycarbonate (PC) is known for its excellent strength and resistance to impacts and heat. These properties makes it a good candidate for tough engineering applications. PC also requires very high print temperatures (in the vicinity of 300°C). Without the proper temperature control (PC requires an enclosed build chamber), the material can warp significantly, with first layer corners curling up from the build plate and part deformations.
PP
Polypropylene (PP) is a semi-crystalline plastic known for its good impact and heat resistance. Thermoplastics with crystalline or semi-crystalline structures contract significantly when cooled and often in an non-uniform way.[5, 10] When 3D printing PP it’s thus essential to work with a heated bed and the right cooling settings to control the rate of cooling and minimize shrinkage.
Warp-resistant 3D printing materials
PLA
Polylactic acid (PLA) is a low-cost bioplastic that has been widely adopted for 3D printing, largely due to its easy printability. The material has a relatively low melting temperature and does not require extreme heat to print, making it fairly resistant to warping on the print bed. While preventative measures for warping can be taken with PLA, users can generally get good results without a heated bed or a dedicated cooling system. That said, due to PLA’s low glass transition temperature (60°C), parts made from PLA can warp if exposed to heat or sun post printing.
- PETG
Polyethylene terephthalate (PETG) is a glycol-modified version of PET, one of the most widely used plastics in the world. As a filament, PETG offers users excellent strength and durability, and while it prints at a similar temperature to ABS (220–260 °C), it is easier to process. This is in large part due to the material’s good adhesion, which helps the first layers of the print to stick to the build platform and prevents warping as the part cools.
TPU
Thermoplastic polyurethane (TPU) is a type of soft, flexible filament that can be used for rubber-like applications. The material requires specific print settings in order to achieve good results but is not particularly prone to warping. Typically, TPU filaments print best with a nozzle temperature around 230 °C, and the material does not require a cooling system or an enclosed build chamber.
- Fiber filled materials
Composite thermoplastics, which integrate reinforcing fibers like carbon fiber or glass fiber into their polymer matrix, are also quite resistant to warping. The inclusion of these fibers functions to constrain thermal expansion and contraction, reducing overall shrinkage on the build platform. It should be mentioned, however, that these materials do require special 3D printer hardware and settings. For instance, due to the increased abrasiveness of fiber-filled filaments, they require hardened nozzles. Slower print times and extra bed adhesion are also advisable when using composite filaments.
How to prevent 3D printer warping?
Regardless of what 3D printing material you are using, you can reduce the chances of 3D print warping and improve 3D print outcomes by using a few key preventative techniques.
Temperature Control
Because cooling filament too quickly is what causes shrinkage and warping, it is key to control the temperature of your build as much as possible. 3D printer temperatures can be regulated using different methods or a combination of approaches. One of the most effective tricks for improving bed adhesion is to use a heated build plate. Each type of filament will have its own recommended bed temperature for good adhesion. For example, PLA works best with a heated bed at a temperature of between 60 and 70°C, while ABS requires a hotter print bed of between 100 and 120°C.[1]
Using an enclosed print chamber can also help to maintain an ambient temperature throughout the printing process and stop 3D printed layers from cooling too quickly. Many 3D printer models have a built-in enclosed chamber, but those that don’t can still benefit from a DIY enclosure.[6] Other ways to improve temperature consistency in your 3D printer are to adjust cooling fan speed settings (especially for the first layers of a print) and keeping your room temperature as ambient as possible (i.e. keeping cold air out by closing windows).
Bed Adhesion
One effective way to minimize the risk of 3D print warping is to improve your 3D printer’s build plate adhesion. Good bed adhesion will keep your 3D printed part stuck to the build surface and prevent the first layers of the print from curling up as they cool.
Bed adhesion can be achieved in a few ways. For example, there are dedicated 3D printer adhesives that can be applied to the build plate before printing. Many also opt for more DIY adhesives, like glue sticks and hairspray. A third option is tape, which is placed on the build plate surface. Painter’s tape is a popular option because it can be removed easily and the porous texture of the non-stick side keeps filament stuck down.[2] Kapton tape is also commonly used to encourage bed adhesion.
If you are using adhesives on your 3D printer, be sure that the print surface is clean before and after printing. Glue residue can cause an uneven print surface, potentially impacting calibration and the quality of future prints. It is also a good idea to try a test print if you are using a new adhesive to ensure it keeps the bottom layer of the print down but can also be easily unstuck when the print is done.[3]
Recommended reading: 3D Printer Bed Adhesion: 8 Ways to fix 3D Print Not Sticking to Print Bed

Bed Leveling
Warping and poor first layer adhesion can also be caused by an unleveled print bed. If the print bed is uneven, even by a few degrees, the adhesion across the first layers will not be consistent. For example, if the left side of a print was deposited from slightly farther away than the right side, the bond between the print and the build plate will not be as strong on that side. Ensuring that your print bed is level before printing can therefore help to prevent warping.
Some FDM 3D printers have built-in bed leveling, which uses sensors and automatic calibration to adjust the print bed. If your machine doesn’t have these options, then manual bed leveling is the way to go. Fortunately, this process is pretty straightforward: you can get your bed level with just a bit of time and a piece of paper. Simply lower your printer nozzle until it is barely just touching the print bed. Then slide a piece of paper under the print head and raise the bed until you feel slight resistance when tugging the paper. These steps should be repeated for every corner of the print bed so that you can start your print with a level playing field, so to speak.
Brim or Raft
Brims and rafts are tried and true techniques for boosting bed adhesion, especially for ABS and other high-temperature filaments. These 3D print features are added in slicer software right before printing and have several functions.
Specifically, a brim is a 3D printed border that connects to and goes around the edges of a 3D printed part. Brims are typically a few millimeters wide and consist only of 1-2 layers. They increase the footprint of the 3D printed part and anchor its edges to the build platform. A raft is similar, only it is also printed under the 3D printed part, acting as a base for it.
Brims and rafts are especially beneficial for 3D printed parts with unbalanced geometries or small footprints, as they can stabilize the print and secure it to the build surface. Both brims and rafts must be removed after printing, either by hand (by peeling them off) or using a tool. Printed parts with brims or rafts may require additional post-processing to achieve a smooth first layer.
Recommended reading: 3D Printing Brims (vs Rafts vs Skirts): How to Get Started
Slicer settings
The risk of warping can also be reduced substantially by implementing the right print settings for the first layers of the printed object. Most slicer software programs allow you to adjust the print speed and layer height specifically for the first layer or layers. A slower print speed for the first printed layers of a build will help to ensure that the filament sticks to where it has been deposited and is not pulled by the nozzle as it moves. Choosing a slightly thicker layer height for the first layer can also improve bed adhesion and help reduce any leveling inconsistencies.
Another print setting that can influence warping is fan speed. Fans are built into some FDM 3D printers and ensure the build space does not get too hot. By tweaking fan speeds you can maintain closer control over print cooling. For example, fans can be programmed to turn on only after the first few layers of a print have been deposited. This helps the first layers cool slowly and evenly on the print bed.
Design considerations
It may not seem immediately obvious, but 3D model design can also influence the risk of warping. If you are struggling with warping, consider printing test prints in different geometries to see if that makes a difference. For example, models with sharp corners at their base tend to warp more than 3D models with a curved bottom layer or rounded corners. This is because stress concentrates in sharp corners, whereas rounded curves are more effective at distributing stress.[7]
If you are printing a 3D model with a sharp rectangular base, you can also add a brim to the part with rounded edges to encourage bed adhesion. Alternatively, there is a commonly used technique known as “mouse ears”, which consists of adding circles around sharp corners for the first layers of a print. In this case it’s a good idea to update slicer settings so that the edges of the actual print have a small gap (smaller than the nozzle size) from the edge of the mouse ear. This will ensure that the print geometry itself is not affected by the addition of mouse ears. [8]
Recommended reading: How to Make a 3D Model for Printing
How to fix a warped 3D print
It goes without saying that prevention is the best way to address the problem of warping. However, it doesn’t really answer the question of what to do when warping has occurred. After all, it’s not ideal to simply throw away every print that warps.
If a print shows small signs of warping and tight tolerances are not a requisite, there is a DIY method to fix the problem. For example, some makers have successfully flattened the bottom of a curled print by placing it on a flat metal surface, such as a frying pan, blowing hot air on the print, and pressing the softened plastic onto the hard surface.[4] That said, this method is particularly effective for materials with lower glass transition temperatures, like PLA, which are less prone to warping in the first place.
It is also possible to reheat a 3D print using a heat gun and manually pressing it back into shape. Again, this can be an effective method for small deformations and for parts that don’t require tight tolerances or good dimensional accuracy.
Unfortunately, the solutions for fixing an already warped print are fairly limited, particularly for high-temperature filaments. That’s why it’s always a good idea to conduct a test print when you are using a new material to ensure that your print settings are optimized for the filament in question.
Conclusion
3D print warping is a frustrating problem most makers will encounter at some point or another. By following the tips and methods laid out in this article and by knowing which materials are prone to warping, however, you can ensure good bed adhesion, consistent printing temperatures, and ultimately reduce warping and improve print quality overall.
Frequently Asked Questions (FAQs)
Q: What are signs of 3D print warping?
A: Warping is a common 3D printing problem that can easily be identified by checking the base layers of a print. Tell-tale signs of warping are if the bottom corners of a print are curling upwards away from the print bed.
Q: What are the causes of warping?
A: In the FDM 3D printing process, warping occurs when extruded filament cools too rapidly or unevenly. The cooling process causes the filament to shrink as it solidifies and, if not properly controlled, upper layers of a printed object can start pulling the bottom layers, unsticking them from the print bed. In slightly more technical terms, as the printed layers cool at different rates, thermal stresses develop within the part, causing it to deform and lift from the build plate.
Q: What 3D printing materials warp?
A: When it comes to 3D printing filaments, certain materials are more prone to warping than others. High-temperature materials like ABS, ASA, and PC have a tendency to warp due to the greater temperature difference when cooling. Semi-crystalline materials like Nylon and PP also tend to warp since they have a high rate of shrinkage. PLA and PETG are typically recognized as the filaments most resistant to warping. Fiber-reinforced filaments (such as carbon and fiber glass composites) also tend to be more resistant to warping than their unfilled counterparts.
Q: Does print temperature influence warping?
A: Print temperature and environment play a huge role when it comes to warping. Since warping is caused by layers of filament cooling too quickly, maintaining a consistent and controlled print temperature can minimize the effects of shrinkage. For example, a heated print bed and enclosure can significantly reduce the chance of warping as they make the cooling process more gradual and uniform across layers.
Q: How can I prevent a 3D print from warping?
A: There are many preventative actions you can take to stop 3D print warping. Using a heated print bed, enclosed build chamber, and the right cooling settings can dramatically reduce the risk of warping. Moreover, using a bed adhesive can help to keep the first layers of a print stuck to the bed. Other preventative measures include using a brim or raft and adjusting slicer settings to improve bed adhesion.
Q: Are there any post-processing methods to fix a warped 3D printed part?
A: While preventing warping during the printing process is ideal, some post-processing techniques can help minimize the effects of warping. For example, you can try reheating a 3D print using a heat gun or hair dryer and then manually pressing it back into shape. This can be an effective fix for visual models or parts that do not require tight tolerances or strict dimensional accuracy.
References
[1] Not Sticking to the Bed [Internet]. Simplify3D, 2024. Available from: https://www.simplify3d.com/support/print-quality-troubleshooting/not-sticking-to-the-bed/
[2] The Complete Guide to Blue Tape for 3D Printing [Internet]. TapeManBlue, 2022. Available from: https://tapemanblue.com/blogs/tips-tricks/blue-tape-for-3d-printing
[3] Build plate adhesion: How to get your print to stick to the build plate [Internet]. Ultimaker, December 6, 2022. Available from: https://support.ultimaker.com/hc/en-us/articles/360012015680
[4] Squagghiati. How to Fix a Warped Print [Internet]. Hubs, February, 2016. Available from: https://www.hubs.com/talk/t/how-to-fix-a-warped-print/4455
[5] Warp [Internet]. Beaumont, 2024. Available from: https://www.beaumontinc.com/injection-molding-glossary/warp-2
[6] Zuza, Mikolas. How to build a simple, cheap enclosure for your 3D printer [Internet]. PRUSA Research, April 13, 2018. Available from: https://blog.prusa3d.com/cheap-simple-3d-printer-enclosure_7785/
[7] Designing for Printing Part 2: Why 3D Printed Parts Warp and How to Stop It [Internet]. Markforged, 2024. Available from: https://markforged.com/resources/blog/3d-printed-part-warping
[8] J. Lake 3D. 3D Print Better Mouse Ears Using CAD [Video]. Youtube, January 4, 2023. Available from: https://www.youtube.com/watch?v=935BHdhSe8o
[9] Liu S.; Feng Y.; Zhang W. Simulating and Predicting the Part Warping in Fused Deposition Modelling by Thermal–Structural Coupling Analysis. Polymers 2023, 15 (3), 373. https://doi.org/10.3390/polym15030373
[10] Issametova M. et al. Determination of Residual Stresses in 3D-Printed Polymer Parts. Polymers 2024, 16 (14), 2067. https://doi.org/10.3390/polym16142067