Your Guide to 3D Printing G-Code
What you need to know about G-code, the programming language essential to translating a digital 3D design into a physical object.

08 Mar, 2024. 11 minutes read
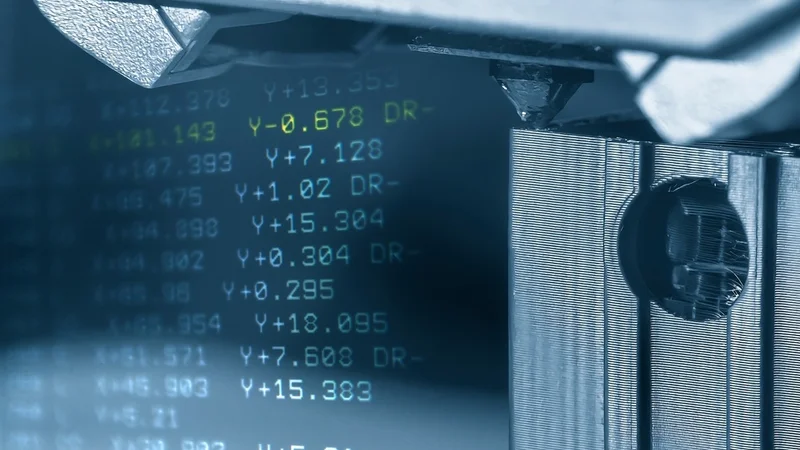
G-code is a programming language understood by CNC machines and 3D printers
G-code, a programming language that communicates with automated machine tools, plays a pivotal role in the 3D printing process. It serves as the bridge between the digital design on your computer and the physical 3D print. In other words, G-code is a series of instructions that guide the movements of the 3D printer, effectively dictating where, how, and when the machine should move to create the desired object.
The importance of G-code in 3D printing cannot be overstated. It is the universal language that 3D printers understand, regardless of the brand or model. Without G-code, the 3D printer would not know how to translate a digital 3D design into a physical object. It is the G-code that tells the printer where to move the printhead, how fast to move it, and when to extrude the filament.
While most 3D printing software can generate G-code automatically, having a basic understanding of this language can open up new possibilities for customization and optimization. A grasp of G-code is valuable for anyone looking to have greater control over the printing process, enabling users to fine-tune their prints and troubleshoot issues more effectively.
History and Evolution of G-Code
G-code has its roots in the 1950s as it was developed during the early days of computer numerical control (CNC) machining. It was developed by MIT’s Servomechanisms Laboratory.[1] The goal was to create a language that could instruct automated machine tools. The result was G-code: a series of commands that could control the movements of a machine tool along defined paths.
Over the years, G-code has evolved and adapted to the needs of various industries. It has become the standard language for CNC machining, used in industries ranging from automotive to aerospace. The evolution of G-code has been driven by advancements in technology and the increasing complexity of the tasks performed by automated machine tools.
More recently, G-code has become an integral part of 3D printing. As 3D printing technology emerged and evolved, the need for a standard language to control these new machines became apparent. Given its widespread use and adaptability, G-code was a natural choice.
G-Code in Traditional Manufacturing
In traditional manufacturing, G-code is used to control a variety of machine tools, including mills, lathes, and routers. These machines rely on G-code commands to move along specified paths, cutting or shaping material to create parts. The precision and repeatability of G-code-controlled machines have made them a cornerstone of modern manufacturing.
In a typical manufacturing process, a digital model of a part is created using computer-aided design (CAD) software. This model is then converted into G-code using computer-aided manufacturing (CAM) software. The G-code is sent to the machine tool, which interprets the commands and carries out the specified movements.
The adaptation of G-code for 3D printing followed a similar process. Instead of cutting or shaping material, however, a 3D printer adds material layer by layer to create an object. The principles of G-code remain the same, with commands controlling the movements of the printer's extruder along specified paths. The result is a physical object that matches the digital model.
Recommended reading: What Is CNC Machining? The Complete Basics to Get Started
The Basics of G-Code
In the context of 3D printing, G-code is a programming language composed of a series of commands and parameters that guide the movements of the 3D printer’s printhead and control the 3D printer settings. Each line of G-code represents a specific instruction for the printer, telling it where to move along the x-axis, y-axis and z-axis, as well as how fast to move, and when to extrude the filament.
The structure of G-code is relatively straightforward. Each line begins with a letter, which represents a specific command, followed by a number, which specifies the value or parameter for that command. For example, the command "G1 F1800 X90.6 Y13.8 E22.4" instructs the printer to move the print head to the coordinates X90.6, Y13.8 at a feed rate of 1800mm/minute, while extruding 22.4 mm of filament.
Within G-code, there are G commands, which are specifically giving instructions about positioning, and M commands which provide more general instructions for the 3D printer’s settings and actions, such as hotend temperature, calibration, and more.
G-Code Commands
G-code commands are the building blocks of the G-code language. Each command instructs the 3D printer to perform a specific action. Some of the most common G-code commands used in 3D printing include[2]:
G0 and G1: These commands control the linear movement of the print head. G0 is used for rapid, non-printing moves, while G1 is used for printing moves. Both commands are followed by coordinates that specify the destination of the move.
G2 and G3: These commands are used for controlled arc moves. G2 moves the print head in a clockwise arc, while G3 moves it in a counterclockwise arc. Both commands are followed by the endpoint of the arc and the radius of the arc.
G28: This command moves the print head to the home position, which is the origin of the printer's coordinate system. This is typically the first command in a G-code file, ensuring that the print starts from a known position.
G29: This command is responsible for bed leveling. Since different 3D printers have different bed leveling systems, G29 has different instructions for each.
G90 and G91: These commands determine whether the extruder’s positioning mode. With G90, the printhead will be set to absolute positioning (G90), while G91 will ensure coordinates are read through relative positioning (G91).
G92: This command sets the current position of the print head to the specified coordinates. This is useful for resetting the printer's coordinate system without physically moving the print head.
M104 and M109: These commands control the temperature of the extruder. M104 sets the extruder temperature and allows the print to continue, while M109 sets the temperature and waits for it to reach the specified value before continuing.
M106 and M107: These commands control the 3D printer cooling fan. M106 controls the fan speed and M107 turns the fan off.
M140: This G-code command instructs the 3D printer to adjust the bed temperature without pausing the print to wait until the temperature is reached.
These are just a few examples of the many G-code commands used in 3D printing. Each command plays a crucial role in controlling the printer's movements and functions, enabling the creation of complex 3D objects from a series of simple instructions.
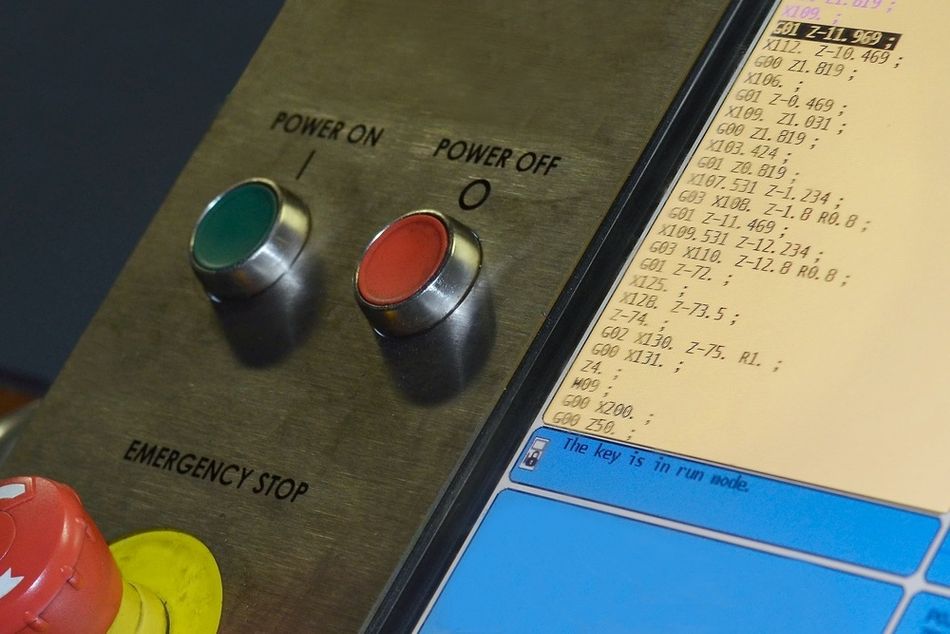
 Slicer software automatically generates G-code, which is transmitted to the 3D printer's firmware.
How 3D Printers Interpret G-Code
The interpretation of G-code by a 3D printer is a critical part of the 3D printing process. The printer's firmware, which is essentially the printer's operating system, reads the G-code file line by line. Each line of G-code represents a specific instruction for the printer, telling it where to move, how fast to move, and when to extrude the filament.
The printer's firmware (for example, Marlin is a common firmware for FDM 3D printers) interprets these commands and translates them into physical movements. For example, if the G-code instructs the printer to move the print head to a specific set of coordinates, the firmware will control the stepper motors to move the print head to that location. If the G-code instructs the printer to extrude a certain amount of filament, the firmware will control the extruder to push out the specified amount of filament.
The process of interpreting G-code is continuous throughout the printing process. The printer's firmware reads the G-code file line by line, interpreting each command and executing it before moving on to the next. This process continues until all the commands in the G-code file have been executed, resulting in a completed 3D print.
Generating G-Code for 3D Printing
The generation of G-code for 3D printing is a process that involves several steps. It begins with the creation of a 3D model using computer-aided design (CAD) software. This model is then converted into a format that can be read by a slicer software, which is responsible for generating the G-code.
The slicer software takes the 3D model and slices it into layers, hence the name. It then generates G-code commands for each layer, instructing the printer where to move and when to extrude filament. The slicing software also calculates the optimal path for the print head to follow, minimizing travel time and ensuring a smooth print.
The generated G-code file is then sent to the 3D printer, either via a direct connection or by saving it to a removable storage device. The printer's firmware reads the G-code file, interpreting each command and executing it to create the final print.
The process of generating G-code is crucial to the 3D printing process. It is the bridge between the digital 3D model and the physical 3D print, translating the design into a series of commands that the printer can understand and execute.
Slicer Software: An Overview
Slicer software plays a key role in the generation of G-code for 3D printing. It takes a 3D model, usually in the form of an STL file or OBJ file, and slices it into layers. It then generates G-code commands for each layer, instructing the printer where to move and extrude filament.
There are several slicer software options available, each with its own set of features and capabilities. Some of the most popular slicer software includes Cura, Slic3r, and Simplify3D. These software options offer a range of settings that can be adjusted to optimize the print, such as layer height, print speed, and infill density.
In essence, slicer software is the tool that translates a 3D model into a language that the 3D printer can understand. It is a crucial part of the 3D printing process, enabling the creation of complex and detailed 3D prints from digital models.
Recommended reading: Best Ender 3 Pro Cura Settings: Temperature, Speed, Retraction, More
Customizing G-Code for Optimized 3D Printing
While slicer programs automatically generate G-code, it is possible to manually edit the programming language for customized or optimized 3D prints. By modifying the G-code, you can control specific aspects of the printing process, such as the speed of the print, the temperature of the extruder, and the amount of filament extruded. This allows for a high degree of control over the final print, enabling the creation of prints that are optimized for specific applications or materials.
It is also possible to add notes in G-code text, which can provide helpful information about a specific line of code. To do this, simply add a semicolon after the line of code and write the note. The semicolon ensures that the 3D printer firmware does not read the comment. It is also possible to embed notes within a line of text, this requires the use of parentheses.[3]
Customizing G-code allows for a high degree of control over the 3D printing process. By understanding the function of different G-code commands and parameters, you can modify the G-code to optimize the print for your specific needs.
Common G-Code Modifications
There are several common modifications that can be made to G-code. One of these is adjusting the layer height, which is controlled by the "Z" parameter in the G-code. By reducing the layer height, you can increase the resolution of the print, resulting in a smoother and more detailed final product. However, this also increases the print time, as more layers are required to complete the print.
Another way to customize G-code is by adjusting the print speed. This is controlled by the "F" parameter in the G-code commands. By increasing the print speed, you can reduce the time it takes to complete a print. However, this can also lead to a decrease in print quality, as the printer may not have enough time to accurately deposit the filament. Conversely, reducing the print speed can increase the quality of the print, but at the cost of increased print time.
Temperature adjustments for the extruder are another common modification. This is controlled by the "M104" and "M109" G-code commands, which set the target temperature and wait for the extruder to reach that temperature, respectively. Adjusting the extruder temperature can help optimize the print for different types of filament.
A common modification is adjusting the print speed, as mentioned earlier. This can be done by modifying the "F" parameter in the G-code. Adjusting the print speed can help balance the trade-off between print quality and print time.
These are just a few examples of the many modifications that can be made to G-code to optimize the 3D printing process. By understanding the function of different G-code commands and parameters, you can customize the G-code to suit your specific needs and achieve the best possible results from your 3D prints.
Recommended reading: 3D print speed: What it is and why it matters
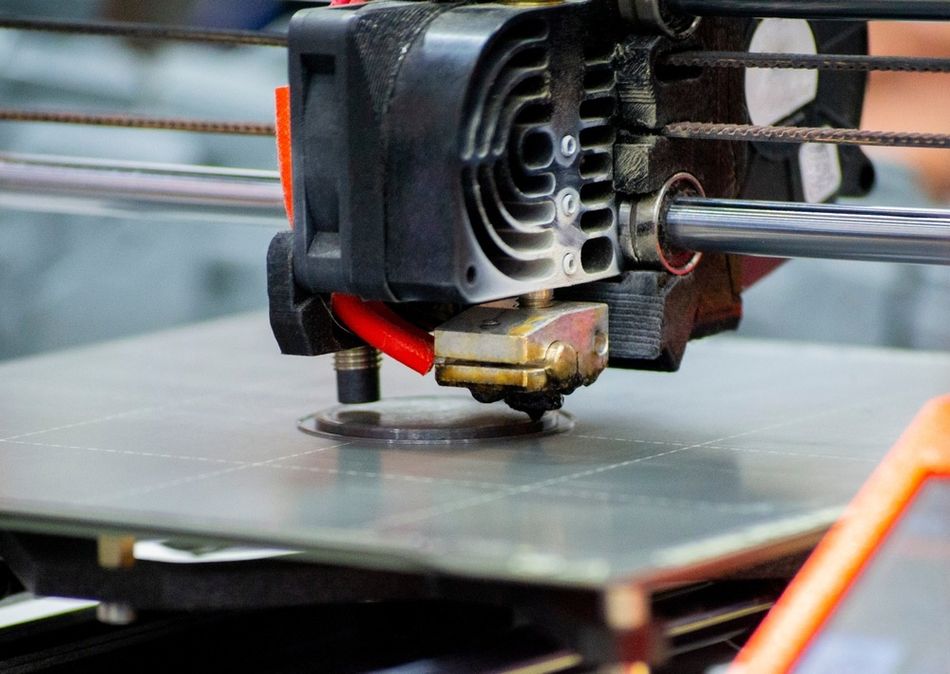
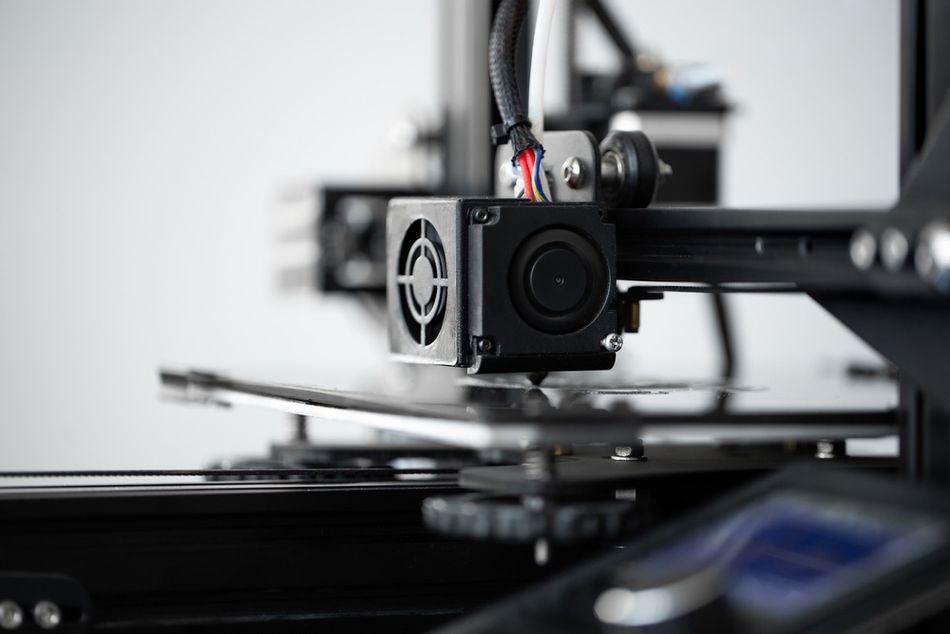 3D Printer
Troubleshooting with G-Code
Troubleshooting with G-code is an essential skill in 3D printing. By understanding the function of different G-code commands, you can identify and resolve issues that may arise during the printing process.
One common issue in 3D printing is under-extrusion, where the printer extrudes less filament than required. This can result in gaps in the print or weak layers. Under-extrusion can often be resolved by adjusting the "E" parameter in the G-code, which controls the amount of filament extruded. Increasing the "E" parameter can increase the amount of filament extruded, helping to resolve under-extrusion issues. However, it’s a good idea to first find the underlying cause of the under-extrusion.
Another common issue is layer shifting, where the layers of the print do not align correctly. This can be caused by a variety of factors, including mechanical issues with the printer or errors in the G-code. If the issue is caused by errors in the G-code, it can often be resolved by checking the "X" and "Y" parameters in the G-code, which control the movement of the print head. If these parameters are incorrect, they can cause the print head to move to the wrong location, resulting in layer shifting.
A third common issue is overheating, where the extruder or print bed becomes too hot. This can cause the filament to melt too much, resulting in a poor quality print. Overheating can often be resolved by adjusting the "M104" and "M140" G-code commands, which set the temperature of the extruder and the print bed, respectively. Reducing the temperature set by these commands can help prevent overheating.
These are just a few examples of the many issues that can be resolved by troubleshooting with G-code. By understanding the function of different G-code commands and parameters, you can identify and resolve issues in the 3D printing process, helping to ensure the best possible results from your prints.
Conclusion: Mastering G-Code for 3D Printing
Mastering G-code is a valuable skill for anyone involved in 3D printing. It provides a deep understanding of how 3D printers operate and allows for a high degree of control over the printing process. By understanding G-code, you can optimize your prints for specific applications or materials, troubleshoot issues, and even create custom G-code commands.
While learning G-code may seem daunting at first, with practice and patience, it becomes more intuitive. There are many resources available, including online tutorials, forums, and documentation, that can help you learn and understand G-code in greater depth.
FAQs
Q: What is G-Code?
A: G-code is a language that is used to control CNC machines and 3D printers. It consists of a series of commands that instruct the machine where to move and what to do. Each command in G-code tells the machine to perform a specific action, such as moving to a certain location or extruding a certain amount of filament.
Q: How is G-code generated?
A: G-code is typically generated by slicer software. The software takes a 3D model, slices it into layers, and then generates G-code commands for each layer. These commands instruct the printer where to move, how fast to move, and when to extrude filament.
Q: Can I modify G-Code?
A: Yes, G-code can be modified to fine tune the 3D printing process. By adjusting parameters such as print speed, extruder temperature, and layer height, you can control specific aspects of the printing process and optimize the print for specific applications or materials.
Q: What is the role of firmware in interpreting G-Code?
A: Firmware plays a crucial role in the interpretation of G-code. It is the firmware that reads the G-code commands and translates them into physical movements. Different 3D printers may use different firmware, and this can affect how G-code is interpreted.
References
[1] G-code Overview and Related Resources for Machinists [Internet]. Practical Machinist. July 31, 2020. Available from: https://www.practicalmachinist.com/cnc-machining/g-code-overview-and-related-resources-for-machinists/
[2] G-Code [Internet]. Marlin. 2024. Available from: https://marlinfw.org/docs/gcode/G000-G001.html
[3] G-Code Tutorial [Internet]. Simplify3D. 2024. Available from: https://www.simplify3d.com/resources/articles/3d-printing-gcode-tutorial/
in this article
1. History and Evolution of G-Code2. The Basics of G-CodeSlicer software automatically generates G-code, which is transmitted to the 3D printer's firmware.4. How 3D Printers Interpret G-Code5. Generating G-Code for 3D Printing6. Customizing G-Code for Optimized 3D Printing7. Conclusion: Mastering G-Code for 3D Printing8. FAQs9. References