IMA Juno DIY Remote-Controlled Rover For Beginner Level Learners in Robotics
A starter package that introduces basics of robotics, Arduino, electronics, and 3D printing with hands-on learning experience.
Technical Specifications
| Project Type | Open source |
| Actuator | Continuous Servo |
| Controller | PC, Juno Android App |
| Microcontroller | Arduino Uno |
| Battery | 4 x AA batteries (6 Volts) |
| Communication Module | Bluetooth HC-06 |
Overview
Intuitive Robotic Kit for Enhancing Awareness about Robotics and 3D Printing
Developing the IMA Juno robotics kit aims to spread awareness about how simple yet effective robotics can be. Thanks to an intuitive hardware design, a user can quickly assemble the hardware pretty, similar to how a Lego kit is assembled. The kit features all the necessary hardware to set up connections, displays, movement mechanisms, and a centralized control mechanism.
Continuous Servos for Flawless Movement
The IMA Juno Rover uses continuous servo motors with 3D-printed attachments for easy mounting to the robotic platform. It’s a two-wheeled rover, and the wheels feature a zigzag pattern allowing the robot to grip tricky surfaces.
Arduino Uno-Based Control
The robot features an Arduino Uno microcontroller, allowing users to explore a vast library of examples and ready-to-use sketches. The intuitive programming platform makes it easier to test various codes and apply new changes helping users to learn the essentials of microcontroller programming.
As there are additional electronic components like LEDs, it also allows the users to test various applications with or without implementing Bluetooth communication.
Optimized 3D Printing Section that Works on Any 3D Printer
The 3D-printed parts make it easier to assemble electronic and mechanical parts perfectly into their places. Moreover, each cable and LED has a proper slot with adequate space for screws and adhesive materials. Therefore, the users can quickly assemble the robot by following an instruction manual.
Moreover, the 3D print files ensure they can be printed on any 3D printer with a print bed of 125mm x 100 mm. The 3D printed parts are so designed that they can incorporate further advancements like adding new sensors and communication modules.
As a result, users can implement more advanced applications once they start getting the feel of the robotic platform.
Simplified Assembly for Beginners
Once the robotic parts have been printed, the user can proceed to assemble the platform, which follows a generic blueprint as follows:
Prepping the 3D printed parts involves removing the tabs initially added to the design to support 3D printing. Moreover, sanding the rough edges and removing any unwanted bits is essential to provide the robot with a sleek and smooth finish.
Mounting motors - The motors must be mounted to their enclosures. The 3D design supports multiple servo attachments, but the IMA Juno uses a ‘+’ type attachment that connects via a screw.
Tyre Assembly - After mounting the servos, it’s time to assemble the tires into their hubs and connect them to the servo attachment with a single screw. This step completes the hardware assembly for the actuators.
Assembling Cards- In the next step, the Arduino board and HC-06 Bluetooth module must be mounted to the robot platform. After that, the breadboard is mounted to the platform.
Electrical Connections - After the mounting is complete, it’s time to set up the electrical connections. Ensuring the correct color coding for wires is critical, especially for beginners.
Code Testing - After the electrical connections are made, the Arduino code must be connected to the desktop and run the Arduino code available at the official explore-making website. The website also contains information about successfully testing the code and other hardware assembly details.
Ready-to-Use Test Code
For beginners, writing code on their own can be slightly tricky, so IMA Juno provides a basic test run code for the users. The code runs on a standard Arduino development environment. While testing the code, the user can use a desktop PC or a mobile phone to control the robot’s movement.
In the case of a mobile phone, the user can connect to the robot via the Juno app and control the robot with Bluetooth protocol.
References
Recommended Specs


Continue Reading
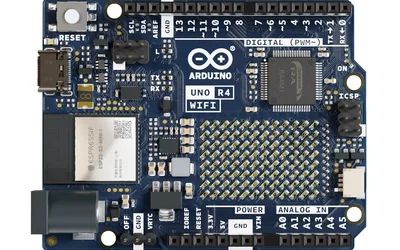
The new Arduino UNO R4 Wi-Fi board provides built-in Wi-Fi and Bluetooth communication as well as a 12×8 LED matrix display to give makers, hobbyists, and engineers an extremely versatile prototyping tool.
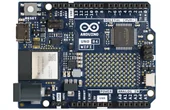

Arduino on Their Open-Source Ecosystems And Collaborations Fuelling Innovations Around The World
How IDT Solution built an open-architecture AOI system for automotive end-of-line quality control – without proprietary PLCs or software licenses.

3 minutes read