PLA Not Sticking to Print Bed: 9 Fixes and Causes
In this article, we examine the causes of 3D printing adhesion problems and how to ensure that PLA prints stick to the print bed.

Last updated on 04 Dec, 2023. 12 minutes read

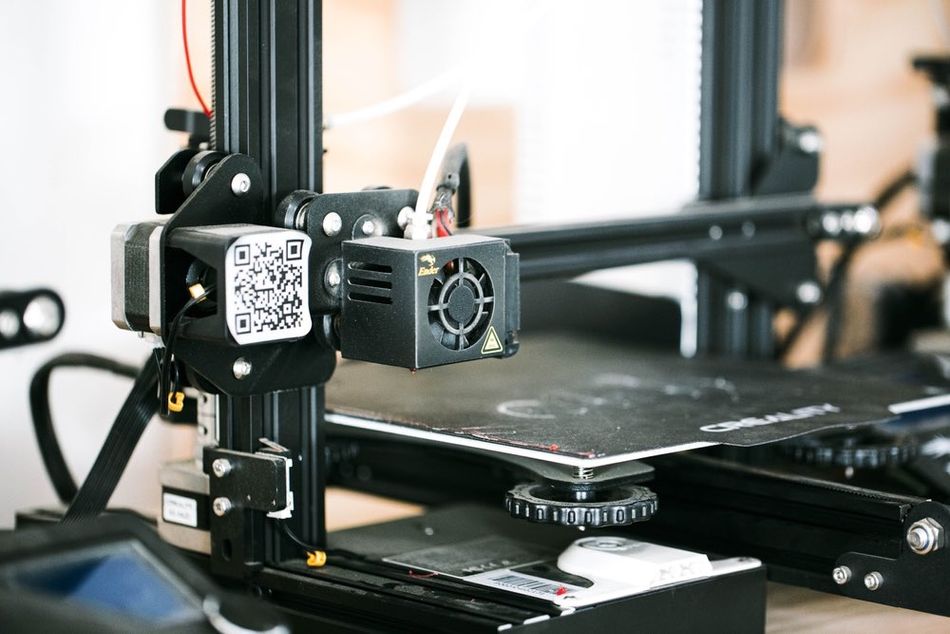
PLA filament is one of the most commonly used materials in FDM 3D printing
PLA (Polylactic acid) is one of the most popular 3D printing materials for fused filament fabrication (FFF); it is also widely known as one of the easiest filaments to work with. The thermoplastic material is made from plant-based starches derived from crops like corn and sugarcane and is thus biodegradable. In terms of its printing characteristics, PLA is easy to process: the filament does not require high temperatures and displays less shrinkage or warping than higher temperature materials, such as ABS. Even so, makers can still experience issues while 3D printing PLA, such as poor bed adhesion. In this article, we take a look at what could be causing your PLA to not stick to the print bed and how to fix it.
Recommended reading: PLA vs. ABS and More - Choosing the Right Filament
Importance of bed adhesion
Bed adhesion is a fundamental aspect of 3D printing. It refers to the ability of the first layer of the printed material, in this case PLA, to stick to the print bed. This initial layer serves as the foundation for all subsequent layers, and its quality can significantly impact the final print's success and appearance.
When the first layer adheres properly to the bed, it provides a stable base for the rest of the print. It ensures that the print remains in the correct position and orientation throughout the printing process. This is crucial because the print head moves in three dimensions, and any shift in the position of the print can lead to errors and inaccuracies in the final product. Good first layer adhesion also helps to prevent shrinkage and warping, as the part is less likely to peel up from the print bed and become deformed as it cools.
In following, poor bed adhesion can lead to a range of problems, such as warping. This typically happens when the PLA cools unevenly, causing different parts of the print to contract at different rates.
A less common issue is bed adhesion failure, where the print doesn't stick to the bed at all. This can result in the print moving around on the bed, leading to a failed print, or in extreme cases, damage to the printer itself. In addition to affecting the quality of the print, poor bed adhesion can also lead to wasted materials and time, as prints that don't adhere properly often need to be restarted from scratch. Therefore, understanding and ensuring good bed adhesion is a critical aspect of successful 3D printing.
Causes of poor bed adhesion and how to fix them
In this section, we are going to cover all of the most common causes of bed adhesion issues for PLA and how you can easily rectify them for better overall print outcomes.
Print bed leveling
If your PLA 3D prints are not adhering well to the build platform, one of the most common causes is a unleveled print bed. If the print surface is uneven, even by a small margin, the discrepancy will lead to certain areas of your print bonding to the print bed and other areas bonding less. And, as any maker will tell you, if your first layer does not uniformly stick to the print bed, the entire print is at risk of peeling up from the build surface and warping.
There are two possible methods for ensuring you have a level print bed. Some 3D printers have auto bed leveling thanks to built-in sensors. If you are working with one of these systems, you simply have to select bed leveling in the 3D printer menu, set a distance, and your 3D printer should do the rest. Alternatively, you can manually level your print bed.[1] An easy way to do this is to align your nozzle close to the print bed and place a piece of standard A4 paper between the nozzle and the build surface. Turn the leveling knob to raise the bed until you feel slight resistance when pulling the paper out. Repeat this process in every corner of the build plate to ensure a level surface. This will ensure that filament is extruded onto the build surface evenly for consistent first layer adhesion.
Print and bed temperature
One of the advantages of printing PLA is that the material does not require a heated print bed and generally has good print results without one. That being said, if you are experiencing adhesion problems, printing temperatures could be a contributing factor and adjusting print and bed temperatures can make a difference. For example, if you are printing a part with a large footprint or are printing in a cold environment, a heated print bed can help to promote better adhesion for PLA prints [3]. If you are using a heated print bed for PLA, a temperature between 50 °C and 60 °C is recommended (different filament brands should specify their optimal heated bed temperature).[2]
Finding the right print temperature is a critical factor when 3D printing any filament: it affects the rate at which the thermoplastic melts and flows through the 3D printer nozzle. And when it comes to PLA, setting an optimal hotend temperature can lead to optimal initial layer adhesion. Compared to other printing filaments, PLA requires modest print temperatures, typically in the range of about 210 °C. However, if that temperature isn’t delivering the results you need, it could be worthwhile to tweak the nozzle temperature slightly (in 5 degree increments). Evaluate the different print temperatures with some small test prints. If adhesion is still a problem, it may be due to other factors.
Recommended reading: PLA bed temperature & print temperature settings
Print speed
When 3D printing PLA or any material, print speed can also have an impact on bed adhesion. If the print speed is set too high, the filament may not have time to properly adhere to the build plate before subsequent layers are printed. This can lead to greater risk of warping and peeling.
Many 3D printer users choose to slow down the print speed for the first few layers of the print in order to ensure that the critical first layer has time to bond with the print surface. This can be done in slicer settings to help improve PLA adhesion. A slower print speed of around 20-30 mm/s is recommended for the first layer.
Bed adhesives
Using an adhesive to glue your 3D print to the build platform can be remarkably effective. While the term may sound technical, bed adhesives are simply substances that help your 3D print’s first layer stick to the print bed. Common DIY bed adhesives for PLA filament include glue sticks or hairspray. Blue painter’s tape is also a good solution for PLA (applied sticky side down), as the filament bonds to the tape’s porous texture.
There are also adhesives specifically designed for FDM 3D printing, including Magigoo products. If you are buying a 3D printer adhesive, simply check that it is suitable for PLA (some are designed for higher temperature thermoplastics). Whatever type of adhesive you are using, it is important to only apply a thin layer onto the printer bed, otherwise the adhesive can create leveling issues or affect the surface quality of the print’s bottom layer.
Print bed cleanliness
An easy way to improve bed adhesion for PLA filament is to clean your 3D printer’s build plate. Print surfaces can be exposed to substances like dust, dirt, or grease from the environment they are in or from contact with human hands. These substances, as well as others—like leftover adhesive or traces of filament—can negatively impact how well your PLA print sticks to the print bed. Cleaning the bed surface before a build can therefore help to improve first layer adhesion.
There are a couple of methods for cleaning a print bed depending on what type of build plate you are using. If you are using a glass bed or borosilicate glass print bed, start by removing the plate and gently scraping off any filament or adhesive residue. From there you can wash the glass surface with window cleaner or soap and water. Finally, wipe down the glass using isopropyl alcohol (IPA) or acetone to remove any traces of grease that could inhibit adhesion. If your 3D printer has a PEI build plate, you can wash it with soap and water or IPA. With this type of material, however, limit the use of acetone to once a month.
Recommended reading: How to clean 3D printer beds: Glass, PEI, adhesive
Z offset settings
Nearly as important as bed leveling is the Z offset value. This 3D printer setting determines the distance of the 3D printer nozzle to the default Z-axis value, also known as the home position. With FDM 3D printers, the home position refers to the closest position of the 3D printer nozzle to the build plate before it touches it. The Z offset setting lets users adjust this default position to move the nozzle’s starting point closer or farther from the home position.
Adjusting the Z offset can place your nozzle at an optimal distance from the build surface in order to improve first layer adhesion. It is especially useful if you are using an adhesive build surface or a secondary build plate, such as a PEI sheet. In the case of PLA thermoplastic, it can also be beneficial to have a slightly closer nozzle position, because the material adheres well when the nozzle puts slightly more pressure on the extruded plastic. If you are adjusting the Z offset, a higher value (>0) will raise the nozzle, while a lower value (<0) will lower it.
Recommended reading: Z offset: What it is and how to adjust it
Wet filament
Poor first layer adhesion may not be caused by your 3D printer hardware or settings at all. In some cases, the quality of the filament may be the culprit. Thermoplastic filaments such as PLA can absorb moisture from humid environments if not properly stored. In the 3D printing process, the water molecules absorbed by the filament are heated along with the plastic and evaporate. This can create air bubbles in the filament as it passes through the extruder, resulting in a variety of flaws, including poor adhesion, stringing, and blobbing.
Maintaining dry PLA filament is therefore important to a successful 3D print. Proper storage techniques, like keeping filament in sealed dry boxes with desiccant packets, can keep moisture at bay. If you suspect your filament has already absorbed moisture, however, it is also possible to dry it out. Because of its low glass transition temperature, PLA can be dried out at fairly low temperatures. For instance, you can dry a spool of PLA in an oven at a temperature between 40 and 45 °C for between four and five hours. Alternatively, you can use a food dehydrator or dedicated filament dryer to remove water from the material.
Recommended reading: How to Dry Filament

Rafts and brims
Another reliable way to improve bed adhesion is to use a raft or brim. While mostly recommended for higher temperature filaments like ABS and PETG, rafts and brims can also offer benefits for PLA, especially if you are struggling with adhesion. Rafts and brims are added to your 3D model before printing in slicer programs such as Cura and help to anchor your print to the build plate.
A raft can be thought of as a 3D printed platform on which your model is printed. In other words, a raft is a printed structure that sits underneath your model, functioning as its base. Because the model is printed onto the 3D printed raft, it adheres to the printed structure instead of the build plate. Rafts can also help to create a level printing surface if you have an uneven or damaged print bed.
A brim, for its part, is a printed border that touches the edge of the 3D model, similar to a brim of a hat. Brims give 3D prints a broader surface area at their base, which can help to improve adhesion. In a sense, brims anchor the edges of a print to the build platform resulting in better adhesion and greater stability. If you are using rafts or brims, it is important to note that they will need to be removed from the final part, which can add post-processing time. Another downside to using rafts or brims is that they consume material, which means more filament waste and higher material costs.
Recommended reading: 3D Printing Rafts vs Brims vs Skirts: How to get started
Damaged build plate
If you try all the aforementioned methods and your PLA is still not sticking to the print bed, it might be time to swap your 3D printer’s build plate for a new one. Over time, some build plates can start to warp and deform. Other defects, like damage caused from part removal, can also reduce the quality of your 3D prints. If you suspect a warped or damaged build surface is causing poor bed adhesion, try replacing your build plate.
When it comes to choosing a new build plate, there are many different materials to pick from. If you primarily use PLA filament, the best options are either glass print beds or spring steel sheets with PEI surface. Both of these surfaces are reliable and offer good adhesion with PLA. Glass build plates are easy to clean and have no risk of warping. Spring steel plates with PEI offer good adhesion properties during the printing process as well as easy part removal.
Conclusion
Whether you are a beginner or experienced 3D printing user, you should know that good bed adhesion is imperative to a successful print job. PLA is fortunately one of the easiest 3D printing filaments to work with and generally sticks well to the print bed. If adhesion problems do occur with PLA, however, simply follow this troubleshooting guide. Ultimately, ensuring a level print bed, setting optimal extrusion and temperature settings, using adhesive aids and extra help in the form of rafts and brims can help you to get your PLA to stick.
Frequently Asked Questions (FAQs)
Q: Why is my PLA not sticking to the bed?
A: There are several reasons why your PLA may not be sticking to the bed, including an unleveled bed, incorrect bed temperature, a dirty or damaged bed surface, bad quality or wet filament, or printing at too high a speed. It's important to troubleshoot these factors to identify and address the root cause of the problem.
Q: How can I improve PLA adhesion to the bed?
A: You can improve PLA adhesion to the bed by ensuring the bed is correctly leveled, maintaining the correct bed temperature, keeping the bed surface clean, using print bed adhesives, slowing down the print speed for initial layers, and using rafts and brims. Regular 3D printer maintenance and preventive measures can also help improve PLA adhesion.
Q: What is the ideal bed temperature for PLA?
A: The ideal bed temperature for PLA is typically between 40°C and 60°C. This temperature allows the PLA to soften enough to stick to the bed without becoming too soft and spreading out too much. That said, it is possible to print PLA without a heated print bed and still have good results.
Q: How often should I level the bed?
A: A 3D printer bed should be leveled regularly, particularly if you start to notice any 3D printing issues, like poor bed adhesion, arise. Leveling the 3D printer can help prevent adhesion problems and ensure consistent, high-quality prints.
Q: What can I use to clean the bed surface?
A: There are a different methods for cleaning a print bed depending on the type of build plate. For example, to clean a glass bed or borosilicate glass print bed, start by gently scraping off any filament or adhesive residue and then washing the glass with window cleaner or soap and water. You can then wipe the glass using isopropyl alcohol (IPA) or acetone. If are using a PEI build plate, wash it with soap and water or IPA.
Q: Does filament quality influence bed adhesion?
A: The quality of 3D printing filament has an impact on many aspects of 3D printing, including bed adhesion. For example, wet filament is a common issue that can lead to problems like stringing, blobbing, and poor adhesion. That’s why it is important to properly store PLA away from moisture (using sealed containers and desiccants) and dry the material before printing when needed.
References
[1] Bertacchi, Denise. How to Manually Level a 3D Printer Bed. Tom’s Hardware. January 2022. Available from: https://www.tomshardware.com/how-to/level-3d-printer-bed
[2] O’Neill, Benedict. PLA Bed Temperature & Print Temperature Settings. Wevolver. November 2023. Available from: https://www.wevolver.com/article/pla-bed-temperature
[3] Kaščak J., Kočiško M., Vodilka A., Török J., Coranič T. “Adhesion Testing Device for 3D-Printed Objects on Diverse Printing-Bed Materials: Design and Evaluation.” *Applied Sciences* 14 (2): 945, 2024. https://doi.org/10.3390/app14020945