How to Dry Filament: PA, TPU, PLA, PVA & PET
Wet 3D printer filament can lead to ruined prints. Fortunately, proper storage and drying techniques can help prevent and solve the problem. Here’s what to know.

Last updated on 04 Mar, 2025. 11 minutes read
Wet filament has been the downfall of many 3D printing projects and any seasoned 3D printing hobbyist will know the importance of properly storing and drying filament. Truly, the moisture levels in 3D printer filament can make or break a 3D print. In this article, we’ll take explain why keeping thermoplastic filaments dry before printing is critical and take you through how to dry filament to ensure a successful print job.
How to Dry Filament
Filament drying is an important step in the 3D printing process, as it can significantly improve your chances of achieving a successful print job. This is because most thermoplastic filaments are hygroscopic, meaning that they absorb moisture from the air. Once that moisture gets trapped in the filament and the filament is used for 3D printing, the water in the plastic will evaporate as it is heated and the vapor can lead to several 3D printing defects [6]. The good news is that if your filament is exposed to moisture, it’s relatively straight forward to get it back to an optimal state. In fact, there are a few different options at your disposal for ensuring your filament is free from moisture. Let’s take a look.
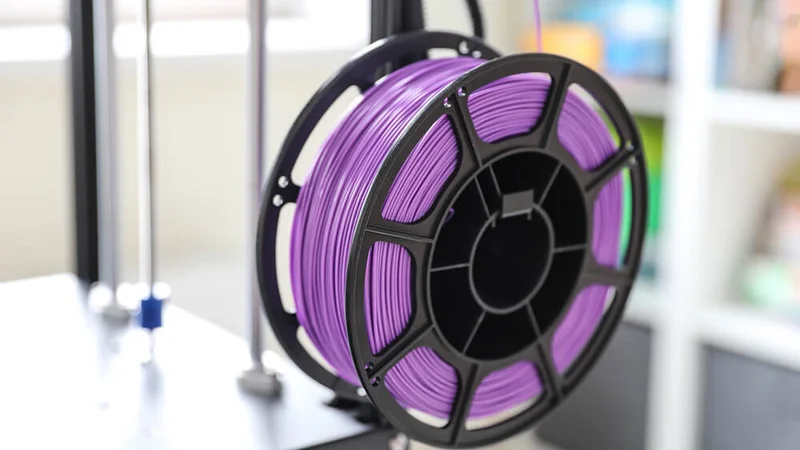
Use a Filament Dryer
A filament dryer is a piece of equipment specifically designed to remove any moisture from filament. The principle behind it is simple enough: filament dryers hold a spool of filament in an enclosure with controlled heating, which causes the water molecules in the thermoplastic to evaporate evenly.

Today, there are several types of filament dryer on the market, including simple plug-and-play products for the hobbyist market, and more advanced systems for professional users. The most basic filament dryers consist of a heated container that fits at least one filament spool. More sophisticated machines come with additional features like spool rotation and airflow for even heat distribution. Additionally, some filament dryers are designed to dry out an entire spool of filament at once, which can then be removed and loaded onto the 3D printer. There are also other systems, known as in-line filament dryers, which are designed to dry the filament and simultaneously feed it into the 3D printer, which saves time.
It is also possible to make your own DIY filament dryer. If you have a 3D printer with a heated print bed, it doesn’t take much to turn it into a filament dryer. All you need is a 3D printed support structure and a low-cost PC fan. [2]
Recommended reading: How to dry hygroscopic filaments really fast
Oven
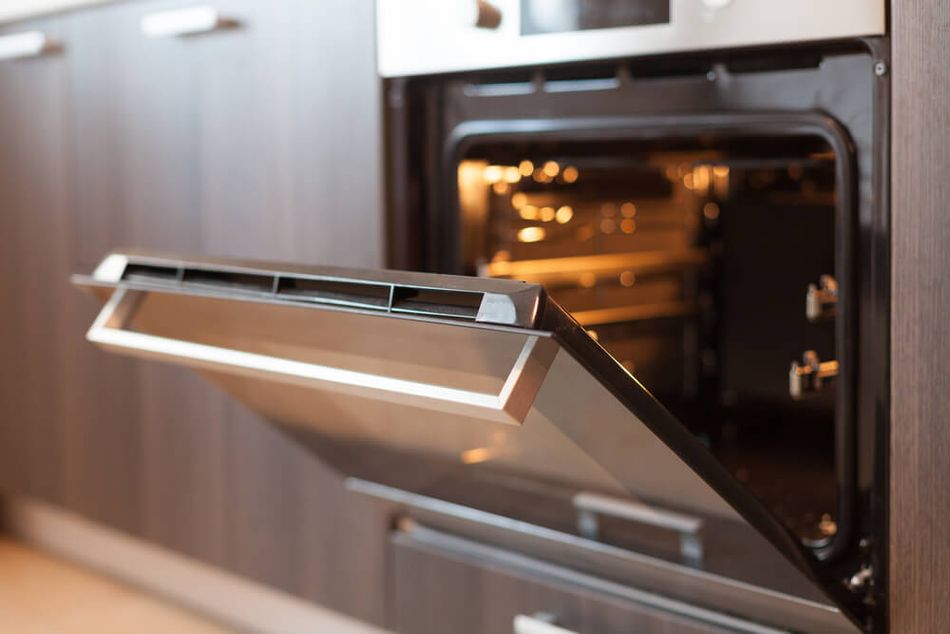
The most accessible way to remove moisture from filament before 3D printing is to use an oven. That’s right, just your run-of-the-mill kitchen oven. Simply set your oven to a low temperature—the exact degree will depend on the type of filament and its glass transition temperature—let it preheat, and then place your filament spools inside for up to six hours.
Before you put filament in a heated oven, it is important to check that your oven has a precise thermostat. You don’t want to set your oven to 80°C only to find it’s actually 95°C and has started to melt your filament. To check your oven’s thermostat, simply put a thermometer into the pre-heated oven for a temperature read. You can adjust your oven settings based on any discrepancies.
It is also important to never put your spool of filament in the oven before it has reached the right temperature. This is because many ovens will overheat before attaining the right temperature, which could ruin your filament spool and result in a mess of melted plastic.
Important note: | Do not use a microwave oven for filament. Microwave heating of plastics can be very uneven; the filament can overheat and melt in spots before water has time to evaporate. Additionally, filaments or their spools may contain conductive additives, which can cause sparks in a microwave. A microwave can also superheat water inside the filament causing sudden eruptions. Overall, it’s not a suitable method. Stick to conventional oven drying if you are using household appliances. |
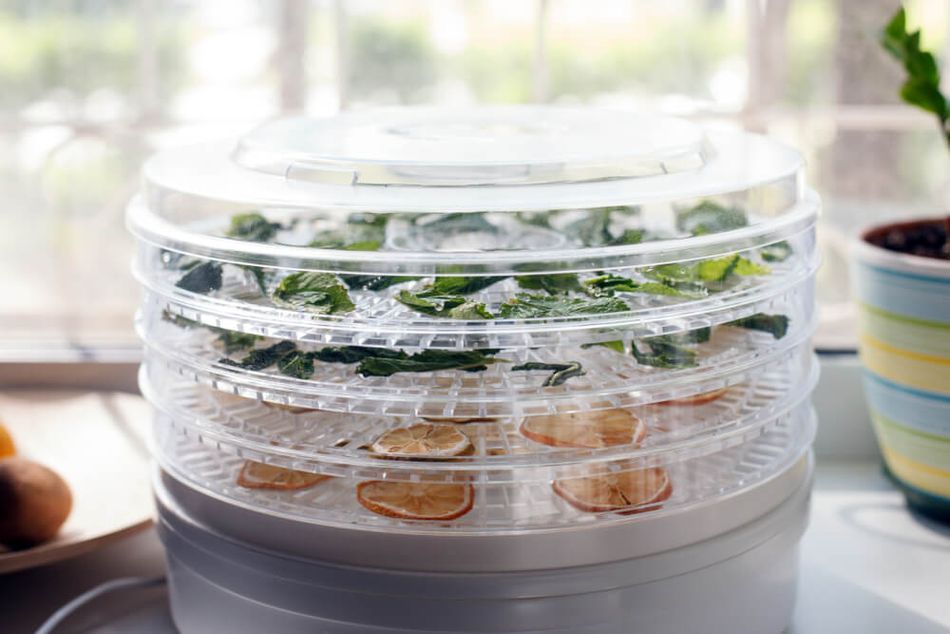
Food Dehydrator
Another filament drying solution you can co-opt from the kitchen is a food dehydrator. Food dehydrators work by circulating hot air through an enclosed container to dry out foods, like fruit and meat. Because most food dehydrators reach the necessary temperatures to dry out filament, they can also be used for that purpose. While food dehydrators are typically less expensive than dedicated filament dryers, their capacity is usually smaller—after all, they aren’t designed for filament spools. Still, they are a popular option within the maker community due to their accessibility.
Temperatures for Drying Filament
Regardless of whether you are drying your filament in an oven, food dehydrator, or filament dryer, there are specific settings for different filament types. A good rule of thumb is to preheat your drying device to just under the material’s glass transition temperature. The glass transition temperature indicates at what point a thermoplastic changes from a hard state to a soft state. PLA filament, for example, has a glass transition temperature of about 60°C, so a good temperature to dry PLA is between 40°C and 50°C.[3] ABS, on the other hand, has a higher glass transition temperature (105°C) so can be dried at a higher temperature. It is also important to take into consideration the spool holder material: you don’t want that to melt or burn in your oven.
Common 3D printing filaments and their drying temperatures:
PLA: 40°C-50°C [8]
TPU: 40°C-45°C [12]
PETG: 60°C-65°C [9]
ABS: 80°C [10]
Polycarbonate (PC): 80°C
ASA: 80°C-85°C
Nylon (PA): 80°C-90°C [10]
How long to dry filament
In terms of drying time, it can take several hours for moisture to be removed from thermoplastic filament materials [11]. In general, you should dry your spools at the recommended temperatures for roughly 4-6 hours, however more hygroscopic materials, such as Nylon (PA) may require longer drying times, up to—and even upwards of—12 hours [7]. If you are using a dedicated filament dryer, drying temperatures and times may vary.
Filament Type | Recommended Drying Temp ( °C) | Typical Time | Notes |
PLA | ~40–50 °C | 4–6 hours | Relatively low heat needed. Do not exceed ~60 °C to avoid softening PLA. |
ABS [10] | ~80 °C | 4–6 hours | Can tolerate higher temp. Dry ABS for better strength and less warping. |
PETG [9] | ~60-65 °C | 4–6 hours | Moderate heat of 65 °C is effective to reduce stringing, but avoid going above ~70 °C.. |
Nylon (PA) [11] | ~80–90 °C | 6–12+ hours | Nylon is very hygroscopic; use longer times. For saturated nylon, up to 12–24 hours at 80 °C may be needed. |
TPU/TPE [12] | ~40-45 °C | 4–6 hours | Low heat to avoid overly softening. Keep temperature around 50 °C as TPU can get soft at higher temps. |
ASA | ~80–85 °C | 4–6 hours | Similar to ABS so drying at ~75 °C works well. |
PVA | ~45 °C | 3–4 hours | Dry at low temp to avoid melting PVA (it has low heat resistance). |
It is important always refer to specific filament manufacturer guidelines if available, particularly when using specialty materials, like a carbon-fiber-filled nylon, for example. A good rule of thumb is to start with a lower temperature and extend the drying time. You can check to see if your filament is losing moisture by weighing it throughout the drying process: a fully dried filament will often show a slight weight loss and when the weight stops dropping, the filament is likely as dry as it's going to get.
Recommended reading: How to Prevent 3D Print Blobs & Zits
How to Store Filament
Filament storage is vital if you want to protect your FFF 3D printing materials from moisture and minimize the need to dry them. Proper storage is also good for keeping materials safe from humidity and things like dust once you have taken the time to dry them out. On top of all that, proper storage of filaments can extend their shelf-life and maintain their optimal properties.
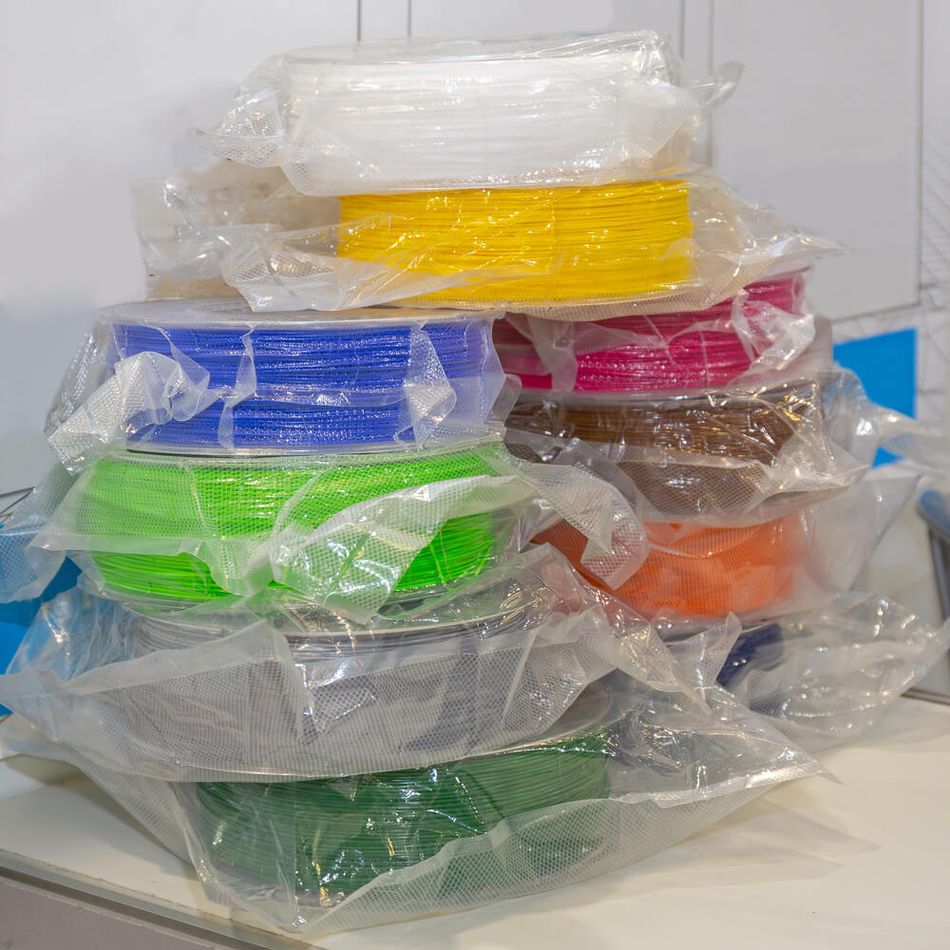
The key to storing filament so it remains in peak condition is to keep it in a humidity controlled space. One reliable solution is to place filament spools inside a dry box. In other words, an airtight container containing a desiccant material (for example, silica gel packets). It’s worth pointing out that desiccant packets need to be replaced periodically, as the materials absorb moisture. Fortunately, many types of desiccant can be reused: all you have to do is remove the moisture from them using a filament dehydrator or an oven on a low-temp setting.
You can also place filaments inside vacuum sealed bags or containers, which provide an airtight seal and keep moisture out. These are particularly effective in regions with high humidity. These containers can be made of plastic or metal and should have a tight-fitting lid with a gasket to ensure a proper seal.
A popular option amongst makers is to create a DIY dry box that not only protects filament from humidity but also feeds the spool into the 3D printer. This project requires a sealable container, desiccant packs, some PVC pipe, tubing, and a few other bits.[4] For optimal filament storage, it’s also a good idea to keep them out of direct sunlight or sources of heat, as these can cause the filament to degrade.
The Problem of Wet Filament
In the fused filament fabrication (FFF) process, thermoplastic filaments are fed through a heated nozzle (called a hotend) until they reach their melting point. As they are melted by the nozzle, the filaments are extruded onto a build platform, where the melted polymer begins to solidify as it cools. This extrusion process is continuous, depositing layer after layer of material until a final object is standing on the build platform.
If 3D printing filament has been exposed to moisture, it can lead to all sorts of issues, like material degradation. This is because the absorbed water can break the polymer chains in the filament, leading to a reduction in its tensile strength and flexibility. Furthermore, 3D printing with wet filament disrupts the printing process, as moisture in the thermoplastic evaporates as the material is heated. This in turn causes air bubbles in the material’s composition, which results in stringing, blobbing, and, ultimately, 3D printed parts with compromised strength and print quality.
Moisture absorption properties of filament are influenced by several factors, including the type of material, the ambient humidity, and the duration of exposure. For instance, Nylon is known to be a highly hygroscopic material and can absorb moisture rapidly from the air.[5] PLA, for its part, is up to 10 times less hygroscopic than nylon, but can still absorb a significant amount of moisture over time.[1]
Understanding Filament hygroscopy | Most 3D printing filaments are hygroscopic – they absorb and retain water from their environment. Thermoplastics like nylon, ABS, PETG, and even PLA have chemical structures that allow water molecules to seep into microscopic spaces between polymer chains. Over time in ambient humidity, filament can reach a moisture equilibrium with the air. For example, nylon (polyamide) is notorious for soaking up water; it can gain up to 10% of its weight in moisture under high-humidity conditions. |
Identifying Wet Filament
While we call it “wet filament”, identifying a moisture-affected 3D printing filament is not quite as simple as touching it to see if it’s wet. Because of the hygroscopic nature of many 3D printer filaments—including PA, TPU, PLA, PVA, PETG, and to a lesser extent ABS filament—moisture and humidity present in the air are actually absorbed by the plastic. When water from the surrounding environment is absorbed by the filament, water molecules disrupt the polymer chains inside the thermoplastic in a process called hydrolysis. Not only does this increase the chance of bubbles forming in the filament as it prints, it also renders the filament more brittle and weak.
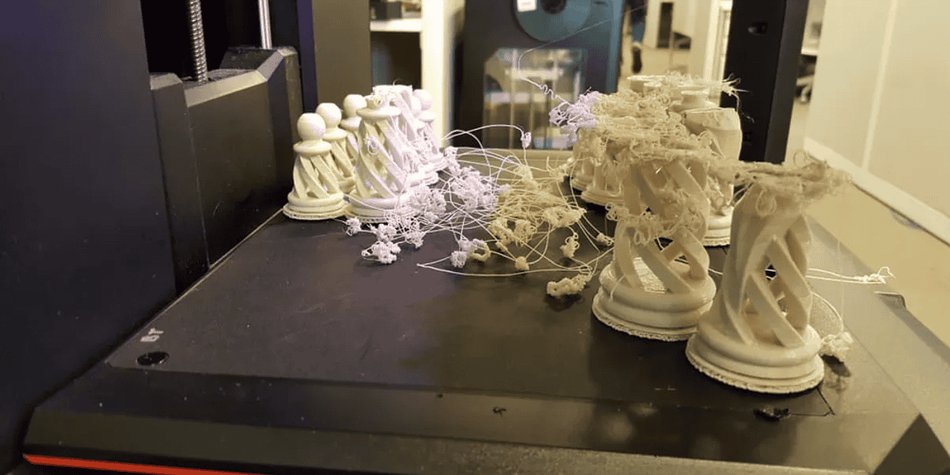
When 3D printing, some telltale signs that your filament has absorbed moisture are sizzling noises coming from your extruder and bubbles in the filament as it is heated. If the melted thermoplastic continues to ooze out of the 3D printer printhead even after the machine is off, it may also be a sign that your filament is wet. Other signs can be found in the 3D printed part itself, like stringing, blobbing, and poor adhesion between layers.
Moisture-laden filament can sometimes also appear discolored or have a cloudy or hazy look. This is particularly noticeable in clear or transparent filaments, which may lose their transparency when they absorb moisture. Generally, however,, it can be difficult to tell whether filament has absorbed too much moisture before the print process. (That being said, if you notice your spool of filament is less flexible than it used to be, that could be a sign it is wet.) It is therefore important to store your filaments properly and to learn how to dry them.
Recommended reading: 3D Printer Stringing: How To Fix It
Conclusion
Taking the time to dry and store your 3D printing filaments properly can save you time and money in the long run. Filaments are at their best when they are dry, encouraging a smooth 3D printing process (with no sizzling or oozing) and good quality prints (with no stringing and good layer adhesion). Be sure to follow this guide if you do want to dry your own filament.
Frequently Asked Questions (FAQs)
Q: Why is moisture bad for filament?
A: Filaments need to be protected from moisture and humidity because they can cause degradation to thermoplastics. In the 3D printing process, when the filament is heated, trapped moisture evaporates, leading to air bubbles and other issues like stringing and blobbling.
Q: Can I dry my filament in the oven?
A: Yes, you can dry filament in the oven, but it's important to use a low temperature and monitor the process closely to avoid overheating the filament. Some ovens may not have accurate temperature control at lower settings, so it's recommended to use an oven thermometer to ensure the correct temperature.
Q: How do I know if my filament needs to be dried?
A: During printing, you may hear popping or hissing sounds and see steam or wisps coming off the nozzle—that's a clear indicator of water boiling out. Visual signs on the 3D print include stringing, bubbles, and a generally rough or matte appearance where it should be smooth. You might also notice the filament is more brittle.
Q: Can I reuse desiccants to dry filament?
A: Yes, many types of desiccants, including silica gel, can be reused. To renew silica gel desiccants, you can bake them in the oven at a low temperature until they change color, indicating that the moisture has been removed.
Q: How long do I have to dry filament?
A: There is no hard and fast rule about how long to dry out a spool of filament. For most filaments, a drying time of between four and six hours is recommended, however more hygroscopic materials like Nylon can sometimes require more time.
Q: How long can I store filament before it degrades?
A: The shelf life of filament can vary depending on the type of filament and the storage conditions. In general, filament can be stored for several months to a year if it is kept in an airtight container with desiccants in a cool, dry place. However, it's recommended to use the filament as soon as possible for the best print quality.
Q: What’s the best way to store filament to keep it dry after I've dried it?
A: After drying, immediately store the filament in a sealed container with desiccant. Good options include ziplock bags (thick ones) with silica gel packs, vacuum-sealed storage bags, or airtight plastic bins/boxes with desiccant inside. The goal is to minimize exposure to ambient air. Finally, store the dried filament in a cool, dark place if possible (heat and sunlight can also degrade some thermoplastics).
Q: Can filament be “over-dried”?
A: In general, you cannot remove too much moisture—once filament is dry, extra drying time just keeps it dry. However, the real concern is thermal overexposure. If you leave filament at elevated temperature for excessive time, it can undergo slow thermal degradation. In this case, many filaments will become more brittle.
References
[1] Banjo AD, Agrawal V, Auad ML, Celestine AD. Moisture-induced changes in the mechanical behavior of 3D printed polymers. Composites Part C: Open Access. 2022 Mar 1;7:100243. https://doi.org/10.1016/j.jcomc.2022.100243 [Accessed November 2, 2023]
[2] Hackaday, 2021. “Most FDM Printers are also Filament Dryers (with a Little Help)”. [online] https://hackaday.com/2021/11/09/most-fdm-printers-are-also-filament-dryers-with-a-little-help/ [Accessed March 1, 2022]
[3] Fillamentum, 2022. “Drying Filaments Before Processing”. [online] https://fillamentum.com/pages/drying-filaments-before-processing/ [Accessed March 1, 2022]
[4] Instructables, 2022. “3D Printer Filament Dry Box”. [online] https://www.instructables.com/3D-Printer-Filament-Dry-Box/ [Accessed March 1, 2022]
[5] Gong H, Runzi M, Wang Z, Wu L. Impact of moisture absorption on 3D printing nylon filament.
[6] Andreozzi, M.; Gentili, S.; Forcellese, P.; et al. Effect of Moisture Content on the Mechanical Performance of 3D-Printed Continuous Reinforced Two-Matrix Composite. Int. J. Adv. Manuf. Technol. 133, 5117–5126 (2024). https://doi.org/10.1007/s00170-024-14041-5
[7] Dinh, L.; Świątek, M.; Kulesza, S. Moisture Sorption and Degradation of Polymer Filaments Used in 3D Printing. Polymers 15 (12), 2600 (2023). https://doi.org/10.3390/polym15122600
[8] **Bambu Lab.** “PLA Basic Filament – Drying conditions: 50 °C for 8 h.” Available from: https://us.store.bambulab.com/products/pla-basic-filament :contentReference[oaicite:0]{index=0} [9] **Polymaker.** *PolyLite™ PETG – Product Information Sheet*, p. 6: “Drying settings 70 °C for 8 h.” Available from: https://polymaker.com/wp-content/tech-docs/PolyLite_PETG_PIS_EN_V1.1.pdf :contentReference[oaicite:1]{index=1}
[10] **3DFuel.** *Workday ABS – Technical Data Sheet*, p. 2: “Drying Temperature 80 °C; Drying Time 2–4 h.” Available from: https://nexa3d.com/wp-content/uploads/2024/07/TDS-3DFuel-Workday-ABS.pdf :contentReference[oaicite:2]{index=2}
[11] **Spectrum Filaments.** *PA6 Neat – Technical Data Sheet*, p. 2: “Drying at 80 °C for 12 h is recommended.” Available from: https://filamentworld.de/fact-sheets/Spectrum_Nylon-PA6-Neat-Schwarz_Datenblatt_EN.pdf :contentReference[oaicite:3]{index=3}
[12] **eSUN.** *eTPU-95A – Technical Data Sheet*, Note 1: “Dry the filament (55 °C/ > 4 h).” Available from: https://www.esun3d.com/uploads/eSUN_eTPU-95A-Filament_TDS_V4.0.pdf :contentReference[oaicite:4]{index=4}