How to Remove Solder from a Circuit Board (Comprehensive Desoldering Guide)
Desoldering is the process of removing solder to detach components from a PCB. Whether you're repairing hardware, modifying a design, or salvaging parts, this hands-on guide walks you through the tools, techniques, and safety tips every electronics pro needs.

09 Jul, 2025. 25 minutes read
Introduction
In the ever-evolving world of electronics, change is constant. Designs are refined, prototypes are revised, and hardware inevitably wears out or fails. Amid this fast-paced innovation and maintenance cycle, one skill proves indispensable across all levels of expertise: desoldering—the delicate and precise process of removing solder to detach electronic components from a printed circuit board (PCB) without inflicting damage.
Desoldering is the unseen backbone of repair, rework, and reuse. Whether you're an engineer fine-tuning a prototype under pressure, a technician breathing new life into aging audio gear, or a student making their first attempt at hardware troubleshooting, the ability to cleanly reverse a soldered connection is as critical as soldering itself. It's not just about undoing a connection—it’s about doing so with care, control, and confidence.
What makes desoldering so challenging—and so important—is the balance it demands. It’s not simply a matter of heating solder and hoping for the best. Too little heat and the joint won't budge. Too much, and you risk lifting delicate pads, scorching the board, or damaging the very components you’re trying to preserve—effective desoldering hinges on mastering this balance of temperature, timing, technique, and tool selection.
Understanding Solder and Desoldering Basics
What Is Solder and Why Does It Matter?
At the heart of every electronic connection lies solder—a fusible metal alloy designed to create both electrical and mechanical bonds between components and the copper pads on a printed circuit board (PCB). Most commonly, solder is made from a mixture of tin and lead (such as Sn63/Pb37, which melts at around 183°C), or from lead-free alternatives like SAC305, which contains tin, silver, and copper and melts at a higher temperature, closer to 217 °C. The higher melting point of lead-free solder means it requires more heat to remove, increasing the challenge of desoldering.
The Principle Behind Desoldering: Controlled Heat
Desoldering, at its core, is about managing heat. When solder is heated beyond its melting point, it becomes a liquid metal that can be drawn away from joints. But doing this successfully requires more than just melting the alloy—it demands precision in heat application, careful technique, and the use of appropriate tools to ensure that neither the board nor the components are damaged in the process.
Why Desoldering Can Be Difficult
What makes desoldering tricky is the nature of the solder joint itself. Once cooled, solder forms a strong metallurgical bond with the component lead and the PCB pad or via. To break that bond and remove the component, the entire solder mass must be fully remelted. If even a small portion remains solid, the lead will stay trapped in the hole or stuck to the pad. This becomes even more difficult when dealing with large copper areas that act as heat sinks, high-mass components, or tightly packed layouts—all of which demand greater heat and better thermal control.
Using Fresh Solder to Your Advantage
One counterintuitive but highly effective trick is to add fresh solder—especially leaded solder—to an existing joint, even one made with lead-free alloy. Doing so improves heat transfer, introduces active flux, and lowers the overall melting point, making removal easier and safer.
The Essential Role of Flux in Desoldering
Flux plays a critical role in this process. Often overlooked, flux is a chemical agent that cleans oxidized surfaces, promotes better heat conduction, and allows the solder to flow more freely. In desoldering, it reactivates older joints, breaks down stubborn oxides, and dramatically improves the performance of both solder wick and vacuum pumps. Whether you’re using flux-core braid or applying liquid flux manually, this small addition can mean the difference between a clean release and a damaged pad.
Minimizing Mechanical Stress During Removal
Beyond thermal management, physical stress is another key factor to control. Desoldering involves not just heat, but often gentle pulling, lifting, or suction. However, applying mechanical force before the solder is fully molten is a common mistake—and a costly one. Doing so risks tearing pads off the board or damaging the internal plating of a through-hole. Even tools like solder suckers, which use rapid vacuum pressure, can jolt fragile joints if not handled carefully. Learning to coordinate heat and motion with finesse is essential to safe and effective desoldering.
Recommended reading: Introduction to Surface Mount Technology (SMT) and Through-Hole Technology (THT)
Tools and Materials for Solder Removal
Before attempting to remove solder from any circuit board, it's crucial to have the right tools and materials prepared. Each tool serves a specific role in the desoldering process, and using the right one can significantly improve both efficiency and safety. Below is a detailed overview of the most commonly used desoldering tools, along with tips for when and how to use them effectively.
Soldering Iron
The soldering iron is the foundational tool for most desoldering tasks. A temperature-controlled soldering iron allows you to apply just the right amount of heat to melt the solder without overheating the PCB or damaging nearby components. Models with interchangeable tips—especially wider chisel tips—offer better heat transfer for stubborn joints or multilayer boards. For best performance, keep the iron tip tinned with fresh solder; this improves heat conduction and prevents oxidation. When working on boards with significant thermal mass, a high-wattage iron or one with excellent thermal recovery is highly recommended.
Desoldering Braid (Solder Wick)
Solder wick is a flat, woven copper braid often pre-treated with flux. When placed on a molten solder joint and heated with a soldering iron, it draws solder away via capillary action. It’s a simple yet effective tool for cleaning pads and clearing solder from through holes. For best results, choose a braid that’s slightly wider than the joint or pad you’re cleaning. If the braid doesn’t absorb solder easily, applying additional flux can greatly enhance its performance.
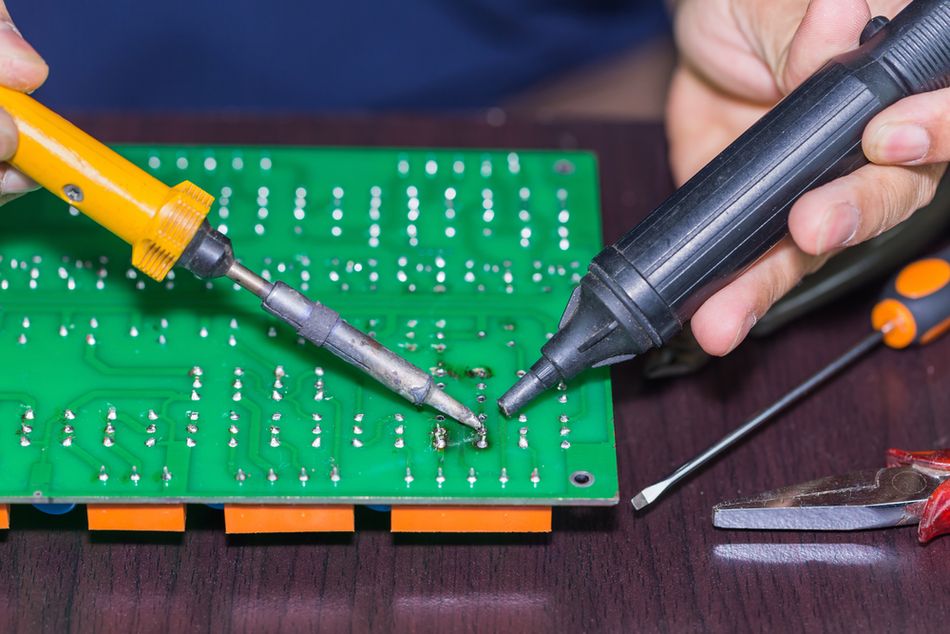
Solder Sucker (Desoldering Pump)
A solder sucker is a spring-loaded vacuum pump designed to remove large amounts of molten solder in one quick action. Once the solder is melted, position the pump's nozzle over the joint and release the plunger to suck up the solder. It’s especially useful for clearing through-hole joints. However, be cautious—improper technique or excessive force can jolt the PCB and damage delicate traces. Some models feature heat-resistant tips that won’t melt in contact with a hot iron.
Hot Air Rework Station (Heat Gun)
For removing surface-mount components (SMDs), a hot air rework station is indispensable. This tool directs heated air through a controlled nozzle, allowing you to evenly melt all solder joints around a component. It’s especially effective for multi-pin ICs like QFPs, SOICs, and connectors, and it can also assist in clearing solder from plated holes. However, hot air must be used carefully—excess heat or prolonged exposure can char the PCB, melt vias, or lift pads. Always preheat gently and monitor the airflow temperature closely.
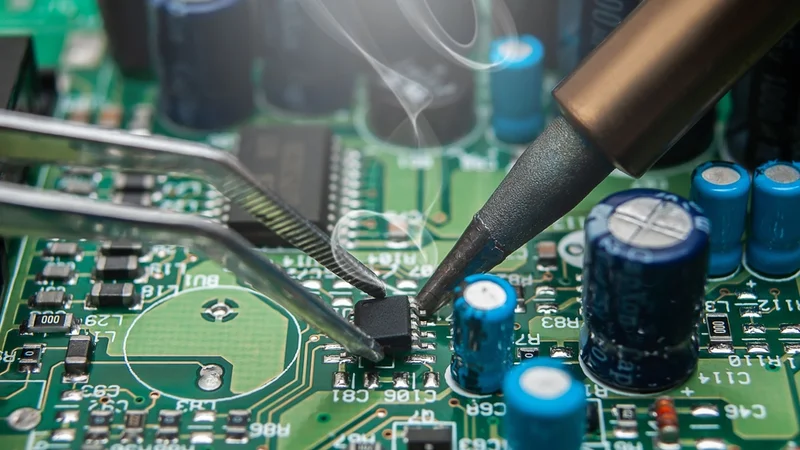
Desoldering Tweezers
Desoldering tweezers feature dual heated tips in a tweezer format, enabling you to heat two solder joints simultaneously—perfect for SMD resistors, capacitors, or even opposing leads of through-hole parts. They’re excellent for removing small two-leaded components quickly and cleanly. Some soldering stations support interchangeable tweezer handpieces. Lacking specialized tweezers, you can improvise with two regular irons, though this method requires coordination and care.
Flux
Flux remains a critical aid in all forms of desoldering. Whether in liquid, paste, or gel form, applying flux to the joint before heating helps clean oxidation, improves solder flow, and ensures better heat transfer. This leads to more efficient removal, particularly on older or oxidized joints. After desoldering, always clean the flux residue—rosin-based fluxes are usually non-conductive but sticky, while water-soluble fluxes must be cleaned to prevent corrosion or electrical shorts.
Special Aids and Low-Melt Alloys
In more advanced desoldering scenarios, especially involving delicate or tightly packed SMD components, tools like low-melt solder alloy (e.g., Chip Quik) become useful. These bismuth-based solders mix with existing solders to lower the melting point and extend the molten time, giving you more control during component removal. This technique is ideal for fine-pitch ICs and cases where traditional tools might risk damage.
If you encounter stubborn solder plugs in vias or plated holes, mechanical aids like thin steel pins, PCB hole-clearing tools, or even micro drill bits can be used. However, mechanical drilling should be your last resort—it risks damaging plating and is best reserved for boards already marked for rework or disposal.
Personal Protective Equipment (PPE)
Safety during desoldering is non-negotiable. Always wear safety glasses to protect against solder splashes, especially when using suction tools or the "flicking" technique. Consider fume extraction or a fan when working with flux, particularly in enclosed spaces. For handling hot components or boards, heat-resistant gloves may also be helpful. Desoldering isn’t just a technical task—it’s a safety-conscious one, too.
With the right desoldering tools and materials in hand, you’ll be better equipped to tackle a wide range of rework scenarios—from basic through-hole removal to complex SMD component reflow.
Recommended reading: Types of SMD Components: A Comprehensive Guide
Safety Practices and Preparation
Before applying heat to any circuit board, it’s essential to create a safe, organized, and well-equipped work environment. Proper preparation not only protects your components—it protects you. The desoldering process involves high temperatures, chemical fumes, and delicate electronic materials, all of which demand caution and care.
Always Power Down and Disconnect
Never begin desoldering a live board. Always ensure the device is fully powered off and unplugged from any power source before working. Attempting to desolder on an active circuit can result in electric shock, component damage, or fire hazards. Additionally, if you're working on ESD-sensitive hardware, such as microcontrollers or communication modules, wear an ESD strap and use an anti-static mat to prevent electrostatic discharge, which can damage or destroy vulnerable components.
Set Up a Stable, Heat-Resistant Work Area
Choose a clean, well-lit, and stable workspace. Use tools like a PCB vise, third-hand holder, or adjustable arm stand to secure the board in place—this is especially important since desoldering often requires both hands: one for the soldering iron and another for a pump, wick, or tweezers. Place a heat-resistant mat or silicone work surface underneath to catch any falling molten solder and to protect your table or desk.
Ensure Adequate Ventilation
Desoldering releases fumes from flux residues, plastics, and sometimes lead oxides, depending on the solder used. Always work in a well-ventilated area, and whenever possible, use a fume extractor to pull harmful fumes away from your breathing zone. Avoid inhaling solder smoke directly, and wash your hands thoroughly after handling solder, especially if it contains lead.
Wear Eye Protection
Molten solder can splatter unexpectedly, especially during certain removal techniques like “flicking” or using compressed air. Wearing safety glasses or goggles is essential to protect your eyes from potential injury. If others are nearby, be mindful of your actions and ensure no one is in the path of ejected solder or hot debris.
Be Mindful of Heat Exposure
The tools used in desoldering—whether irons, hot air, or tweezers—can exceed 300 °C. Components and boards can retain heat long after the tool is removed. Use thermal tweezers, needle-nose pliers, or heat-resistant gloves to handle freshly desoldered parts or warm boards. Keep flammable materials away from the work area, especially when using a heat gun or hot air rework station, which disperses heat over a wide area.
Prepare the Board Beforehand
Examine the area you intend to work on. If the board has a conformal coating, adhesive, or sealant, it may need to be removed or scraped off before heating. Inspect the solder type—lead-free solder requires more heat and may benefit from the addition of leaded solder, which lowers the joint’s melting point and improves flow. For corroded or dirty joints, a small application of flux and fresh solder can “wet” the surface, making it easier to reflow and remove.
Choose the Right Desoldering Method
Before you start, assess the task and decide on the most efficient method. For example, removing a simple solder bridge between pads may only require solder wick. A multi-pin through-hole connector may be better tackled with a vacuum desoldering station, if available. In situations without specialized equipment, a solder sucker combined with braid can be effective. For difficult removals, you may even opt to sacrifice the component by cutting it out cleanly to simplify the desoldering process. Having a clear plan reduces working time and minimizes unnecessary heat exposure to your board.
Desoldering Techniques for Through-Hole Components
Through-Hole Desoldering Techniques
Understanding Through-Hole Components
Through-hole components are electronic parts with leads that pass through holes in the PCB and are soldered on the opposite side. These include pin headers, connectors, DIP ICs, resistors, capacitors, and more. Desoldering these parts can be challenging because the solder often fills the plated through-holes. Successfully removing the component requires eliminating all solder around the leads without damaging the board.
Using Desoldering Braid (Solder Wick)
A desoldering braid is a fine copper mesh pre-coated with flux that uses capillary action to draw molten solder away from a joint. It is particularly effective for cleaning up pads, removing excess solder, or finishing a job after other methods.
Steps:
Place the braid on the joint – Lay it directly over the soldered area.
Apply heat – Press a tinned iron onto the braid. The heat transfers to the solder below, melting it.
Watch for solder uptake – As solder wicks into the braid, it will change color.
Remove both simultaneously – Lift the iron and braid together before the solder solidifies to avoid pad damage.
Trim and repeat – Cut off the used section and repeat with a fresh piece if necessary.
Tips: Choose the right width for the job, add fresh solder to old joints to improve heat transfer, and avoid scraping the board with the braid.
Using a Solder Sucker (Desoldering Pump)
A solder sucker is a spring-loaded vacuum tool that quickly removes molten solder. It’s especially useful for clearing through-hole joints.
Steps:
Prep the tool – Lock the plunger and keep it ready.
Melt the solder – Heat the joint with a soldering iron.
Position and activate – Place the nozzle over the liquid solder and release the plunger.
Remove and repeat – Pull away and reset the tool. Repeat as needed for stubborn joints.
Best Practices: Use the tool immediately after the solder melts, avoid banging it on the board, and stabilize your hand to prevent jarring movements.
Using a Desoldering Station (Vacuum Desoldering Iron)
Desoldering stations integrate a heated tip with suction, allowing for efficient through-hole solder removal.
Steps:
Preheat and position – Let the station reach operating temperature, then place the tip over the joint.
Trigger suction – Once the solder melts, activate the vacuum.
Slide and clean – Withdraw the tip slowly while maintaining suction.
Clean regularly – Ensure filters and tips are unclogged for effective operation.
This method is ideal for rework settings and reduces thermal stress by minimizing contact time.
The "Heat and Tap" (Inertia) Method
A manual technique that involves melting solder and then tapping the board to eject it.
Steps:
Melt all solder points – Apply heat to multiple pins.
Flip and tap – Quickly flip the board and tap it against a surface.
Clean up – Follow up with a wick or a sucker to clear residue.
Caution: This is not recommended for delicate boards. Always wear eye protection as molten solder can fly off during the process.
Sacrificial Component Removal
If the component isn’t needed, consider cutting it out to simplify desoldering.
Steps:
Snip leads – Use cutters to remove the component body.
Desolder each pin – Remove pins one at a time using heat and pliers.
This minimizes risk to the PCB and is highly effective for stubborn or multi-pin components.
Clearing and Cleaning Through-Hole Vias
After component removal, solder may remain in the via.
Techniques:
Wick Method – Place the braid over the hole and heat.
Sucker Method – Add fresh solder to help reflow, then use suction.
Needle Method – Push a needle through the hole while heating.
Hot Air – Heat from one side, and allow the solder to drip out.
After clearing, inspect each via to ensure it's open and the plating is intact. This prepares the board for clean component replacement.
With these methods, engineers and technicians can approach through-hole desoldering with confidence, minimizing damage and improving repair efficiency.
Desoldering Techniques for Surface-Mount Components
Surface-mount devices (SMD) are components that sit on the surface of the PCB and are soldered to pads without holes. They range from tiny resistors and capacitors to large integrated circuits with hundreds of pins (like QFP, and BGA packages). The absence of through-hole barrels means you generally don’t have solder “trapped” in holes, but instead, you have many solder joints possibly all needing to be heated at once (for multi-leaded parts). Here are techniques to remove SMDs, from small two-leaded parts to larger ICs:
Hot Air Rework Method (for SMD ICs and Components)
One of the most effective tools for SMD desoldering is a hot air rework station. It allows you to apply heated airflow to an area, warming all the pins of a component nearly simultaneously. Here’s how to use hot air to remove an SMD component:
Prep the board and area: Remove any sensitive parts nearby if possible (or shield them with Kapton tape or aluminum foil). For instance, plastic connectors or ribbon cables near the target component might melt or warp; cover them or move them. Apply some liquid flux around the pins of the component you want to remove – this helps the solder flow once molten and also helps heat conduction.
Set the temperature and airflow: Typical settings might be around 300–350 °C for leaded solder, or 350–400 °C for lead-free, with a moderate airflow. (If your station has specific mm nozzle sizes, use one that covers the component but not much beyond it.) You might use a slightly lower temperature if the board is very sensitive, but then you’ll need more time. Some experimentation may be needed.
Even heating: Hold the hot air gun a few centimeters away and move it in small circles or back and forth over the component to distribute heat evenly. Avoid focusing on one spot for too long to prevent scorching. Typically, in 5–15 seconds (depending on the mass of the component and board copper), you’ll see the solder start to glisten, which means it’s molten. With BGAs or parts where you can’t see the solder, you have to judge by time and by nudging the part.
Remove the component: The moment all solder joints are molten, gently lift the component off. Using a pair of ESD-safe tweezers is ideal. Try nudging a corner of the IC or device – if it slides or moves, it’s ready to lift. Do not pry if it’s not moving freely – continue heating a bit more instead. Once it’s free, lift it away and out of the heat.
Board cooldown: Many stations (and operators) will suggest letting the board cool naturally, or at least not moving it until it’s cooled a bit, to avoid thermal shock. Some hot air stations have a cool-down feature – basically blowing air without heat – which can help gradually bring the temperature down. However, do not directly blast a hot board with compressed air or anything extremely cold, as that could crack the PCB or components.
Important caution: You typically only need to heat with hot air for a short time – just enough to melt the solder. Excessive hot air exposure can delaminate pads and even cause the PCB to bubble or discolor. It’s a balance: too short and the part won’t come off; too long and the board is damaged. Using additional flux and even adding some low-melt solder can reduce the required time. If a part is stubborn, sometimes it helps to carefully add a bit of leaded solder to each pin with a soldering iron (to lower melting temp as discussed) before using hot air. This mixes alloys and can make removal easier. Also, ensure your airflow isn’t so high that it blows other tiny components off the board – this can happen with very small passive parts in the vicinity.
For large components, you might consider pre-heating the PCB from the bottom side (some rework stations include a preheater). Preheating the board to ~100 °C can significantly reduce the thermal shock and the time needed to then reflow the specific part with hot air.
Recommended reading: Guide to PCB Mounting: Techniques, Tips, and Best Practices
Desoldering Tweezers (for Chip Components and SMD ICs)
For small SMD components like resistors, capacitors, LEDs (usually two terminals), or even small-outline transistors and diodes, desoldering tweezers are excellent. With heated tweezers, you essentially clamp the component from both sides, heating both solder joints at once, and lifting it off. If you have a soldering station that supports tweezers, the usage is straightforward:
Bring the tweezer tips (set to the right temperature) to touch both soldered ends of the component. Wait a second or two for the solder to melt on both sides.
Once melted, simply lift the part away.
If it’s not coming, ensure both sides are indeed molten – sometimes one pad might be bigger (ground pad) and needs a bit more time or a touch of extra solder.
If you don’t have specialized tweezers, you can mimic this by using two soldering irons (one in each hand) to touch both ends of a 2-pin component. For ICs with more pins, tweezers won’t cover all pins at once (unless it’s a small 4-pin SOT-223 or something). However, some tweezers have interchangeable tip sizes that can do SOIC-8 packages by heating four pins per side simultaneously – but these are more exotic.
For larger ICs, one technique is to use soldering iron drag methods: e.g., flood all the pins with solder (so they’re all connected by a big blob on each side of the IC), then while molten, remove the IC. But hot air or low-melt alloy is usually easier for multi-lead parts as described next.
Low-Melt Alloy (Chip Quik Technique)
If hot air is not available or you want to minimize high-temperature exposure, the low-melt alloy technique is a lifesaver for SMDs. Products like Chip Quik are designed for this. The process:
Apply flux around the pins of the component (flux is often provided with the alloy kit).
Melt a generous amount of the low-melt solder alloy onto the pins/pads of the component using a soldering iron. Essentially, you’re mixing this alloy with the existing solder on the joints. The low-melt alloy usually contains metals like bismuth and indium and has a melting point of around 138 °C, much lower than normal solder.
The alloy stays liquid far longer as it cools. Once all pins have this alloy, you can often keep the entire set of joints molten simultaneously (because the alloy prolongs the melt).
Gently remove the component with tweezers while everything is still liquid. It should come off with minimal force.
You will be left with a bunch of alloyed solder on the pads; this must be cleaned off. Use a desoldering braid to wick away the remaining low-melt solder from the pads while keeping it molten with the iron. The braid might need extra flux because those alloy components can be a bit pasty.
This technique effectively lowers the difficulty of multi-pin removal at the cost of some cleanup afterward. It’s particularly useful for removing chips with many leads or even removing shields and connectors that have soldered tabs, without using hot air. The downside is the alloy is consumable (it costs money each time you use it) and you must carefully clean it off before resoldering new parts because that alloy is not typically reliable for final solder joints.
Desoldering Methods at a Glance: A Comparative Guide
Method/Tool | Best For | Pros | Cons / Considerations | Skill Level |
Desoldering Braid (Solder Wick) | Residual solder, fine pads, solder bridges, small through-holes | Inexpensive, gentle on pads, leaves clean surfaces, easy to learn | Slower for bulk removal, may need multiple passes, risk of pad lifting if misused | Beginner |
Solder Sucker (Desoldering Pump) | Bulk solder in through-holes, single large joints | Fast for clearing holes, portable, no external power needed | Risk of mechanical shock, poor for fine SMDs, requires good timing and aim | Beginner / Intermediate |
Desoldering Station (Vacuum Iron) | High-volume through-hole removal | Highly efficient, combined heat and suction, minimizes thermal stress per pin | Expensive, requires upkeep, tip size matters, less effective for SMDs | Intermediate / Advanced |
Hot Air Rework Station (Heat Gun) | Multi-pin SMDs, shielded or large surface-mounted parts | Removes all pins at once, effective for large components, clears vias with practice | Risk of overheating, can displace nearby parts, requires precision and heat control | Intermediate / Advanced |
Desoldering Tweezers | Two-leaded SMDs (resistors, capacitors, diodes), small ICs | Heats both ends at once, precise, reduces risk to adjacent pads | Limited to certain component sizes, costly, not suitable for high-pin-count parts alone | Intermediate |
Cleanup of SMD Pads
After removing an SMD component (by any method), you’ll usually have residual solder on the pads. If you’re going to solder a new component there, it’s best to clean the pads first:
Use a solder wick with flux to soak up excess solder on each pad, leaving them flat. This is important for fine-pitch ICs to avoid shorts when you put a new part on.
If pads are oxidized or uneven, apply a bit of flux and drag a clean soldering iron tip across them (with very little solder on it) to smooth things out, then wick again.
Be gentle to avoid lifting any small pads. If a pad is very delicate or already partially lifted, you might opt to leave a thin tinning of solder rather than risk more wicking, and just solder the new part onto that.
Finally, clean flux residues off the board around that area with isopropyl alcohol or appropriate electronics cleaner, especially if you used a rosin or water-soluble flux. No-clean flux residues can be left if they don’t cause issues, but it’s good practice to clean regardless so you start fresh.
Recommended reading: SMT VS SMD (VS THT): A Comprehensive Guide to Electronics Assembly Techniques
By now, we’ve covered removing solder from both through-hole and SMD contexts. At this stage, you would proceed to install new components or fix whatever issue caused you to remove the solder in the first place. But before closing out, let’s summarize some general best practices to avoid damage and ensure quality work, and then we’ll tackle some frequently asked questions.
Post-Desoldering Cleanup and Inspection
After successfully removing solder and components, a bit of cleanup will go a long way in making the PCB ready for rework or re-use:
Remove Residual Solder: As emphasized, use solder wick to get the last bits of solder off pads and out of holes. The goal is to have pads that are flat (not bumpy with old solder) and open holes. Any remaining solder can cause component fit issues or create unintended connections.
Inspect Pads and Traces: Check that all pads are still attached firmly to the PCB. If you notice a pad has partially lifted (you might see it not flush or a gap), be extremely cautious when soldering the new part – and consider repairing it (there are pad repair kits where you glue down a new copper pad or run a wire to replace a torn trace). If a copper pad did peel off completely due to overheating or pulling, you can often still salvage the circuit by carefully wiring that pin of the component to the next node in the circuit (for example, wiring to the via or trace the pad was originally connected to). It’s a delicate process, but it’s better than scrapping the board.
Board Cleaning: Flux residues can be sticky and mildly corrosive (if rosin-based). Use a PCB cleaning solution or >90% isopropyl alcohol with a lint-free wipe or brush to clean the area. This also helps reveal any solder splashes or tiny solder balls that might be lurking, which could cause shorts. Pay attention to areas where the solder might have flowed or been blown. A magnifier is useful to inspect for shiny solder particles.
Final Touches: If the board had conformal coating and it was removed for the rework, remember to reapply it if the board will be going back into a field environment. Also, if any thermal pads (like those under chips) or special solder features are disturbed, make plans to address them when resoldering the new component (e.g., applying fresh thermal interface or solder paste as needed).
Recommended reading: What are Vias in Pad? Advantages, Limitations, Applications, and Comparison with Conventional Vias
Taking the time to leave the board clean and inspected will set you up for success in whatever comes next (resoldering parts, testing, etc.). Now, to solidify our understanding, let’s conclude with the key points and then answer some frequently asked questions about solder removal.
Conclusion
In electronics, the ability to take things apart cleanly is just as valuable as putting them together. Mastering solder removal isn’t just a complementary skill to soldering—it’s a critical discipline in its own right. Whether you’re resolving a simple solder bridge on a beginner’s project or conducting delicate rework on a densely populated, multi-layer board, the principles remain the same: apply heat with control, use the right tools for the task, and work with patience, precision, and care.
Throughout this guide, we've walked through a full toolkit of desoldering techniques—from solder wick and suction pumps for through-hole components to hot air rework and low-melt alloys for surface-mount devices. We've emphasized the role of flux in improving flow, the benefits of adding solder to remove solder, and the value of knowing when to sacrifice a component to save the board.
For engineers, repair technicians, and electronics hobbyists alike, these skills are more than just practical—they’re transformative. They can extend the lifespan of valuable hardware, reduce repair costs, accelerate prototyping, and restore functionality when replacement isn’t an option. With each successful removal, your confidence will grow, and so will your intuition for choosing the most efficient, least invasive method.
Practice remains the best teacher. Use old boards to experiment, observe how different solder behaves under heat, and refine your touch. Remember: never force a component, always add flux when in doubt, and approach every board as if it matters—because it does.
By applying the insights and methods shared here, you’ll be equipped not just to fix what’s broken, but to work with the kind of precision that defines true craftsmanship in electronics. Desoldering isn’t undoing—it’s doing right.
FAQ
Q1: What is the best method to remove solder from a circuit board?
A1: There is no single “best” method; it depends on the situation. For removing small solder bridges or excess solder, a desoldering braid (solder wick) is often best because it’s clean and precise. For removing a through-hole component, a combination of a solder sucker (to pull out most solder) and a braid (to clean up the rest) works well. If you have a lot of desoldering to do, a vacuum desoldering station is ideal. And for surface-mount ICs, a hot air rework station or low-melt alloy can be the most effective. In practice, experienced technicians use multiple methods in tandem – for example, adding fresh solder and then using wick, or sucking then wicking – to get the job done efficiently and safely. The best method is the one that removes all the solder while avoiding damage to the board, so choose based on the tools you have and the specific joint you’re working on.
Q2: Can I remove solder without a soldering iron (or without expensive tools)?
A2: It’s possible in some cases, but generally having a soldering iron (or other heater) makes the job much easier and safer. Without an iron, one method is to use a heat gun or even a regular hair dryer on a high setting for very simple tasks, but these are not precise and can overheat the board. Another method, as mentioned, is using compressed air: heat the solder somehow (maybe a makeshift heater or chip quick alloy that lowers melting temp), then blast it with compressed air to blow the solder off. There’s also a quirky method of using an inverted can of compressed air (which sprays cold propellant) to freeze a solder joint, making it brittle, and then cracking the solder off – but this is quite risky for the board and component. In emergencies, some hobbyists have used tools like a wood-burning iron or even a lighter to heat solder (not recommended for quality work). Realistically, if you’re doing any serious electronics work, a basic soldering iron is a must; even a budget one will open the door to proper solder removal techniques.
Q3: How do I remove solder bridges or excess solder from PCB pads?
A3: Solder bridges (unintended blobs connecting two or more pads) are typically removed with solder wick. Place the braid on top of the bridge, heat with the iron, and the braid will soak up the excess solder【26†】. Always remember to add a bit of flux if the solder doesn’t flow at first. Another approach, if the bridge is stubborn, is to add a little more solder to it and then quickly swipe the iron tip between the pads to break the bridge – this spreads the solder out – and then use the wick to clean up. For excess solder on a single pad (like a pad that’s got too much solder on it), wick is again the go-to. In all cases, flux helps, and using a clean section of braid for each attempt yields the best result.
Q4: Is lead-free solder harder to desolder than leaded solder?
A4: Yes, generally lead-free solder is a bit more challenging to remove. It has a higher melting point (around 30–40 °C higher than eutectic 63/37 solder) and doesn’t flow as nicely – it tends to be stickier and forms rougher joints. This means you often need to use a higher iron temperature or longer heating time, which in turn can put more stress on the board. A well-known trick is to mix in some leaded solder when desoldering a lead-free joint. By adding 63/37 or 60/40 solder, you effectively lower the overall melting point of the mixture, making it easier to reflow and remove. You’ll also find that lead-free solder leaves more residue and oxide, so using flux is even more important to get it to wick or suck up nicely. If you’re planning to do a lot of rework on lead-free boards, investing in good tools (like a temperature-controlled iron and possibly a preheater or higher wattage iron) will make life easier.
Q5: How can I avoid damaging the PCB when removing solder?
A5: The key to avoiding damage is temperature and time control, plus using the proper technique. Use the right tools: a temperature-controlled iron set to an appropriate heat (too low and you dwell too long, too high, and you can scorch or lift pads). Do not overheat a pad for more than a few seconds at a time. If a joint isn’t melting, remove the iron, let the board cool slightly, then try again with maybe a higher temp or add solder/flux to assist – rather than pushing harder or staying on it for 20+ seconds straight. Also, never pull a component lead out by force; always ensure the solder is fully molten around it. Use gentle wiggling or slight tension and if it doesn’t release, apply more heat or remove more solder. When using a braid, as mentioned, lift it off together with the iron to prevent sticking and pad liftoff. With solder suckers, ensure you have good alignment so you’re not scraping the nozzle against the pad. Finally, let the PCB cool down after a few intensive desoldering operations – doing too much rework in one area consecutively can overheat the local area. If you follow these practices, you greatly minimize the risk of damage. Many engineers also practice on junk boards to get a feel for how much abuse a pad can take; over time you’ll “sense” when a pad is starting to get distressed (the solder might not wet it well, or it looks discolored) and you’ll learn to back off.
Q6: Can I reuse the solder I removed?
A6: Generally, no. Once the solder has been wicked into a braid or sucked into a pump, it’s not practical to reuse. It’s oxidized and mixed with flux and possibly contaminants from the board. Solder is cheap, and using fresh solder for new connections is always recommended for reliability. If you collect solder blobs, dispose of them properly (they do contain lead if it’s leaded solder). Some people wonder about re-melting solder that was sucked into a pump – those come out as little cylinders sometimes – but again, it’s not worth it. Always use fresh solder for making new joints; removed solder’s only fate should be the trash (or recycling for metal content if available).
Q7: My through-hole still won’t clear – what do I do if a via is very stubborn?
A7: Stubborn plated through-holes can be frustrating. First, try the tricks discussed: add more solder (to fully saturate the hole) then try sucking it out, or heat and use braid from both sides. Ensure you’re using a strong enough heat source – a thicker tip or higher temperature might be needed if the via is connected to a ground plane that wicks heat. If it still won’t clear, consider adding a bit of low-melt alloy to that hole to help it stay liquid longer, then try suction again. Another tactic: heat the hole and quickly insert a wooden toothpick – the wood won’t solder but might push the solder aside (don’t use anything that will melt or a material that solder sticks to). If all else fails and the via is critical, you might have to drill it out carefully with a micro-drill bit just the size of the hole (slightly smaller than the pad). Be aware that this almost certainly destroys the plating of the via, so after putting a new component in, you might need to run a wire if that via is connected to inner layers. Drilling is a last resort. Usually, patience with braid and flux will eventually clear even the toughest hole. Sometimes letting the board cool and coming back fresh can help, as you can attack from a different angle or notice something you missed (like solder on the other side you didn’t fully remove).
Hopefully, this Q&A addresses some of the lingering questions. With the knowledge from this guide, you should be well on your way to proficiently removing solder from circuit boards in a variety of scenarios. Good luck with your hardware projects and rework tasks.
References
R. Tummala, M. Swaminathan, M. Bakir, G. Lo, and P. L. Singh, Fundamentals of Microsystems Packaging. New York, NY, USA: McGraw-Hill Education, 2008.
IPC, IPC-7711/7721C Rework, Modification and Repair of Electronic Assemblies. Bannockburn, IL, USA: IPC, 2017.
J. F. Khoury, Electrical Engineering Handbook. Boca Raton, FL, USA: CRC Press, 2005.
F. R. Brock, "Solder alloys and soldering processes," ASM Handbook, Volume 2: Properties and Selection: Nonferrous Alloys and Special-Purpose Materials. Materials Park, OH, USA: ASM International, 1990.
Altium, "Controlling Heat for PCB Thermal Management." [Online]. Available: https://resources.altium.com/p/controlling-heat-for-pcb-thermal-management. Accessed: July 2, 2025.
J. P. Keller, Electronic Components: A Comprehensive Guide. New York, NY, USA: McGraw-Hill, 2004.
Hakko, "Desoldering FAQs." [Online]. Available: https://www.hakko.com/english/support/faqs/desolder_faq.html. Accessed: July 2, 2025.
Kester, "Understanding Flux." [Online]. Available: https://www.kester.com/knowledge-base/understanding-flux. Accessed: July 3, 2025.
Wikipedia, "Desoldering." [Online]. Available: https://en.wikipedia.org/wiki/Desoldering. Accessed: July 3, 2025.
in this article
1. Introduction2. Understanding Solder and Desoldering Basics3. Tools and Materials for Solder Removal4. Safety Practices and Preparation5. Desoldering Techniques for Through-Hole Components6. Desoldering Techniques for Surface-Mount Components7. Post-Desoldering Cleanup and Inspection8. Conclusion9. FAQ10. References