E-Step Calibration: How and When To Do It
When setting up your 3D printer for the first time or swapping out components, knowing how to perform E-step calibration is vital for ensuring the right amount of filament gets extruded.

Last updated on 15 Jan, 2025. 10 minutes read
This article explains the basics of E-step calibration for FFF printers
On the whole, FDM 3D printers are smart pieces of equipment that are capable of doing almost exactly what you tell them to. Sometimes, however, the components of the machine need calibrating so the physical hardware is in sync with the digital instructions being sent to it.
One essential part of 3D printer calibration is setting the number of E-steps per millimeter on the extruder. In short, E-steps are the incremental movements made by the extruder stepper motor as it rotates, and this rotation translates to linear movement of the extruded filament. When the manufacturer puts together your 3D printer, it programs the extruder to make a certain number of “E-steps” in order to extrude a given length of filament. But the required number of E-steps varies depending on certain factors, and can also change over time or when new components are installed.
This article goes over the basics of calibrating E-steps. First, we look at what E-steps are and how they affect extrusion. Then we learn how to calibrate E steps using a slicer capable of sending G-code commands. Finally, we examine the relationship and key differences between E-steps and flow rate.
What Are E-Steps?
E-steps is an abbreviation of “extruder steps,” with “steps” referring to the incremental movements made by the extruder’s stepper motor.
To understand E-steps, we therefore need to understand stepper motors. A stepper motor is a brushless phased electric motor, for which a full rotation is divided into a fixed number of steps, that can be instructed to move and hold at one of these steps without any position sensor. A typical stepper motor can move in steps of around 1.8 degrees, which means it takes about 200 steps to complete a full rotation.[1] Motors that take more steps to complete a full rotation are more accurate.
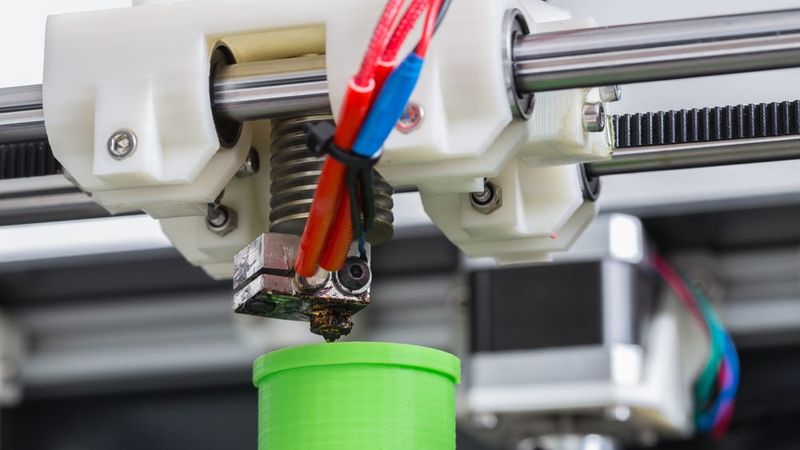
3D printer extruders use stepper motors due to their excellent precision and reliability. Each step moves the filament a little way along. But in order for a printer to work properly, we need to know exactly how many steps it takes to extrude a certain amount of filament, otherwise the printer might extrude too much or too little. This value isn’t always consistent, and physical changes to the printer — even in the time between leaving the factory and being installed on your desktop — can change the value. This is where talking about E-steps comes in handy.
In short, E-steps are an important measurement for your 3D printer firmware, where a value is set that represents how many steps the stepper motor needs in order to extrude 1 mm of filament.[2] The number of required steps can differ depending on hardware and material, and can also change over time. It therefore requires calibration every now and again.
When Is E-Step Calibration Required?
E-step calibration is generally required only when installing new hardware, such as an extruder or stepper motor, or when replacing the printer’s control board. These changes can affect the accuracy of filament extrusion, as the steps-per-millimeter value may no longer match the new components. In most cases, once E-steps are correctly calibrated once, no further calibration is necessary unless additional hardware modifications or firmware updates alter the printer's extrusion behavior.
In summary, perform E-step calibration after:
- Buying a new 3D printer
- Installing a new extruder
- Installing new stepper motors
- Replacing your printer's control board
Issues Caused by Poorly Calibrated E-Steps
If the E-steps per millimeter value is not set properly, then the printer is vulnerable to either over-extrusion or under-extrusion, i.e. the extruder pushing too much or too little filament toward the hot end. For instance, if the extruder is programmed to make 100 steps in order to extrude 1 mm of filament, but those 100 steps actually results in the extrusion of 1.5 mm of filament, then the E-steps value needs to be re-calibrated to prevent over-extrusion.
Knock-on issues can result from a lack of calibration, such as poor first-layer adhesion, inter-layer adhesion, gaps between layers, and warping (under-extrusion), as well as sagging, nozzle clogging, oozing, and stringing (over-extrusion).
Recommended reading: How to fix under extrusion: Maintenance and print settings
Calibrating E-Steps
To calibrate a 3D printer’s E-steps, the following tools are required:
- Computer with slicer that allows for single-line G-code commands, such as Simplify3D or Octoprint
- Spool of filament (non-flexible, e.g. PLA, ABS, or PETG)
- Calipers
- Permanent marker
The following steps will guide you through E-step calibration. Note that these instructions are for printers with Bowden extruders running Marlin firmware, such as the Creality Ender 3.
- Obtain the printer’s current E-steps settings. Using the printer’s LCD interface, navigate to Control > Motion > E-steps/mm, and note the value. If this is not possible, use the slicer to run an M503 command, and find the value at the end of the line beginning with “echo: M92.”
- Load the non-flexible filament. Preheat the nozzle to the required temperature for the filament and load the spool as usual.
- Set the printer to relative mode. This can be achieved by sending an M83 command to the printer via the slicer. In this mode, all coordinates are interpreted as relative to the last position, rather than being interpreted as absolute values.
- Measure and mark the filament. Using calipers (or a ruler), measure the 120 mm of filament immediately before the entrance to the extruder and mark it precisely using a permanent marker. This extra 20 mm should give us enough leeway to see how many millimeters of inaccuracy there are. (We can’t mark at 100 mm, because if the printer is over-extruding, the pen mark will disappear beyond sight!)
- Extrude 100 mm of filament. There are two ways to do this. On the printer interface, navigate to Prepare > Extruder > Move 10mm, then change the value to 100 with the control dial. Alternatively: in the slicer software, send the command G1 E100 F100. Either method tells the printer to extrude 100 mm of filament (or, more precisely, what it believes to be 100 mm of filament).
- Measure the actual extrusion. Now the extrusion has taken place, the mark you originally made 120 mm from the extruder entrance should — if the extruder is perfectly calibrated — now be exactly 20 mm from the extruder entrance. Measure the actual distance using calipers. If it is more than 20 mm, then the printer has been under-extruding; if it is less than 20 mm, it has been over-extruding. Make a quick calculation of 120 mm minus the distance between the extruder and your pen mark. This is how much filament the printer has actually extruded in its attempt to extrude 100 mm.
- Calculate your new E-steps settings. We can figure out the printer’s current number of E-steps per “100 mm” by taking the value from step one (E-steps/mm) and multiplying it by 100. But what the printer interprets as “100 mm” is not actually 100 mm: we gathered the actual length extruded during step six. Now if we take the steps per “100 mm” and divide it by the actual length extruded, we get a new and accurate E-steps/mm value. (Note, however, that if your new E-steps/mm value differs from the current value by >30%, you may have a clog or some kind of mechanical issue.)
- Apply new E-steps settings. The accurate new E-step value can be implemented in two ways. Using the printer interface, navigate to Control > Motion > E-steps/mm, select “E-steps/mm” and input the new value. Alternatively, use the slicer to send the command M92 E[new value, to one decimal place] followed by the command M500.
- Check that calibration is complete. Turn the printer off and on again, then repeat step one to check that the E-steps/mm has changed. If so, extruder calibration is complete. For total peace of mind, you can repeat steps 4–6 to make sure the printer is extruding exactly 100 mm when told to do so.
What Is a Normal E-Steps Value?
E-steps/mm refers to the number of steps the extruder motor takes to push one millimeter of filament through the system. For the most popular hobbyist FFF printer out there, the Creality Ender 3, the default E-steps value is 93 steps/mm. This works well for stock extruders but may need adjustment based on hardware changes or specific extrusion behavior.
In practice, many users find their calibrated E-steps value to be slightly higher, often ranging from 95 to 110 steps/mm. This increase is commonly due to minor differences in extruder components or slight filament slippage, which affects the actual amount of filament fed into the hotend. While it is better to not have slippage at all, it is often more convenient to account for it during E-steps calibration.
Values approaching 120 steps/mm can still be acceptable, especially for setups using less efficient extruders or softer filaments. However, if your calibration results in an E-steps value significantly above 120, it’s often a sign of a mechanical issue. Potential causes include a partially clogged nozzle, misaligned Bowden tube, or a damaged extruder gear.
What Is Flow Rate?
Flow rate is an extrusion setting that is closely related to E-steps calibration. Sometimes called an extrusion multiplier (or just “Flow” in Cura), flow rate is a setting that instructs the printer to extrude more or less material. It can be easily adjusted in slicing software, and is useful when dealing with a variety of different filaments: some materials require a much higher flow rate than others. Flow rate is expressed as a percentage, with the default value being 100.
If flow rate sounds an awful lot like E-steps calibration, that’s because it is. Essentially, adjusting the E-steps per millimeter and adjusting the flow rate achieves the same thing: both settings instruct the extruder stepper motor to make more or fewer steps during extrusion in order to push through more or less material.
The difference is that adjustment of E-steps is an essential piece of 3D printing calibration that properly sets up the printer for an average spool of filament. Flow rate, on the other hand, is a fast, simple, and temporary way to adjust the default number of E-steps per millimeter in order to accommodate different types of filament (or even just different brands of the same filament, which may behave in different ways). The flow rate is relative to the E-steps per mm value, which is itself absolute.
So given that E-steps and flow rate settings can achieve the same outcome, how do you know which to change? Generally, you should only need to calibrate your extruder E-steps when setting up the printer for the first time or installing a new extruder. But flow rate might need to be adjusted every time you change filament.
In its Cura guidelines, Ultimaker defines “Flow” like this:
The flow is the amount of material that needs to be extruded over a specific amount of time and is based on the filament diameter and print speed. The flow is always set to 100%, which means that the extruded amount of filament will match the calculated amount. This setting is not usually changed, as the calculation is done automatically, but it can be useful when printing with experimental materials.[3]
Setting the Flow Rate
In order to extrude the right amount of filament for a given material, you need to set the right flow rate. Slicers like Cura have flow rates for individual materials in their respective material profiles, but it may be necessary to work out a new flow rate for an experimental material or a material that is not producing the right results with the default settings.
Materials that shrink a lot during extrusion tend to require a higher flow rate, while those that swell a lot require a lower rate. Flow rate can also account for marginal differences in filament diameter, as well as differences in nozzle diameter.
- In Cura, the “Flow” parameter can be found under “Material” settings. It is expressed as a percentage, with 100 the default.
- In Simplify3D, the “extrusion multiplier” parameter can be found within “Edit Process Settings” under the “Extruder” tab. Expressed as a positive number relative to 1, the default value is 1.0.
Conclusion
Calibrating your 3D printer’s E-steps is a good way to ensure that the extruder is pushing through roughly the right amount of filament every time it receives an instruction. If the E-steps value is drastically wrong, you may experience issues such as over-extrusion or under-extrusion. It is therefore recommended to calibrate the E-steps per mm when setting up a printer for the first time or when changing extruders.
That being said, E-steps calibration is not a catch-all solution to extrusion issues. If you’re experiencing a number of printing problems, there may be other technical issues with your setup that need diagnosing independently. Furthermore, if you have gotten used to 3D printing with an uncalibrated extruder, it might take a while to re-tweak your print parameters after the calibration has taken place (by adjusting the flow rate, for example) in order to achieve the desired print quality.
Once you have calibrated your E-steps, your primary focus should be on adjusting the flow rate or extrusion multiplier in order to fine-tune material extrusion. Flow rate overrides the base E-steps value and is helpful when printing with experimental materials, materials that exhibit unusual shrinkage or expansion, or materials with a nonstandard diameter.
Frequently Asked Questions
What are E-steps?
E-steps, short for "extruder steps," refer to the number of steps the stepper motor takes to extrude one millimeter of filament. This value ensures accurate extrusion by controlling how much filament is fed into the hotend during printing. Proper E-step calibration is crucial for achieving consistent layer adhesion, precise dimensions, and high-quality prints.
When is E-step calibration necessary?
E-step calibration is typically required when you install new hardware, such as a different extruder, stepper motor, or a new control board. It's also necessary if you notice significant under- or over-extrusion, indicating that the current E-step value may no longer be accurate.
Why does the E-step value change?
E-step values can change when you replace hardware that affects the extrusion system, such as switching to a geared extruder or upgrading to a different stepper motor. Manufacturing tolerances between components can also cause slight variations in extrusion behavior, making recalibration essential after hardware upgrades.
Do I recalibrate E-steps for different filaments?
No, E-step calibration is not required for different filament types. Filament diameter and material properties may affect print quality, but these are typically addressed by adjusting slicer settings, such as flow rate or temperature, rather than recalibrating E-steps.
References
[1] Athani VV. Stepper motors: fundamentals, applications and design. New Age International; 1997.
[2] Helmer D, Voigt A, Wagner S, Keller N, Sachsenheimer K, Kotz F, Nargang TM, Rapp BE. Suspended liquid subtractive lithography: printing three dimensional channels directly into uncured PDMS. InMicrofluidics, BioMEMS, and Medical Microsystems XVI 2018 Feb 19 (Vol. 10491, pp. 84-89). SPIE.
[3] Material settings [Internet]. Ultimaker. 2022 [cited 2022 Jul 4].