How to Remove 3D Print from Bed: A Comprehensive Guide
Good bed adhesion is key to achieving defect-free prints. But how do you remove 3D prints that are stuck firmly to the build surface of the 3D printer? This guide reveals all.

04 Aug, 2023. 18 minutes read
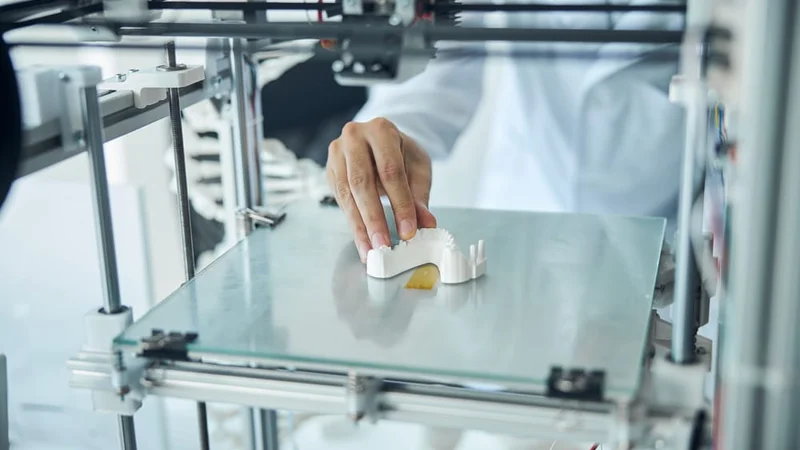
Removing a part from a glass build plate
For beginners and experts alike, one of the trickiest aspects of FDM 3D printing is first-layer adhesion. Prints need to stick to the bed surface firmly enough to prevent the base from lifting up during printing, but not so firmly that they get permanently stuck to the bed.
This exercise gets especially complicated given the huge number of variables that affect bed adhesion. Different filaments have varying adhesive properties, while printing temperature, bed temperature, build plate surface material, use of adhesive agents like glue, and the use of rafts all affect how well the printed parts stick to the bed. Taking these variables into account, users must strike a balance between good adhesion and ease of part removal.
It’s not always a problem, of course. With a bit of luck and careful preparation, printed objects will stick to the print surface during printing and then pop right off the print bed once they’ve cooled down. Few sounds are more satisfying than the pop of a print detaching easily from the build platform after contracting slightly during cooling.
However, all printer users will experience an overly stuck print once in a while, and the situation needs to be handled carefully to avoid damage to the parts — or, worse, the print bed itself. This guide looks at how to remove 3D prints from bed surfaces like PEI sheets, BuildTak, and glass beds, including those coated with adhesive agents like glue stick and hairspray.
Understanding 3D Printing and Bed Adhesion
The 3D Printing Process
3D printing, also known as additive manufacturing, is a process that creates three-dimensional objects by depositing material layer by layer. The most common method of 3D printing is Fused Deposition Modeling (FDM), which uses a thermoplastic filament that is heated and extruded through a nozzle onto a build platform. The nozzle moves in the X, Y, and Z axes, following a predetermined path to create the desired object.
During the FDM process, the first layer of the print is crucial, as it forms the foundation for the entire object. The first layer must adhere well to the build platform to ensure that the subsequent layers are accurately deposited and that the final object maintains its intended shape and dimensions. The build platform, or print bed, plays a significant role in achieving proper adhesion and preventing issues such as warping or print failure.
Several factors influence the success of the first layer adhesion, including the type of print bed, bed temperature, and bed leveling. Additionally, the choice of filament material, nozzle temperature, and print speed can also impact the adhesion quality. By understanding the 3D printing process and the importance of bed adhesion, you can optimize your prints and minimize the risk of print failure.
Importance of Bed Adhesion
Bed adhesion is a critical factor in the success of a 3D print. Proper adhesion ensures that the first layer of the print remains firmly attached to the build platform throughout the entire printing process. This is essential for several reasons:
Print quality: A well-adhered first layer provides a stable foundation for the subsequent layers, ensuring that the final object maintains its intended shape and dimensions. Poor adhesion can lead to warping, curling, or shifting of the print, resulting in a distorted or unusable final product.
Print stability: Strong bed adhesion prevents the print from detaching or moving during the printing process. If the print becomes dislodged, it can cause the extruder to collide with the object, potentially damaging both the print and the printer.
Reduced print failures: Proper adhesion minimizes the risk of print failure, saving time, material, and effort. Failed prints can be frustrating and costly, particularly when using expensive filament materials or printing large, complex objects.
Bed adhesion is therefore highly important, but sometimes prints can adhere too well, making it hard to remove them.
Recommended reading: 3D print not sticking to print bed? Here’s the solution
Setting up a 3D Printer for Easy Part Removal
Before we look at how to remove 3D prints from bed surfaces — i.e. things you can do once the objects have already been printed — we should look at the different ways you can prepare your printer for easy part removal.
The two most important aspects to consider here are the flexibility or rigidity of the build plate and the build surface material.
Flexible vs Rigid Build Plates
The build plate is a solid part of the print bed that can be removed from the build platform. Usually made from glass or spring steel, the build plate may or may not have a layer of another material on top of it acting as the build surface.
While glass build plates are common and highly affordable, flexible build plates such as those made from spring steel can make part removal much easier. This is because the build plate can be removed from the printer and bent slightly, creating a gap between the plate and the parts. If the parts have been printed well, they usually pop off the flexible plate with minimal effort.
That being said, rigid build plates offer some advantages. As well as being cheaper than spring steel, glass plates provide a very smooth bottom layer.
Build Surface Materials
When trying to facilitate easy part removal, another important aspect to consider is the build surface material, which isn’t necessarily the same as the build plate material.
With a glass build plate, users often print directly onto the glass, though its surface is often coated with an adhesive such as glue stick or hairspray. Alternatively, it is possible to apply a layer of Kapton tape or painter’s tape over the build plate, though this sometimes creates unwanted air bubbles and difficulty removing the tape when it needs replacing.
One of the most popular build surface materials is BuildTak, a proprietary product from Ideal Jacobs Corp, a commercial printing and manufacturing company from New Jersey. The build surface works with materials like PLA, ABS, HIPS, and flexible filament.
Equally popular is PEI (polyetherimide) sheet. PEI build surfaces are often textured to enable easier part removal, and they are also compatible with materials like PETG, which won’t print well on BuildTak.
Recommended reading: Tips to improve PETG bed adhesion
Cleanliness of the Build Surface
Keeping your build surface clean is a good way to improve first-layer adhesion while also making it easier to remove parts.
By removing gunk and residue from the build surface after prints, you improve the chances of natural bed adhesion; this in turn reduces the need to push the first layer too close to the bed, which can cause parts to become overly stuck.
Cleaning the build surface also prolongs its lifespan and improves overall print quality.
Heated Beds
Heated print beds can result in better prints by minimizing warping caused by dramatic temperature changes.[1] They can also lead to better first-layer adhesion, which indirectly leads to easier part removal.
This might sound counterintuitive, as adhesion would appear to make the print more likely to stick to the bed. However, the advantage of the heated bed is that it can simply be turned off when printing is finished, effectively reducing the adhesion as the parts cool and contract. The same cannot be said of, for example, chemical adhesives like glue stick, which remain stuck between the parts and the build surface after printing.
Rafts
Using rafts is not part of the physical 3D printer setup, but it is another consideration that needs to be made before printing rather than after, being implemented using your slicer software.
A raft is a kind of flat support structure that is printed directly onto the build surface and on top of which the actual part is printed. It helps with bed adhesion and minimizes part warpage, and it allows you to be more vigorous if the part needs to be scraped off the build surface. This is because any potential damage from the scraping will be inflicted on the raft, which is disposable.
Recommended reading: How to clean 3D printer beds: glass, PEI, adhesive
Bed Leveling
A well-leveled bed ensures that the first layer of the print adheres evenly across the entire bed surface, reducing the risk of warping and print failure. An uneven bed can result in poor adhesion in some areas and excessive adhesion in others, making it difficult to remove the print without causing damage.
To level your 3D printer bed, follow these general steps:
Home the printer: Start by homing the printer, which moves the extruder to the origin point (0,0,0) in the X, Y, and Z axes. This establishes a reference point for the leveling process.
Disable the stepper motors: Disable the stepper motors, which allows you to manually move the print head and bed without damaging the motors or the printer's electronics.
Adjust the bed height: Move the print head to each corner of the bed, adjusting the height of the bed at each point using the leveling screws or knobs. The goal is to achieve a consistent gap between the nozzle and the bed surface across the entire bed. A common method for checking the gap is to use a piece of paper or a feeler gauge, sliding it between the nozzle and the bed until it just barely catches.
Check the bed level: After adjusting the bed height at each corner, move the print head to various points across the bed to check the level. If necessary, make additional adjustments to the bed height until the gap between the nozzle and the bed is consistent across the entire surface.
Re-home the printer: Once the bed is properly leveled, re-home the printer to reset the origin point and prepare for printing.
First Layer Height
The height of the first layer can impact print adhesion and removal. A lower first layer height can improve adhesion by increasing the contact area between the print and the bed surface. However, a first layer that is too low can cause excessive adhesion, making it difficult to remove the print without causing damage.
Experimenting with different first layer heights can help you find the optimal balance between adhesion and ease of removal. Researchers have found that first layer height can have a bigger impact on the force required to remove prints than bed temperature or extruder temperature.[3]
Steps to Take Immediately After Printing
Cooling the Bed and Prints
Before attempting to remove a 3D print from the bed, it is essential to allow both the bed and the print to cool down to near room temperature. Cooling helps to reduce the risk of damage to the print and the bed, as well as making the removal process safer. The cooling process allows the print material to contract slightly, which can help to release the print from the bed surface more easily.
The recommended cooling time depends on the size of the print and the material used. For small prints made from PLA, a cooling time of 10–15 minutes is usually sufficient. Larger prints or prints made from materials with a higher glass transition temperature, such as ABS or PETG, may require longer cooling times of 30 minutes or more.
Disconnecting the Printer
Before attempting to remove a 3D print from the bed, it is important to take safety precautions, such as disconnecting the printer from the power source. This step helps to prevent any accidental activation of the printer's motors or heating elements, which could cause injury or damage to the print and the printer.
Disconnecting the printer also ensures that the bed and print have stopped receiving heat, allowing them to cool down more effectively. This is particularly important when working with heated beds, as they can retain heat for an extended period and may require additional cooling time before it is safe to handle the bed and print.
Tools for Removing 3D Prints
Spatulas and Scrapers
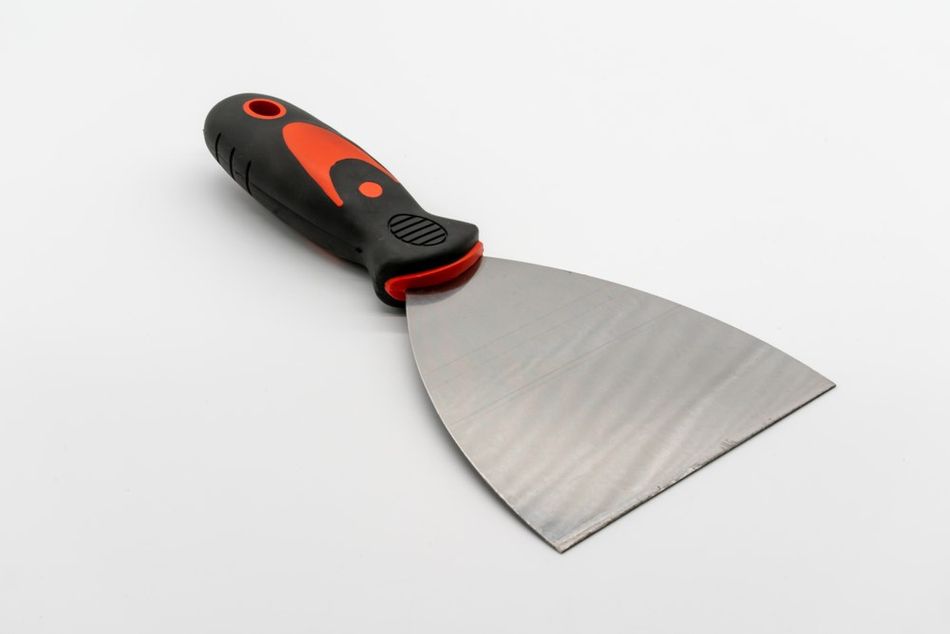
Spatulas and scrapers are among the most commonly used tools for removing 3D prints from the bed. These tools typically feature a thin, flat blade made from metal or plastic, which is used to gently pry the print away from the bed surface.
To minimize the risk of damage, it is important to use a spatula or scraper with a thin, flexible blade and a rounded or beveled edge. This allows the tool to slide more easily under the print, reducing the amount of force required for removal. When using a spatula or scraper, always work slowly and carefully, starting at one corner of the print and gradually working your way around the edges until the print is fully detached from the bed.
Advantages: Spatulas and scrapers are versatile and can be used with a variety of build surfaces. They are also relatively inexpensive and easy to find. When used correctly, spatulas and scrapers can effectively remove prints without causing damage to the bed or the print itself.
Disadvantages: One potential risk associated with using spatulas and scrapers is the possibility of damaging the bed surface or the print if too much force is applied. This can result in scratches, gouges, or other damage to the bed, which can affect print adhesion and quality in future prints. Additionally, using a spatula or scraper with a sharp edge can pose a risk of injury if not handled carefully.
Tweezers and Pliers
Tweezers and pliers are another set of tools that can be used for removing 3D prints from the bed. These tools are particularly useful for handling small, delicate prints or for removing support structures and brims from the print.
Needle-nose pliers are well-suited for gripping small, hard-to-reach areas, while flat-tipped tweezers can be used to lift prints with a larger surface area.
Advantages: Tweezers and pliers offer greater precision and control compared to spatulas and scrapers, making them ideal for working with intricate or fragile prints. They can be used to gently grip and lift the print away from the bed without applying excessive force, reducing the risk of damage to the print or the bed surface. Additionally, tweezers and pliers can be used to remove support structures and brims from the print, helping to improve the overall appearance and quality of the final object.
Disadvantages: One potential drawback of using tweezers and pliers is the risk of accidentally crushing or deforming the print if too much pressure is applied. This can be particularly problematic when working with delicate or thin-walled prints. To minimize this risk, it is important to use tools with a gentle grip and to work slowly and carefully when removing prints or support structures.
Specialty Tools
In addition to the more common tools like spatulas, scrapers, tweezers, and pliers, there are specialty tools designed specifically for 3D print removal. These tools often feature unique designs or materials that cater to the specific needs of the 3D printing process.
Some companies manufacture tools specifically designed for 3D print removal. These tools often feature thin, flexible blades with a non-stick coating to help them slide easily under the print without causing damage to the bed surface. They may also have ergonomic handles for improved grip and comfort during the removal process.
Techniques for Removing 3D Prints From the Bed
This section looks at how to remove 3D prints from bed surfaces. It starts with quick and simple methods — usually sufficient for moderately stuck parts — and proceeds to more laborious solutions which typically only need to be used if parts are firmly stuck.
Many of these methods are surface-agnostic, though you are most likely to need them when printing directly onto a rigid glass bed. If printing directly onto the build plate (i.e. onto glass), it is best to wait for the parts to cool down before attempting any of the following methods: cooling causes the printing material to contract, reducing adhesion and making the parts easier to remove.
Bend the Flexible Build Plate
The first method of removing parts from the print bed is only applicable when using a flexible build plate such as a PEI-coated spring steel one. It is one of the simplest and most effective means of part removal.
Many flexible build plates are magnetic and can be easily detached from the metal base. Once this has been done (with the parts still attached to the build surface), simply bend the plate slightly over a cushioned surface until the parts pop off.
Manually Pull the Parts
For rigid or flexible build plates, parts can sometimes be removed by exerting brute force. Use one hand against the build surface as leverage, and use the other to pull and pry the parts from the bed. This will only work if the parts are fairly large and simple; parts with thin and delicate features may get damaged if you try to yank them from the bed.
A word of warning: do not exert too much force while the build surface remains attached to the printer, as this can damage any clamps holding the build plate in place. If the parts do not detach with moderate force, remove the build plate from the printer then try pulling harder.
The Wiggle Method
The wiggle method is a simple yet effective manual technique for removing 3D prints from the bed. This method involves gently wiggling the print back and forth to loosen its bond with the bed surface, eventually allowing it to be lifted away without the need for tools.
To perform the wiggle method, start by gripping the print firmly with your fingers, taking care not to apply too much pressure to avoid crushing or deforming the print. Begin to wiggle the print back and forth, applying a gentle rocking motion along the edges of the print. As you wiggle the print, you should feel the bond between the print and the bed surface gradually weakening.
The wiggle method works best for prints with a relatively large contact area with the bed, as this provides more leverage for the rocking motion. It may be less effective for prints with a small contact area or delicate features, as these prints may be more prone to breakage during the wiggling process.
Cool the Build Surface
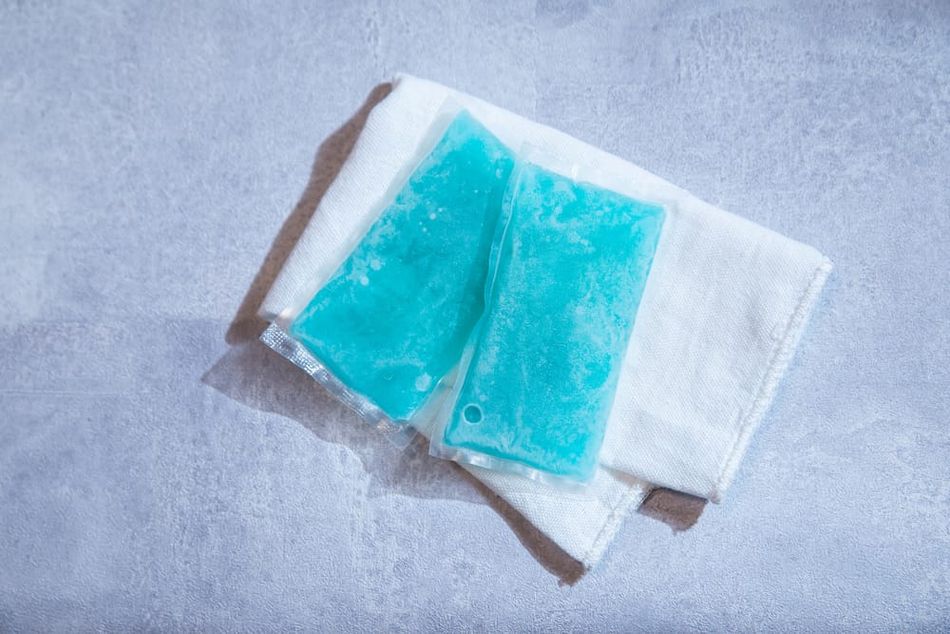
We have noted that parts will detach from the print bed more easily after the heated bed has cooled down. However, you can reduce the temperature further by removing the build plate and placing it in an even cooler environment such as a fridge. If you don’t have room in your fridge, rest the build plate on top of some ice packs. Try removing the parts manually (or with one of the following methods) after 10 minutes of cooling.
Use a Tool
If you struggle to remove the prints manually, use a flat tool like a paint scraper, spatula, or knife to get between the prints and the build surface. Companies like BuildTak sell dedicated scrapers for removing prints from the bed.
Although this method is more effective at prising the parts free than using your hands, it risks causing damage to the build surface, especially when using a knife. This doesn’t matter too much if you’re printing on tape, for example, but you certainly don’t want to be making cuts and scratches on your glass build plate.
It is best to remove the build plate from the printer before attempting to remove parts with a scraper or knife.
The Tap and Lift Technique
The tap and lift technique is our preferred method for removing 3D prints from the bed using tools like scrapers and spatulas. This method involves tapping the edge of the print with your chosen tool to create a small gap between the print and the bed, which can then be used to lift the print away.
To perform the tap and lift technique, start by selecting a suitable tool with a thin, flat edge. Position the tool at the edge of the print, ensuring that it is parallel to the bed surface. Gently tap the edge of the print with the tool, applying a small amount of force to create a slight gap between the print and the bed. Be careful not to apply too much force, as this can damage the print or the bed surface.
Once a small gap has been created, carefully slide the tool under the edge of the print, using a gentle lifting motion to separate the print from the bed. Continue to lift the print along its edges, working your way around the entire print until it is fully detached from the bed.
The tap and lift technique requires patience and a steady hand to avoid damaging the print or the bed surface.
Use Floss
Dental floss can sometimes be used to remove parts from the build surface. This method is effective because the floss is fine enough to get between the prints and the build surface but is unlikely to cause any damage to the 3D printer bed.
Stronger alternatives to dental floss include jewelry wire and soldering wire.
Use Water
Water can be used in various ways to facilitate print removal from the build plate, particularly when using a glass surface.
One option is to use cold water to create a rapid temperature difference. Remove the build plate from the printer, flip it upside down, and run cold water on its underside to quickly reduce its temperature. When the build plate is cool to the touch, flip it back the right way up and try removing the parts.
If you used glue stick on top of the build surface, you can help loosen it up with warm water. In this case, run the warm water directly onto the joint between the parts and the build surface. After about a minute of water application, try removing the parts.
If you used PVA glue and the parts cannot be removed with any of the above methods, try submerging the entire build plate and parts in a sinkful of warm water for several minutes, then try removing the parts again.
Use Chemicals
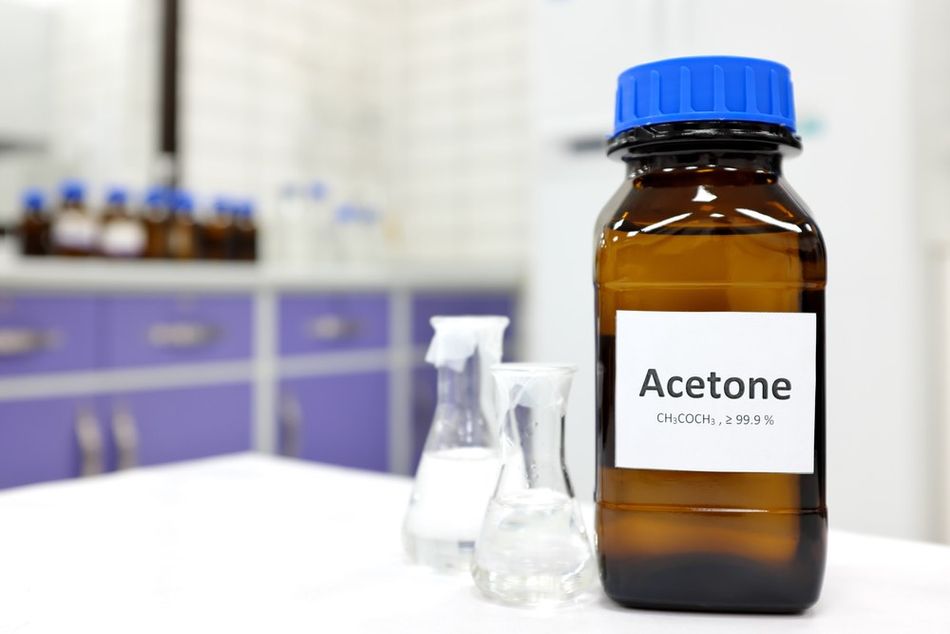
If none of the above methods work, you can try using a solvent like isopropyl alcohol (IPA) or acetone, which is particularly effective for ABS parts. The use of chemicals is best employed as a last resort, as solvents can eat away at your prints and your build surface. Solvents work by dissolving or weakening the bond between the print and the bed, making it easier to separate the two.
To use a solvent for print removal, apply a small amount of the solvent to a cloth or paper towel, and gently dab it onto the edge of the print where it meets the bed surface. Allow the solvent to penetrate the bond between the print and the bed for a few minutes, taking care not to let the solvent spread to other areas of the bed or printer. Once the solvent has had time to work, use a tool such as a spatula or scraper to gently lift the print away from the bed.
Using solvents for print removal can be an effective method for dealing with stubborn prints, but it should be used with caution to avoid damaging the bed surface or the print itself. Always follow the manufacturer's recommendations and safety guidelines when working with solvents, and consider using alternative removal techniques whenever possible to minimize the risk of damage.
Conclusion
Getting the hang of part removal takes some time. And since it depends on your combination of printer, build plate, build surface, and other factors, it’s not always clear what advice you should follow.
While glass build plates are dependable and can provide excellent bed adhesion, beginners struggling with part removal should definitely consider investing in a flexible plate with a PEI or BuildTak surface, as this makes part removal much easier, rarely requiring much more than a quick bend of the build plate.
If a flexible build plate isn’t an option, or if parts are still regularly getting stuck to the surface, then printer users should go about part removal in a methodical manner. The sensible course of action is to attempt the simplest methods of part removal first (using hands, a scraper, or a cooling agent) before moving on to more laborious methods if that doesn’t work (warm water immersion, solvents).
Perhaps the most important thing to remember is that, even though stuck parts can be frustrating, you should always exercise caution to avoid damaging the build plate or other parts of your printer. In other words, don’t aggressively scratch up your glass bed with a knife or pour large amounts of harsh chemicals on your PEI surface just because part removal is taking longer than you expected.
By closely following this guide on how to remove 3D prints from beds, you should be able to easily remove your parts without damaging either the parts or your printer.
Frequently Asked Questions
1. How long should I wait for the bed and print to cool before attempting removal?
The cooling time depends on the size of the print and the material used. For small prints made from PLA, a cooling time of 10-15 minutes is usually sufficient. Larger prints or prints made from materials with a higher glass transition temperature, such as ABS or PETG, may require longer cooling times of 30 minutes or more.
2. What is the best tool for removing 3D prints from the bed?
Common tools include spatulas, scrapers, tweezers, pliers, and specialty print removal tools. Experimenting with different tools and techniques can help you find the best solution for your specific setup.
3. Can I use solvents to remove prints from the bed?
Solvents can be used to remove prints in some cases, particularly when dealing with materials that have a strong bond to the bed surface or when other removal techniques have proven unsuccessful. It is important to choose a solvent that is compatible with both the print material and the bed surface and to follow the manufacturer's recommendations and safety guidelines.
4. How can I prevent prints from sticking too strongly to the bed?
Proper bed leveling, restricted bed temperature, flexible build plates, and good build surfaces can help to prevent prints from sticking too strongly to the bed.
5. What should I do if my print is stuck and I cannot remove it?
If your print is stuck and cannot be removed using standard techniques, consider using a solvent to help release the bond between the print and the bed. If you have to damage the print to release it, bear in mind that this is usually preferable to damaging the bed itself.
References
[1] Nazan MA, Ramli FR, Alkahari MR, Abdullah MA, Sudin MN. An exploration of polymer adhesion on 3D printer bed. InIOP Conference Series: Materials Science and Engineering 2017 Jun 1 (Vol. 210, No. 1, p. 012062). IOP Publishing.
[2] Kerr T. Affordable Desktop 3D Printers. In3D Printing: Introduction to Accessible, Affordable Desktop 3D Printing 2022 Nov 22 (pp. 45-58). Cham: Springer International Publishing.
[3] Peña Doll M. Part removal of 3D printed parts (Doctoral dissertation, Massachusetts Institute of Technology).