How Long to Cure Resin Prints and Post-Curing Methods
Post-curing is an important step in SLA 3D printing. Knowing how long to cure resin 3D prints and what curing methods to use can help you attain the highest quality parts.

Last updated on 10 Oct, 2023. 13 minutes read
Curing ensures that resin 3D printed parts achieve their optimal properties.
Resin 3D printing technologies, such as stereolithography (SLA) and digital light processing (DLP), have become a popular 3D printing technology due to their ability to produce highly detailed and accurate parts. This printing method uses a photosensitive resin that solidifies when exposed to a light source, typically ultraviolet (UV) light. This solidification process is known as curing.
While curing is an essential part of the resin 3D printing process, with UV lasers or exposures built in to the 3D printer hardware, it is also common for makers to post-cure finished prints. Post-curing resin 3D prints allows users to enhance their print’s mechanical properties and achieve superior performance in terms of strength, stiffness, and even temperature resistance. But the question remains: how long to cure a resin print? The answer depends on a few factors, like curing method and type of resin. In this article, we’re starting by looking at how resin 3D printing works before diving into everything you need to know about post-curing, including how to tell when the right curing time has been reached.
How Resin 3D Printing Works
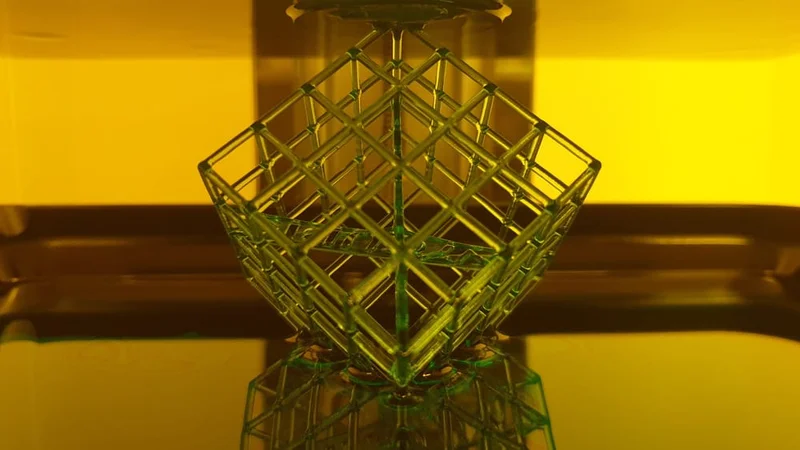
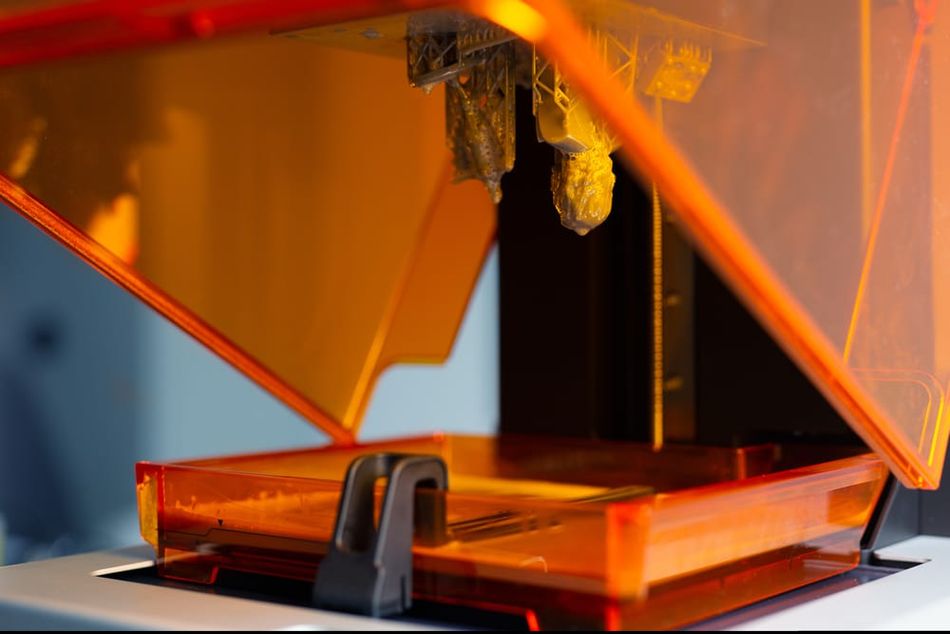
Resin 3D printing, which includes technologies like SLA and DLP, is a type of additive manufacturing technology that uses photosensitive liquid resin as the printing material (as opposed to thermoplastic filaments used in fused filament fabrication). Photosensitive resins are liquid photopolymers that transition from liquid to solid form when exposed to UV light. In the resin 3D printing process, layers of liquid resin are exposed to a light source in sequence, resulting in a solid 3D object. The light source can be a laser, a digital projector, or an array of LEDs, depending on the specific printer technology.
In SLA printing, a UV laser is directed onto a layer of liquid photopolymer and, based on a pre-designed 3D model, draws a crosssection of the model onto the resin. As the laser moves, the UV light selectively cures the liquid resin, causing it to solidify. Once a layer is complete, the build platform raises or lowers, another layer of liquid resin is applied, and the process is repeated. SLA is known for its high-resolution capabilities and precision.
In DLP printing, a digital projector is used to expose a light image onto an entire layer at once. In other words, the projector displays an image of a single layer, and the UV light from the projector solidifies the resin in the shape of the image. This method can be faster than SLA, as it doesn't require the laser to trace each layer individually, but can have less precision. Regardless of the specific technology, the key principle in resin 3D printing is the use of light to selectively solidify the photosensitive resin, building up the object layer by layer.
The Benefits of Post-Curing
As we’ve seen, during the 3D printing process, photopolymer resin is exposed to UV light, which initiates a chemical reaction called photopolymerization. This reaction causes the resin to solidify and form the layers of the printed object. However, the initial exposure to UV light during printing is often insufficient to fully cure the resin, leaving it in a partially solidified state. Uncured or partially cured resin prints can exhibit several issues, such as:
Part weakness: Insufficient curing can result in a print with sub-optimal mechanical strength, making it prone to breakage or deformation under stress.
Surface stickiness: Partially cured prints often have a sticky surface, which can attract dust and dirt, making post-processing more difficult.
Shrinkage and warping: As the resin continues to cure after printing, it can cause the print to shrink or warp, leading to dimensional inaccuracies.
To address these issues and ensure the final print has the desired properties and strength, many users choose to post-cure their prints. Post-curing involves exposing the print to a controlled UV light source for a specific duration, allowing the resin to fully cure and achieve its optimal mechanical properties. Proper post-curing not only improves the strength, durability, and temperature resistance of the print but also enhances its surface finish and overall appearance.[1]
As we’ll see in more detail, there are a few different methods for post-curing resin 3D prints, including sun curing, UV light curing, and more. In general, before you initiate the post-curing process, it’s a good idea to first prepare your 3D print by washing it and removing supports.
Preparing 3D Prints for Curing
When a resin 3D print is ready to come off the 3D printer, it is common for leftover uncured resin to still be stuck to the part’s surface. It is therefore important to clean this uncured resin off of the green part before undergoing the final curing process. If the resin is not removed from the part’s surface, it can cause dimensional inaccuracies and surface imperfections on the final cured part.
One of the most common and affordable ways to remove this resin residue before curing is to use a bath of isopropyl alcohol (IPA). IPA is a solvent that is present in many household products, including rubbing alcohol and hand sanitizers.[2] IPA can also be used to dissolve liquid resin. To clean and prepare 3D prints for curing, simply submerge the printed parts in a bath of IPA for about three minutes. If there are still traces of liquid resin left, you can repeat this rinse one more time.
Because of the volatile and flammable nature of IPA and its reaction with the liquid resin, it is very important to handle the materials with care. This includes using the materials in a well ventilated environment and wearing protective gloves made from a non-reactive material like nitrile or neoprene. It is also vital to dispose of used IPA safely: consult local guidelines on hazardous waste disposal and never pour IPA with dissolved resin particles down the drain.[3]
When the liquid resin has been safely cleaned off the green 3D printed part, you can then remove the supports—if there are any. It is easier to remove supports before the final curing because they won’t be as hardened. You can do this by snapping them off by hand or if greater precision is required by using pliers or cutting tools.
Recommended reading: What is Resin 3D Printing?
What are the different curing methods?
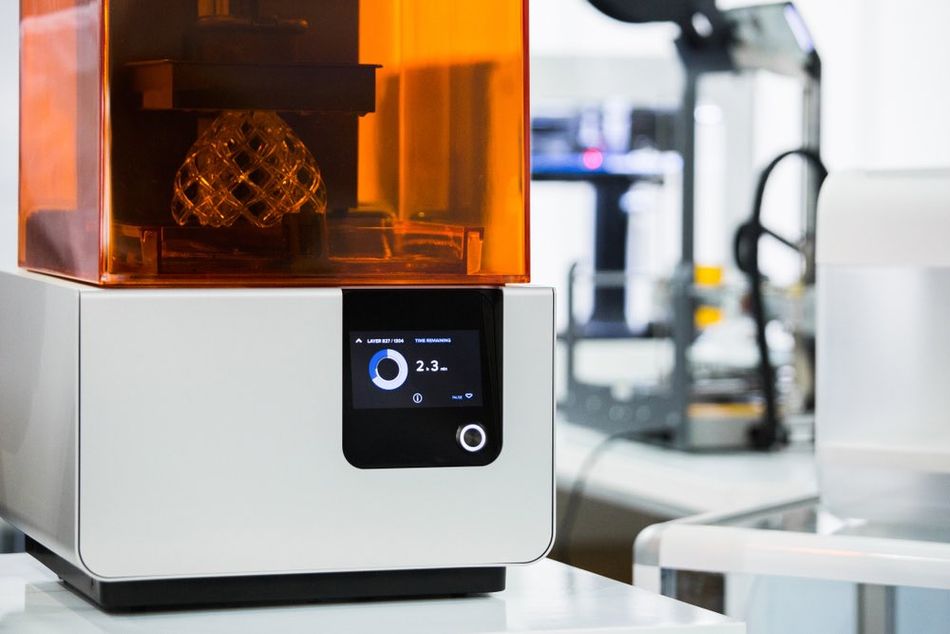
There are a number of options at your disposal when it comes to post-curing resin parts. Most SLA and DLP 3D printer manufacturers offer auxiliary UV curing stations, such as the AnyCubic Wash and Cure Machine, the Elegoo Mercury Plus 2-in-1, and the automated Form Cure by Formlabs. But for those on a tighter budget, there are other options too. Let’s take a look.
Curing with Sunlight
By far the cheapest method for curing a 3D printed resin model is to use natural sunlight. The UV rays emitted by direct sunlight will gradually cure the photopolymer resin material. That being said, direct sunlight is also the slowest method for post-curing and can be inconsistent depending on the strength of the UV radiation on a given day.
In the best conditions—full sun and no clouds—it can take about two hours to cure a small 3D printed model in direct sunlight. Transparent parts will cure faster (in about half the time it takes a non-transparent part), while large prints can take up to eight hours to fully cure. It is therefore important to check on the parts regularly to see how the curing process is progressing. If you are curing your 3D models outside, you should also be rotating the print to ensure that every angle is being exposed to the sun equally.
Pros of Curing with Sunlight
Cost: Solar curing does not require any specialized equipment making it the most affordable option for post-curing.
Eco-friendly: Solar curing is a more environmentally friendly option compared to using artificial UV light sources, which consume electricity.
Cons of Curing with Sunlight
Inconsistent exposure: Due to the variability of sunlight intensity, it can be challenging to achieve consistent curing results.
Longer curing times: Solar curing generally takes longer than UV light curing, as the intensity of sunlight is usually lower than that of a dedicated UV light source.
Limited control: With solar curing, it is more difficult to control the exposure time and intensity of the UV light, which can increase the risk of over- or under-curing the print.
Curing with a UV Lamp
If time is of the essence, using a UV lamp is probably a better option. An artificial UV light source will guarantee consistent, reliable results for 3D print curing. Moreover, the curing process using a UV light will only take a few minutes (as little as 1 minute for clear resins). Most dedicated 3D printing curing stations have the added benefit of a turntable, which rotates the 3D printed part to ensure that every angle is receiving the same UV exposure.
If you’re not ready to invest in a brand-name curing chamber, you can also make your own DIY curing station using a plastic box, aluminum foil, a battery-operated turntable, and LED UV lights.[4] Another option that works for smaller 3D printed parts is using a UV lamp designed for curing nail polish. Simply place the parts on the curing bed and expose them for a few minutes. Be sure to keep a close eye on prints curing under UV light: they can quickly become over-cured, which leads to brittleness.
Pros of UV Lamp Curing
Controlled exposure: UV curing chambers allow for precise control over the exposure time and intensity of the UV light. This reduces the risk of over- or under-curing the print.
Efficiency: UV light curing is significantly faster than solar curing, as the UV light source can be more intense and focused on the print.
Consistency: UV curing can provide more even exposure, ensuring that all areas of the print are fully cured. This is particularly important for prints with complex geometries or intricate details, where uneven curing can lead to weak points or surface imperfections.
Cons of UV Lamp Curing
Cost: UV curing, particularly UV curing chambers, can be expensive. This can be a barrier for some users, especially hobbyists or small businesses with limited budgets.
Maintenance: UV light sources, such as UV lamps or LEDs, can degrade over time and may need to be replaced periodically. This can add to the ongoing cost and maintenance requirements of the curing process.
Underwater Curing
Many SLA 3D printing users are fond of the underwater curing method. As the name suggests, this technique consists of submerging printed models in water and then exposing them to UV light (whether it’s direct sunlight or a UV lamp). The benefit of underwater curing is that the water bath helps to refract the UV rays, which leads to more even UV exposure. It also takes less time than traditional curing.
To cure your 3D print under water, place the part into a transparent container filled with water. Then place the container outside in the sun or expose it to a UV lamp. Due to the scatter effect of the water on the UV rays and the lack of oxygen in the water, curing can be achieved in as little as half the time it would normally take. So be sure to keep a close eye on your submerged print. When the curing is complete, remove the print from the water bath and let it dry.
If using this method, it’s also important that you dispose of the used water safely. Since the water may contain traces of uncured resin, which is toxic, it can be dangerous to simply pour it down the drain. To be safe, leave the water bath out in the sun or use your UV lamp to fully cure all the resin particles and filter them out before disposing of the water.
Pros of Underwater Curing
Efficiency: Using the underwater method can halve curing times, both for sunlight and UV lamps.
Consistency: Since water refracts UV rays, parts submerged in the liquid are exposed to more even UV exposure.
Cons of Underwater Curing
Risk of over-curing: Since underwater curing speeds up the curing process significantly, the risk of over-curing also increases.
Extra handling: Using water in the post-curing process will add another step to your waste management: you can’t simply pour water with resin down the drain.
Recommended reading: Resin vs. Filament 3D Printer: Pros and Cons of Curing and Extrusion
Factors Affecting Curing Time
The amount of time a print is exposed to UV light after coming off the print bed varies depending on a number of factors. These include:
Type of resin: The type of resin used in 3D printing can significantly impact the curing time required for a print. For example, flexible and tough resins can take longer to cure than standard resins.
Size and geometry: Larger prints or prints with intricate details may require additional curing time to ensure that all areas of the print are fully cured. Consider increasing the curing time for larger or more complex prints, and monitor the results to fine-tune the process.
Curing method: Different curing methods have very different curing times. For instance, it can take hours to cure a part in sunlight and just minutes in a UV chamber.
Environment: Temperature and humidity can influence curing times. In general, the curing process is generally more efficient in warmer temperatures and in lower humidity.
How to identify a fully cured resin 3D print
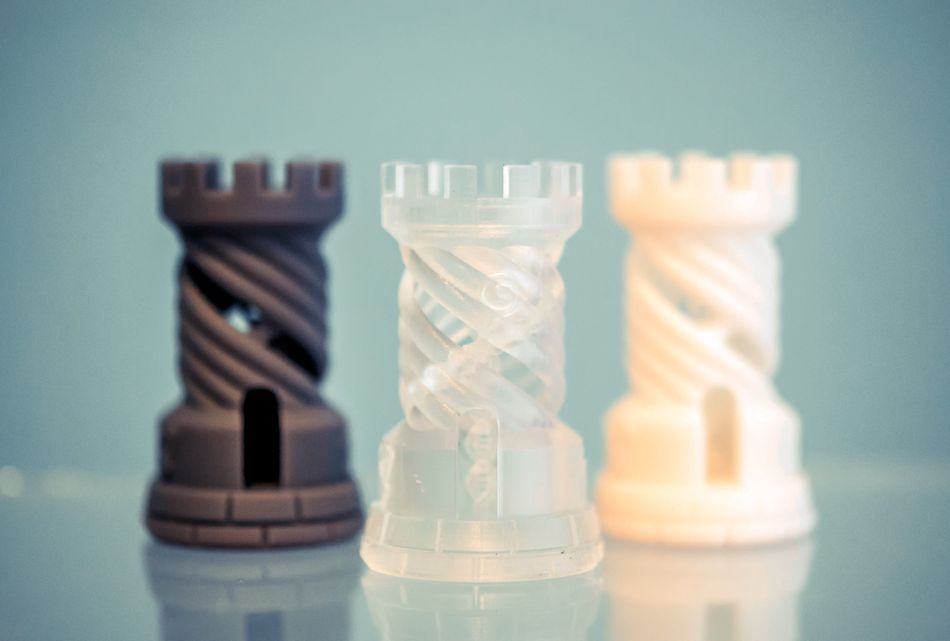
The easiest way to identify if a resin 3D print is fully cured is simply to look at it. A fully cured 3D print will be distinguishable by its matt finish. A green resin 3D print (that is right off the 3D printer or is not done curing), by contrast, will have a glossy finish. As soon as the printed part takes on a fully matt, non-glossy texture, it should be done curing. An over-cured part, on the other hand will become porous, which can result in a rougher texture.
In general, smaller parts or models 3D printed using transparent resins will cure faster than larger models, which require a longer curing time. It’s important to factor this in when deciding how long to cure a resin print. The type of resin can also influence curing times, so be sure to check the instructions on the resin brand you are using.
While slightly less reliable, you can also touch the 3D printed part to tell if it has finished curing. An under-cured component will still feel slightly sticky or gummy, while a well-cured part will feel smooth and hard. This method may not be completely reliable, however, since sticky resin on the part can also be symptomatic of another problem.
Why is there sticky resin after curing?
Sometimes a fully cured 3D print may still have sticky patches on it. This can be a sign that your 3D printed model was not properly cleaned before post-curing. In other words, if there is liquid resin residue left on the 3D printed part, it will cure at a different rate than the solid object, resulting in sticky semi-cured imperfections on the part surface.
In order to avoid this SLA 3D printing issue, it is important to properly clean and remove any leftover liquid resin before curing. As we saw in the previous section, an IPA bath can be used to dissolve the liquid resin and prepare the model for curing. If, however, the IPA already has been used to dissolve resin, the resin particles in the solvent can actually contaminate the cleaning process, resulting in sticky prints. To ensure this doesn’t happen you can either use fresh IPA or remove the resin particles by curing them inside the solvent and then carefully filtering them out from the IPA liquid.
Recommended reading: 3D Printing Technology: SLA vs SLS
Why are there fumes and vapors when I cure?
If you are seeing significant fumes or vapors while curing your 3D printed component, it’s a sign that the part has not been properly cleaned and that there is still liquid resin on the part. If you did carefully clean the part using a solvent, steam can also be a sign that the IPA solution used to clean the part was too saturated with resin particles.
While fully cured resin is safe, liquid resin is toxic and should not be touched. Similarly, vapors generated by SLA 3D printing and curing can have negative effects with enough exposure. That’s why you should always 3D print and cure SLA parts in a well ventilated space. Ensure that your curing setup is located in a well-ventilated area or includes a ventilation system, such as a fan or vent, to help dissipate any fumes generated during the curing process.
Is it possible to over cure resin 3D prints?
Yes, it is possible to over cure a resin 3D print. If you’ve exposed your 3D print to too much UV light, the part’s mechanical properties will start to degrade, resulting in a printed component that is brittle and porous. Because curing is achieved so quickly using UV lamps or curing stations, there is a higher risk of over-curing if you are using these methods. To avoid over-curing, check the state of your resin model frequently. If it is under-cured, you can simply put it back under UV light.
Because UV rays from the sun also gradually cure and degrade photopolymer resins, keeping your 3D printed object in the sun can also cause over-curing over time. This can make a 3D printed part more brittle and prone to breaking.
Conclusion
Resin 3D printers are known for their high precision and for making prints with high-quality surface finishes. Optimize the process even more by knowing how long to cure resin prints. As we saw, the type of curing light (sunlight, UV lamp, or underwater) dramatically influences how long to cure printed parts. Curing in direct sunlight is free but can take anywhere from 1-8 hours. Using artificial UV light, on the other hand, requires some additional equipment but can finish resin prints in mere minutes.
Frequently Asked Questions (FAQs)
Q: What is the ideal curing time for resin prints?
A: The ideal curing time depends on a number of factors, including the type of resin, print size and geometry, curing method, and environment. When possible, follow guidelines for the specific resin you are using and check your part frequently throughout the post-curing process.
Q: Can I cure my resin prints using sunlight?
A: Yes, solar curing is an common method that uses natural sunlight as the UV light source. While this is the most accessible post-curing approach, it is significantly slower than using a UV lamp (hours vs minutes) and does not provide the same level of control and consistency.
Q: What is underwater curing?
Underwater curing consists of submerging printed models in water and then exposing them to UV light. This technique can double the speed up the curing process and help ensure more even UV exposure, since the water refracts the UV rays.
Q: What are the consequences of over-curing or under-curing a resin print?
A: Over-curing a 3D print makes the plastic material more porous, which leads to cracks and brittleness. Under-curing, which can be identified by a glossy finish or surface tackiness, can result in loss of details and shrinkage. Proper curing is crucial to achieving the desired mechanical properties and surface finish for your resin prints.
Q: Can I use a DIY curing setup instead of a commercial UV curing chamber?
A: Yes, a DIY curing setup can be a cost-effective and customizable alternative to a commercial UV curing chamber. It may not offer the same level of control and consistency as commercial UV chambers, but it is still possible to achieve good results.
References
[1] Štaffová M, Ondreáš F, Svatík J, Zbončák M, Jančář J, Lepcio P. 3D printing and post-curing optimization of photopolymerized structures: Basic concepts and effective tools for improved thermomechanical properties. Polymer Testing. 2022 Apr 1;108:107499.
[2] Britannica, 2023. “Isopropyl Alcohol” [Internet]. https://www.britannica.com/science/isopropyl-alcohol [Accessed October, 2023]
[3] Formlabs, 2022. “Isopropyl alcohol (IPA)” [Internet] https://support.formlabs.com/s/article/Isopropyl-Alcohol-IPA?language=en_US [Accessed May 3, 2022]
[4] Kathy Millatt, August 16, 2018. “Build your own easy UV Curing Chamber for Resin 3D Printers like the Anycubic Photon” [Internet] https://www.youtube.com/watch?v=H2_QF2fPuaE [Accessed May 3, 2022]
in this article
1. How Resin 3D Printing Works2. The Benefits of Post-Curing3. Preparing 3D Prints for Curing4. What are the different curing methods?5. Factors Affecting Curing Time6. How to identify a fully cured resin 3D print7. Why is there sticky resin after curing?8. Why are there fumes and vapors when I cure?9. Is it possible to over cure resin 3D prints?10. Conclusion11. Frequently Asked Questions (FAQs)12. References