Your Guide to Painting PLA 3D Prints
Painting is a great way to take your PLA 3D prints to the next level. Here’s what it takes to prepare your prints for painting and a guide to different painting techniques for 3D printed parts.

Last updated on 17 Apr, 2024. 12 minutes read
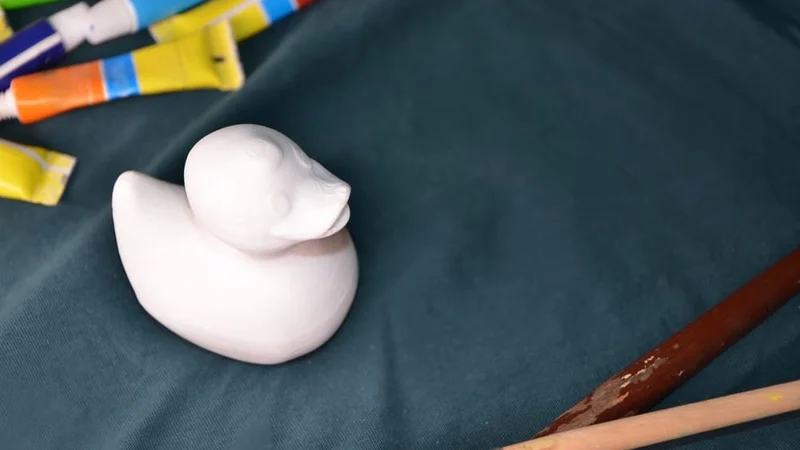
Painting PLA 3D prints requires some preparation, like support removal, sanding, and priming.
When it comes to painting PLA 3D prints, it’s not quite as simple as removing your part from the print bed and applying paint with a brush. Of course, you could do that, but the result would be sub-optimal and the paint might be inconsistent or chip off. For the best results painting PLA, there is a bit of prep work that needs to take place, including removing supports, smoothing the print surface, and priming. In this article, we provide a step-by-step beginner-friendly guide to painting PLA parts and explain why each post-processing step is important.
Recommended reading: PLA vs ABS: Which filament should one use?
Best paints for PLA
Before getting into how to prepare your 3D print for painting, let’s first talk about what types of paint work well with thermoplastics such as PLA. Fortunately, there are different options at your disposal, both in terms of paint type and application method.
As far as thermoplastic filaments go, PLA is one of the easiest to paint. With the right preparation and priming treatment, most types of paint will adhere to the material’s surface [5]. Acrylic paint, enamels, and lacquers can all be used to finish a PLA print. When it comes to application, you can choose to paint using brushes or using spray paint.
Despite the fact that many paints work with PLA, the most popular options for painting PLA are acrylics and enamels. Let’s take a look:
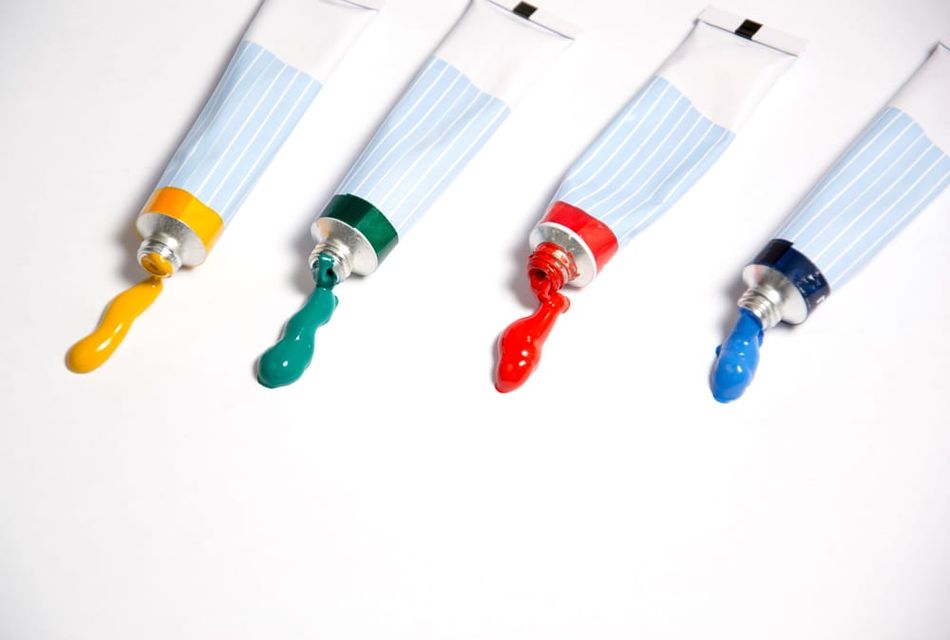
Acrylic Paint
Acrylic paint is a water-based product made up of pigment particles, acrylic polymer binder, and water. The three materials form an emulsion which can be easily applied to surfaces. When the water in the paint evaporates, the paint becomes dry and stable.[1] Acrylics are known for being easy-to-use and are quick drying. When wet, they can be cleaned easily with water, but become permanent when dry. Acrylics are also highly versatile and adhere well to a wide range of substrates, including thermoplastics like PLA. In terms of appearance, acrylic paints have a matte finish.
Enamel paint
Enamel paint is a category of solvent-based paints (oil-based paints) characterized by their glossy finish. Enamel paints are also known for creating a thin hard and stain-resistant shell, which can give products greater durability and weather resistance.[2] Like acrylics, enamel paints are sold as liquid (to be applied by brush) or in aerosol form (to be sprayed). Enamel paints typically dry slower than acrylic and can have a stronger smell due to the solvents in them.
Preparing to paint PLA 3D prints
Here are the steps you should follow to ensure that your PLA 3D print is ready for painting:
Step 1: Removing supports
Once you’ve removed your PLA part from the 3D printer, the first step is to remove any supports. (If your 3D model doesn't require any support structures and doesn’t need any cleanup, you can skip this step and head straight to step two.)
In the FDM 3D printing process, support structures ensure that certain design features—such as overhangs over 45 degrees or bridges—can be extruded successfully without succumbing to gravity. If supports are printed from the same material as your build (i.e. they are not soluble supports), they must be manually removed. In some cases, removal is as simple as breaking or cracking supports off by hand. This is easiest if the support structures are very low in density and are not well bonded to the surface of the PLA part.
If your part has features that are at risk of breaking, however, we recommend using tools to assist in support removal, such as a knife, a pair of needle-nose pliers, or flush cutters. The aim, ultimately, is to remove the supports and leave as little trace as possible on the part surface. Working gently is the best way to remove supports while minimizing the risk of damage to the final model. You can also heat up the blade of a knife, which will soften the PLA and make it easier to pry the support away from the part surface.
We should note that build orientation and part design can greatly influence the support removal process. If turning your 3D model on its side on the print bed will reduce the number of supports required, the removal process will be significantly faster. Similarly, if you can tweak a design to remove a particularly challenging overhang, you will cut back on the amount of supports needed in the first place. Different types of support, such as tree supports, can also be easier to remove.
Recommended reading: How to Remove Supports from 3D Prints
Step Two: Smoothing
Once supports have been successfully removed from your printed model, it’s time to smooth out the part’s surface. The goal of this step is to remove any blemishes or surface defects leftover from supports as well as to flatten any prominent layer lines created by the filament extrusion process.
Sandpaper is the most popular method for smoothing PLA 3D prints: it’s cheap, safe, and is highly effective at removing surface inconsistencies. The one downside is that it can be time consuming. There are a number of different sanding mediums, including sanding blocks, sandpaper, and nail files. Sanding blocks are great for smoothing out larger parts with broader surface area; nail files are handy for smoothing out small details on PLA prints; and conventional sandpaper is pretty much suitable for everything.
When smoothing a PLA 3D print, rub the sandpaper over the part’s surface in small circular motions—against the grain of the print. This will gradually remove the top layers of plastic and smooth any blemishes. If you have different types of sandpaper at your disposal, it is recommended to use a variety of different grit levels, starting with the coarsest sandpaper (lowest grit) and moving towards the finest sandpaper (highest grit). Many makers also finish the smoothing process with wet sandpaper. This is exactly what it sounds like: simply dampen a piece of fine-grit sandpaper and rub it over the 3D printed object. This step will not remove as much material as earlier sanding stages, but will result in a very smooth, polished surface.
If time is a concern, you can use an electric sander. In this case, follow the same steps (starting with a lower grit sandpaper and moving to finer grit), but be sure not to sand one area for too long, as it can create a heat buildup that can soften and melt the PLA.[3] It is also a good idea to equip yourself with gloves and a mask when sanding PLA [8], and to work on an easy-to-clean surface. When sanding is complete, clean your work area and the 3D print to remove any PLA particles.
It is also possible to use solvents to smooth the surface of a plastic 3D print, however there are important considerations when using PLA. For instance, acetone, a common chemical used to smooth ABS prints, does not work well with PLA. Other solvents can be used, though users should always take care to use proper personal protective equipment (PPE), ventilation, and fire safety precautions, users should always ensure adequate ventilation and wear proper PPE to keep solvent vapors below 10 % of the lower explosive limit (LEL)[7][11].. You can read more on that in the article linked below.
Recommended reading: PLA and Acetone? Here are Better Ways to Smooth PLA 3D Prints
Step Three: Priming
While your 3D print should feel smooth to the touch after sanding, applying a primer will take it to the next level, evening out any remaining roughness or texture and filling in gaps. Primer also functions as a base layer and promotes better adhesion between the PLA surface and the paint [6]. Priming is an essential step if you want your 3D print to have a professional painted finish.
There are many different primers on the market, but primer filler (such as Rust-Oleum) is among the most recommended for finishing FDM 3D prints. Primer filler is sold as a spray, making it easy to apply. It also typically has a gray coloring, which provides a good neutral base for applying color later on. You can find primer fillers at your local hardware store.
To use an aerosol primer filler, it is important to mix the contents of the primer inside the can. Shaking the can vigorously can cause unwanted bubbles, so swirl the can for a few minutes instead. If in doubt, follow the instructions on the primer filler can.
For the best coverage, suspend your 3D model in the air and spray the primer from a distance of 25-30 cm. Spray the primer in steady motions across the model, from left to right and up and down. This will ensure that the primer is being applied evenly and is covering the whole print surface. You also want to avoid spraying too much at one time, because this can cause pooling or dripping. Finally, be sure to work in a well ventilated space using the proper protective equipment.
When the first coat of primer is complete, let it dry. If needed, you can go back in with your sandpaper for any touch ups. Typically, PLA 3D prints require at least two coats of primer before painting gets underway. Before applying your first coat of paint, make sure the primer is completely dry (this can take about 40 minutes). Finally, be sure to work in a well-ventilated space using the proper protective equipment [7].
Painting 3D Prints
Once your print has been sanded and primed, it is ready to be painted. In this step, you have some choices to make. For starters, you have to choose the type of paint you want to work with. As we saw earlier, some of the best paints for PLA are acrylics and enamel paints. You also have to choose which application method you will use: spray painting or hand painting.
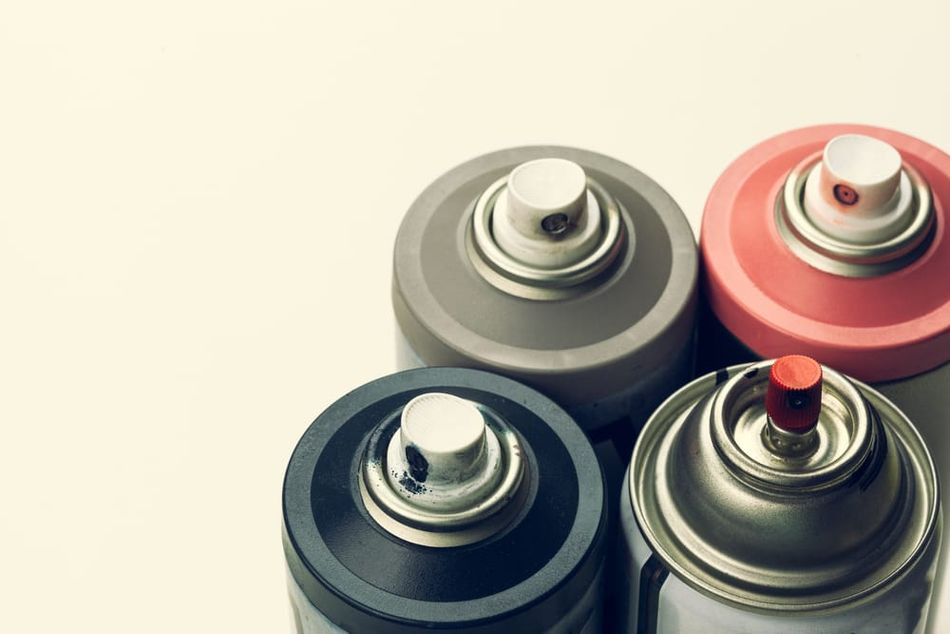
Spray Painting
Spray painting is a good option for achieving a uniform, smooth surface finish. It is also good for parts that require tighter tolerances or good dimensional accuracy because it adds color in thin layers with less buildup than hand painting. Be sure to follow instructions on the spray paint you are using (i.e. in terms of shaking the can and storage).
For the best results spray painting your 3D print, hang your print using a thin wire in a well ventilated area [7]. This will enable you to spray the entire print’s surface without missing any spots. Similar to applying the primer, move the spray can continuously, back and forth and up and down, with wide strokes that cover the entirety of the print. This will ensure that the paint is applied evenly and to the entire print.[4]
Once the first coat is complete, wait 15 to 20 minutes before applying a second coat. Repeat this until the desired saturation and finish is achieved. At this point, leave the painted 3D print for at least 24 hours before applying any varnish or polishing coatings. And don’t forget to wear protective equipment, like gloves, goggles, and mask when spray painting [7].
Hand Painting
Hand painting is usually the best choice for 3D prints that require fine details, such as toys or miniature models. Use good quality brushes and paint to coat your 3D print in the colors of your choosing. When the base layers of paint are dry (it might take several even coats to get the opacity and consistency you want), go in with finer paint brushes to add detail. If possible, start by using the lightest colors and progress to using the darkest colors.
If you are painting using brushes, it is best to work with acrylic paint. This type of paint is easy to work with and is among the most affordable. Note that cheaper acrylic paints might not have the best coverage and may require more coats than a better quality paint.
Clear Coat
When you are happy with the appearance of the color paint, there is the optional step of adding a clear coat to your print. The clear coat is a transparent layer that protects the surface of the paint and can modify the finish. For example, if you have painted your print with matte acrylics, you can apply a glossy clear coat for a shinier finish. The clear coat can also be applied by brush or sprayed using the same techniques we discussed for painting.
Masking and Detailing
Masking and detailing techniques are essential for creating clean lines, patterns, and gradients, as well as adding small accents to enhance the overall appearance of painted PLA pieces. Masking techniques allow you to create crisp, clean lines and intricate patterns on your PLA surface. Masking tape is an easy-to-work-with material that can be used for masking PLA prints. When using masking tape, apply it firmly to ensure a tight seal and prevent paint bleed. For complex patterns or designs, use multiple layers of tape to build up the desired shape. When removing the tape, do so carefully to avoid peeling off the paint underneath. To create gradients, try using a reverse masking or a faded masking method, which involves blending colors gradually by overlapping masking tape or using a spray gun with adjustable pressure.
Adding small details and accents can greatly enhance the visual interest and realism of your painted PLA pieces. Fine brushes are essential for this task, so invest in high-quality, fine-tipped brushes and practice your brush control and steadiness to achieve precise lines and shapes. Stencils are another excellent tool for adding patterns and details. You can create custom stencils using a cutting machine or purchase pre-made stencils that suit your design. Secure the stencil firmly to the PLA surface and apply paint using a stippling motion, then remove the stencil carefully to reveal the pattern.
For complex designs or intricate areas that require protection during painting, liquid masking fluid is a valuable tool. Apply the liquid mask using a brush or a precision applicator, allowing it to dry completely before painting over it. Once the paint has dried, remove the liquid mask by gently rubbing it off, revealing the protected area underneath. This technique is particularly useful for creating complex patterns, masking off small details, or preserving areas of the PLA surface that need to remain unpainted.
Conclusion
Painting is a reliable way to make your 3D prints look more professional, whether you are making a product design prototype, a decoration for your home, or a functional part. Achieving a high-quality paint job, however, takes some time and effort. Here are some of our key takeaways for painting PLA 3D prints:
Acrylic and enamel paints are the two best options for painting PLA 3D prints.
Before painting, it is essential to remove supports and smooth the print’s surface using sandpaper.
Priming ensures that the print surface is sealed and smooth. It also helps the final coats of paint to adhere to the plastic material.
For smooth uniform coats of paint, spray paint is recommended. Hand painting is best for adding small details.
Hang or mount your 3D print to paint every angle and to ensure even coats. This will also help the paint to dry uniformly without any blotches.
When post-processing and painting PLA, make sure to work in a well-ventilated space and to use the proper protective equipment, such as mask and gloves.
Frequently Asked Questions (FAQs)
Q: What types of paint are compatible with PLA material?
A: Most paints, including acrylic paints, enamels, and lacquers, can be used to coat PLA 3D prints. Typically, acrylic paints or enamels are the most common and easy to use.
Q: Do I have to sand my 3D print before painting?
A: It is a good idea to prepare your PLA 3D print for painting by first sanding the part’s surface. This will help to remove any traces of supports and layer lines. To smooth the surface of the 3D print, simply rub the sandpaper in small circular motions against the grain of the print.
Q: Do I need to prime my 3D print before painting?
A: While priming isn’t an essential step, applying a layer of primer after sanding and before painting will improve the overall quality of the finished product. A layer or two of primer will smooth out any surface roughness and encourage better adhesion between the plastic surface of the print and the coat of paint.
Q: Can I spray paint a PLA 3D print?
A: Yes, spray painting is an effective way to coat a 3D print in a thin layer of paint. It’s a good idea to hang the 3D print before spraying to cover as much of the surface area as possible. When using spray painting, move the spray can continuously in all directions and with wide strokes to ensure that the paint is applied evenly and to the entire print.
References
[1] What is Acrylic Paint? [Internet]. Liquitex, 2024. Available from: https://www.liquitex.com/us/knowledge/what-is-acrylic-paint/
[2] Lewis, Charlene. Enamel vs Acrylic – The Difference Between Acrylic and Enamel Paint [Internet]. Acrylgiessen, February 2021. Available from: https://acrylgiessen.com/en/enamel-vs-acrylic/
[3] MakerBot. MakerBot Learning - Post-Processing: Sanding [Internet]. Youtube, September 20, 2016. Available from: https://www.youtube.com/watch?v=0KU0lgoC42Q
[4] MakerBot. MakerBot Learning - Post-Processing: Painting [Internet]. Youtube, September 20, 2016. Available from: https://www.youtube.com/watch?v=Jz_s7sJOlMU
[5] Žigon, J.; Kariž, M.; Pavlič, M. Surface Finishing of 3D-Printed Polymers with Selected Coatings. Polymers 2020, 12 (12), 2797. https://doi.org/10.3390/polym12122797
[6] Berg, A. Comparing the Efficacy of Four Methods of Preparing 3D-Printed Polymer Surfaces to Take Paint and Their Effect on an Acrylic Paint Layer. Meddelelser om Konservering 2021, 1, 81-94. (open-access PDF)
[7] **OSHA.** “Ventilation – Spray Finishing Operations,” 29 CFR 1910.94. Available from: https://www.osha.gov/laws-regs/regulations/standardnumber/1910/1910.94 :contentReference[oaicite:0]{index=0}
[8] **3M / NIOSH.** *Respirator Selection Guide*, 2025 rev., p. 5. Available from: https://multimedia.3m.com/mws/media/639110O/3m-respirator-selection-guide.pdf :contentReference[oaicite:1]{index=1}
[9] **NIOSH.** “Table of IDLH Values – Acetone = 2 500 ppm (10 % LEL),” 2024 update. Available from: https://www.cdc.gov/niosh/idlh/intridl4.html :contentReference[oaicite:2]{index=2}
[10] **Krylon.** *Fusion All-In-One® Safety Data Sheet*, Version 27, 29 Mar 2025. Available from: https://paintdocs.com/docs/webPDF.jsp?SITEID=KRYLON&cntry=US&doctype=SDS&lang=2&prodno=724504027997 :contentReference[oaicite:3]{index=3}
[11] **OSHA.** “Painting – Solvent Vapors Not to Exceed 10 % LEL,” 29 CFR 1915.35(b)(2). Available from: https://www.osha.gov/laws-regs/regulations/standardnumber/1915/1915.35 :contentReference[oaicite:4]{index=4}
Listen to this article