What is Slicing in 3D Printing? A Guide for Engineers
Slicing turns a digital 3D model into machine-readable instructions for your 3D printer. This article looks at how 3D printing slicers work and how to use them.

30 Jun, 2025. 11 minutes read
In the fast-moving world of additive manufacturing, one process remains constant as the gateway between digital design and physical 3D printing: slicing. This important process involves sophisticated algorithms that can make or break your 3D printing success.
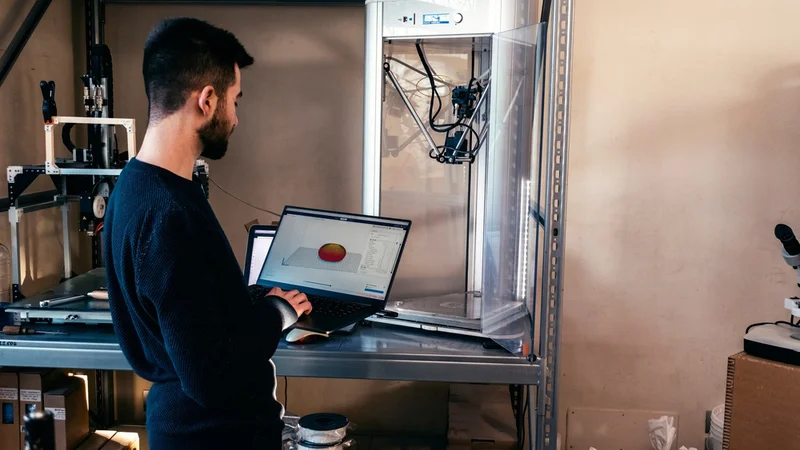
So what is slicing in 3D printing? At its core, this process involves transforming a digital 3D model into machine-readable instructions for the 3D printer, and there are hundreds of variables that users of slicing software can master to achieve better prints. For engineers of all stripes, understanding slicing in 3D printing is essential to achieving conistent printing outcomes.
This technical guide looks at the theoretical foundations and practical implementations of slicing technology, providing you with the knowledge needed to optimize your additive manufacturing workflows.
The Fundamentals of Slicing
What is Slicing in 3D Printing, Exactly?
Slicing in 3D printing is the computational process that converts three-dimensional CAD models into a series of two-dimensional layers that a 3D printer can understand and execute. Think of it as translating a complete 3D blueprint into step-by-step manufacturing instructions, similar to how a CNC machine requires toolpath programming, but with added complexity for material deposition.
At its core, slicing software performs several critical functions:
Analyzes the 3D model geometry
Allows the user to adjust orientation, support structures, and various printing parameters
Calculates layer-by-layer toolpaths
Generates machine-specific G-code instructions
The slicing process directly impacts every aspect of your print: dimensional accuracy, surface finish, mechanical properties, and production time.
How Slicers Work
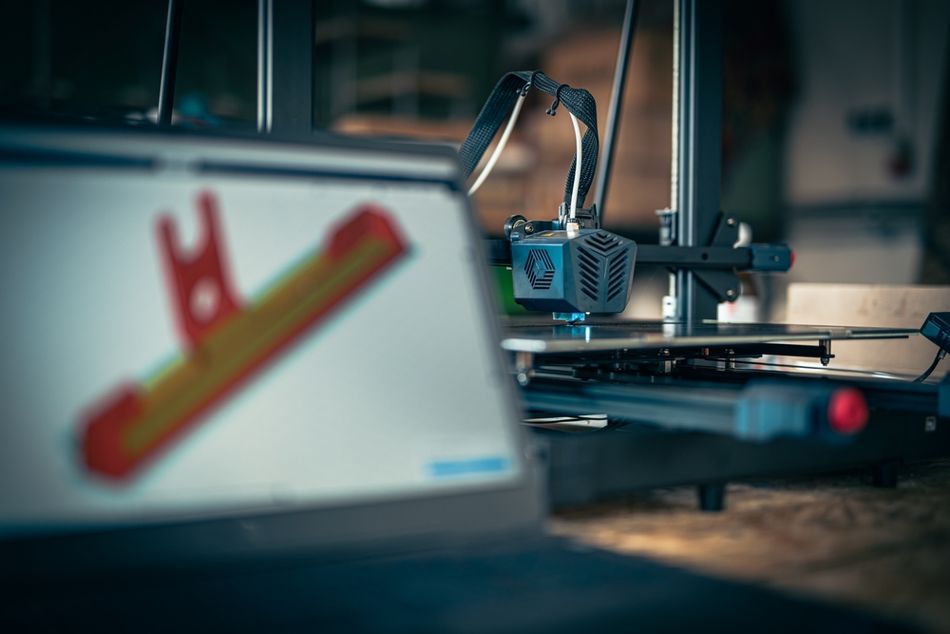
Before a 3D model can be printed, it must be converted into instructions the printer understands. This is the job of a 3D slicer, which translates a digital model—usually in STL or 3MF format—into G-code, a text-based set of commands that tells the printer exactly how to build the object layer by layer.
For each layer at a given height (z), the slicer:
Identifies which triangles in the model intersect the current slicing plane (an STL file is made up of interconnected triangles)
Calculates intersection points to create 2D outlines (called perimeters or shells)
Generates paths to fill the interior with infill, using patterns like grid or gyroid
Plans travel moves, retractions, and support structures as needed
Outputs G-code commands specifying exact coordinates, movement speed, extrusion amount, and temperatures
The resulting G-code file is a complete set of instructions that the printer follows line by line—moving the printhead, adjusting the extruder, and building the object from the bottom up. In essence, the slicer is the bridge between a static 3D model and a dynamic manufacturing process.
The Complete Slicing Workflow
Step 1: Model Preparation and Import
The slicing process starts with a 3D model exported from 3D modeling or CAD software. While STL remains the industry standard, modern slicers increasingly support advanced formats:
STL: Tessellated surface geometry (most common)
OBJ: Includes texture and color information
3MF: Manufacturing-aware format with embedded metadata[1]
AMF: Advanced features including curved triangles and material gradients
Engineers should ensure models are manifold (watertight), properly scaled, and free from geometric errors. Tools like Netfabb or Meshmixer can repair common issues such as:
Non-manifold edges
Intersecting triangles
Reversed normals
Zero-thickness walls
Recommended reading: Understanding 3D Printer File Formats (STL, OBJ, 3MF, and more): What Files do 3D Printers Use?
Step 2: Part Orientation
3D print slicing software lets the user choose their preferred orientation of the part on the print bed. Model orientation impacts print quality, support requirements, and mechanical properties.[2] Consider these factors:
Minimize supports by placing flat surfaces directly on the build surface and rotating the model so that overhangs face upward at angles less than 45°.
Improve adhesion by ensuring a large, flat surface makes contact with the build surface. This increases stability and helps prevent warping.
Enhance strength by aligning the part so that the layers run perpendicular to expected stress directions—layer lines are typically the weakest link.
Reduce layer lines on cosmetic surfaces by angling smooth or curved faces away from the Z-axis, which helps avoid visible stepping.
Step 3: Support Structure Generation
If your model includes overhangs, bridges, or complex geometry, support structures are often necessary to ensure accurate printing. Most slicers, including Cura, PrusaSlicer, and Bambu Studio, allow you to control support generation through adjustable settings. Here’s what you should do during this step:
Enable support generation in the slicer’s support settings menu. This typically involves toggling a setting like “Generate Support” or “Supports: On.”
Choose support placement:
Touching build plate generates supports only from the print bed.
Everywhere allows supports to be built on other parts of the model, useful for internal or mid-air features.
Adjust the overhang angle threshold to control where supports are applied. A typical default is 45°—meaning any surface steeper than this angle will be supported. Increasing the angle reduces the amount of support used.
Select a support pattern based on your needs:
Grid and lines offer strong, regular support but may be harder to remove.
Tree supports (available in some slicers) are more material-efficient and easier to detach, especially for curved or organic shapes. They are more widely used on resin printers.
After adjusting support settings, use your slicer’s preview mode to inspect where supports are generated. Most slicers also include manual tools to block or paint support regions—useful for fine-tuning difficult areas and minimizing cleanup.
Step 4: Slicing Parameters Configuration
Once the model is oriented and supported, users can set the slicing parameters that control print quality, strength, speed, and material use. Most slicers provide ready-made print profiles optimized for specific printers and materials. These are a great starting point, especially for beginners.
However, users can (and often should) adjust key parameters based on their specific needs:
Layer height: Lower values (e.g. 0.1 mm) give smoother surfaces and finer detail but take longer to print. Larger heights (e.g. 0.2–0.3 mm) print faster but cannot achieve such fine details.
Wall/perimeter settings: Increasing wall count improves strength and surface finish but adds to printing time. Typical values range from 2–4 walls.
Infill density and pattern: Adjust infill percentage (e.g. 15% for light use, 50%+ for structural parts) and choose patterns like grid, gyroid, or lines depending on strength or speed needs.
Print speed and temperature: Most slicers auto-fill these based on material choice, but users can tweak them to reduce stringing or improve surface quality.
Retraction settings: Important for reducing blobs and stringing. Profiles usually handle this, but tuning may be needed for flexible or specialty filaments.
Once satisfied with the settings, users slice the model to generate toolpaths. Always inspect the layer-by-layer preview to catch thin features, gaps, or unexpected print behavior before exporting the file.
Recommended reading: Cura Infill Patterns: What They Are and When to Use Them
Step 5: Export and Validation
Finally, users export the G-code or printer-specific file. Before printing, they should:
Review the layer preview for anomalies (missing layers, thin walls, etc.)
Check estimated print time and material use
Save the file to SD card, USB, or send directly over network
Once the file is loaded, the user typically starts the print from the printer’s onboard interface or through connected slicing software. Some printers also support remote monitoring or print initiation via cloud services. Optional validation steps, such as print simulations or printability checks, are available in advanced slicers to catch potential errors before committing to a physical print.
Advanced Slicing Features
Beyond the basic slicing workflow, modern slicers offer a range of advanced features that give experienced users more control over print quality, strength, and efficiency. These tools are especially useful for fine-tuning complex prints, optimizing for specific applications, or working with unusual materials or hardware setups.
Variable Layer Height: Instead of using a fixed layer height, slicers can automatically vary it—using thicker layers in low-detail areas to speed up prints and thinner layers in detailed regions for smoother surfaces. This balances speed and quality in a single print and can lead to improved mechanical properties.[3]
Custom Supports: Many slicers allow users to manually place, block, or paint support regions. This gives precise control over support placement, making removal easier and reducing scarring on visible surfaces.
Modifier Meshes: Some slicers, like PrusaSlicer, let users add “modifier meshes” to apply different settings (e.g. infill, speed, temperature) to specific parts of a model. This is useful for strengthening certain zones, reducing weight, or applying fine detail only where needed.
Sequential Printing: In multi-object prints, slicers can print one object at a time rather than all layers at once. This reduces travel moves and stringing but requires careful spacing to avoid collisions.
Bridge Settings: Advanced slicers offer control over bridge speed, cooling, and extrusion rate to improve unsupported horizontal spans.
Top Slicing Software in 2025
As of 2025, the slicing software landscape remains diverse and fairly competitive, with established slicers like Cura and PrusaSlicer continuing to lead through regular updates and community support. Recent years have seen new slicers from hardware manufacturers like Bambu Lab, whose Bambu Studio integrates AI features tailored to their printers. Meanwhile, some proprietary slicers have increased pricing or shifted toward subscription models, pushing more users toward open-source alternatives.
The table below shows some of the more common slicers available to users, along with their key advantages and disadvantages.
Slicer | Maker | License | Pros | Cons | Cost | Best for |
Cura | Ultimaker | Open Source (LGPL) | User-friendly, large community, frequent updates, supports many printers | Limited advanced features for experts | Free | Beginners to intermediate |
PrusaSlicer | Prusa Research | Open Source (GPL) | Powerful features, modifier meshes, great for Prusa printers | Slightly steeper learning curve | Free | Intermediate to advanced users |
SuperSlicer | Community | Open Source (GPL) | Calibration tools, advanced infill, ironing, arc weaving | Experimental features can be unstable | Free | Power users, experimental |
Simplify3D | Simplify3D | Proprietary | Process-based workflow, excellent support generation, variable settings | Paid, no free trial | $199 per user (one-time) | Professional, production |
Bambu Studio | Bambu Lab | Proprietary | AI-assisted features, optimized for Bambu printers | Limited to Bambu hardware | Free | Bambu printer users |
ideaMaker | Raise3D | Proprietary | Cloud functionality, remote monitoring, advanced supports | Best with Raise3D printers | Free | Raise3D ecosystem, professionals |
Netfabb | Autodesk | Subscription | Mesh repair, lattice generation, simulation, build optimization | Subscription cost, complex interface | Subscription | Industrial, metal printing |
Slic3r | Open Source | GPL | Flexible, advanced features | Interface feels dated | Free | Advanced users |
MatterControl | MatterHackers | Open Source | All-in-one design and slicing | Less polished slicing | Free | Beginners, hobbyists |
ChiTuBox | ChiTuBox Inc. | Proprietary | Specialized for resin printers, hollowing, drainage, supports | Focused on SLA/DLP/LCD | Free/basic, paid options | Resin printer users |
IceSL | IceSL Team | Open Source | Shader-based slicing, procedural modeling | Steeper learning curve | Free | Research, experimental |
FullControl | Community | Open Source | Python-based parametric slicing, full toolpath control | Requires programming knowledge | Free | Research and development |
Creality Print | Creality | Proprietary | Optimized for Creality printers, remote control, cloud integration | Limited to Creality hardware | Free | Creality printer users |
Integration with Digital Design Workflows
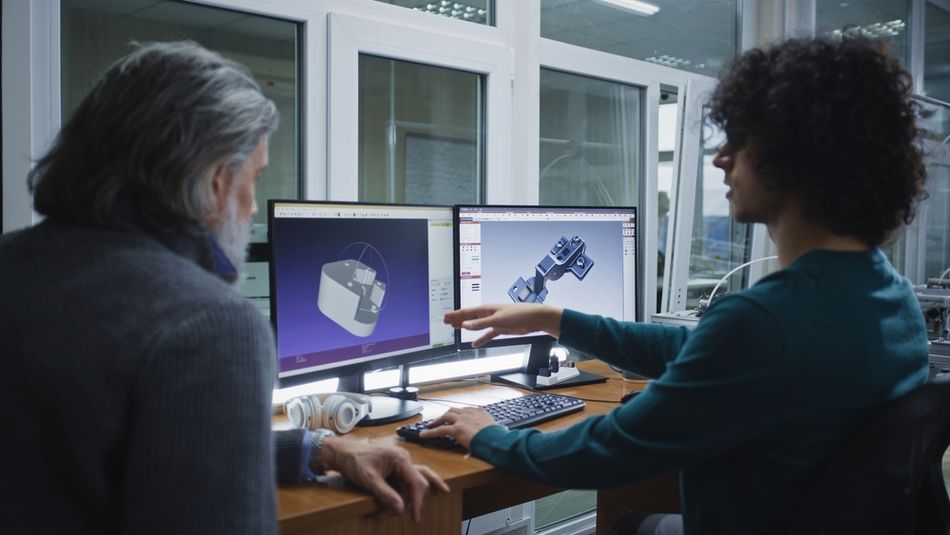
Some modern engineering workflows aim to connect CAD design directly with slicing software to save time and reduce errors. Many CAD programs like SolidWorks, Fusion 360, and Rhino now offer plugins or built-in tools that streamline the export process. Some slicing tools can also adjust print settings automatically based on model metadata, chosen material, or previous print data—making slicing smarter and more consistent.
Version control for slicing profiles is becoming more common in professional environments. Teams can now track changes to print settings, test updates automatically, and roll back to earlier versions if issues arise. This improves print reliability and makes collaboration easier across departments.
Cloud-based slicing services are also on the rise. They offer benefits such as:
Faster processing for large or complex models
Centralized profile management for team-wide consistency
Real-time collaboration across users or departments
Machine learning for print quality optimization
Enhanced security, including encryption, on-premise deployment, and audit trails
Recommended reading: How to Make a 3D Model for Printing
Troubleshooting Common Slicing Issues
Issue | Possible Cause | Fix or Recommendation |
Missing walls or gaps | Wall thickness < nozzle width; thin features ignored | Increase wall/perimeter count or enable “print thin walls” option |
Model not sliced or missing layers | Non-manifold geometry; holes or zero-thickness surfaces | Repair model using Netfabb, Meshmixer, or slicer’s built-in repair |
Support not generated | Overhang angle threshold too high; support turned off | Lower overhang angle setting; enable supports globally or for specific areas |
Excessive or hard-to-remove support | Support density too high; poor pattern choice | Reduce support density; switch to tree or line supports |
Hollow print or missing infill | Infill density set to 0%; layer preview not updated | Increase infill percentage; re-slice and preview again |
Layer seams or random zits | Inconsistent retraction or seam setting | Use “aligned seam” or “hide seam” options; enable combing/retraction tuning |
Long slicing times or software lag | Model has too many polygons; insufficient RAM | Simplify mesh before import; reduce STL resolution; close other apps |
Artifacts in preview only | Preview visualization glitch | Confirm by exporting and re-opening G-code; preview on printer if possible |
Tiny islands or floating parts | Disconnected geometry in model | Use “remove all disconnected parts” or manually delete stray elements |
Slicers for Different 3D Printing Technologies
Slicing differs depending on the 3D printing process, so the right slicer software depends on the type of hardware being used. Whether you’re using FDM, resin, or powder-based technologies, your choice of 3D slicer affects everything from the first layer to final part quality. Different technologies may also require different file formats.
Here’s how slicing varies across technologies:
FDM/FFF: The most common 3D printing process. Printer slicers like Cura or PrusaSlicer generate detailed G-code for nozzle movement, extrusion, and cooling. Users focus on parameters like layer height, infill, andfirst layer adhesion to ensure strength and accuracy.
Resin printing (SLA, DLP, LCD): Stereolithography and other photopolymerization-based methods use light to cure liquid resin. Slicer software like ChiTuBox outputs images and lift instructions. Supports, hollowing, and drainage become critical.
SLS and metal printing: Powder-based processes rely on industrial slicers that handle 3D object orientation, heat management, and dense packing of model files in the build area.
Conclusion
Slicing is a critical step in the 3D printing process, transforming digital models into precise machine instructions. Far beyond basic preprocessing, today’s slicer software enables fine control over strength, speed, surface quality, and material use. For engineers working in design, prototyping, or electronics, mastering a3D slicer unlocks greater efficiency and reliability. With emerging features like AI-driven settings, multi-axis support, and cloud-based slicing, thebest slicer for your workflow is one that balances usability with deep customization. In modern additive manufacturing, intelligent slicing—not just hardware—defines the success of your printed parts.
Frequently Asked Questions
Q: Are 3D printer slicers free?
A: Yes, many popular slicers like Ultimaker Cura, PrusaSlicer, and SuperSlicer are free and open source. However, some commercial options like Simplify3D or Netfabb require a paid license.
Q: What's the difference between STL and newer formats like 3MF for slicing?
A: STL files contain only basic geometric data (triangulated surfaces), while 3MF includes manufacturing metadata like print settings, materials, colors, and assembly information. 3MF files can store multiple objects, their relative positions, and even thumbnail previews, making them superior for production workflows. However, STL remains widely compatible across all slicing software.
Q: How do I determine the optimal layer height for my prints?
A: Optimal layer height depends on your priorities. For detailed features, use 0.1–0.15 mm layers. For faster prints with acceptable quality, use 0.2–0.25 mm. For rapid prototypes, 0.3 mm works well. Remember that layer height should not exceed 80% of your nozzle diameter, and for best results, choose heights that are multiples of your Z-axis motor's full step distance (typically 0.04 mm).
Q: How much does slicing software impact print quality versus hardware?
A: Slicing can improve print quality via intelligent toolpath planning, temperature management, and flow control. However, mechanical precision, quality components, and proper calibration are fundamental requirements for which software cannot compensate.
Q: What is the difference between 3D print slicing and CNC machine toolpath generation?
A: 3D print slicing builds the part additively, layer by layer, with extrusion paths optimized for support, strength, and print speed. CNC toolpaths, by contrast, are subtractive—they guide cutting tools to remove material from a solid block, requiring strategies for tool clearance, chip removal, and cutting forces.
References
[1] Rossel J, Mladenov V, Somorovsky J. Security Analysis of the 3MF Data Format. InProceedings of the 26th International Symposium on Research in Attacks, Intrusions and Defenses 2023 Oct 16 (pp. 179-194).
[2] Doshi M, Mahale A, Singh SK, Deshmukh S. Printing parameters and materials affecting mechanical properties of FDM-3D printed Parts: Perspective and prospects. Materials Today: Proceedings. 2022 Jan 1;50:2269-75.
[3] Pelzer L, Hopmann C. Additive manufacturing of non-planar layers with variable layer height. Additive Manufacturing. 2021 Jan 1;37:101697.
in this article
1. The Fundamentals of Slicing2. The Complete Slicing Workflow3. Advanced Slicing Features4. Top Slicing Software in 20255. Integration with Digital Design Workflows6. Troubleshooting Common Slicing Issues7. Slicers for Different 3D Printing Technologies8. Conclusion9. Frequently Asked Questions10. References