The Complete Guide to 3D Printing Post Processing
3D printing post-processing techniques turn rough and incomplete models into functional, aesthetic parts that are ready for their end-use. This article looks at the main techniques available for both polymer and metal AM.

Last updated on 22 Jul, 2025. 17 minutes read
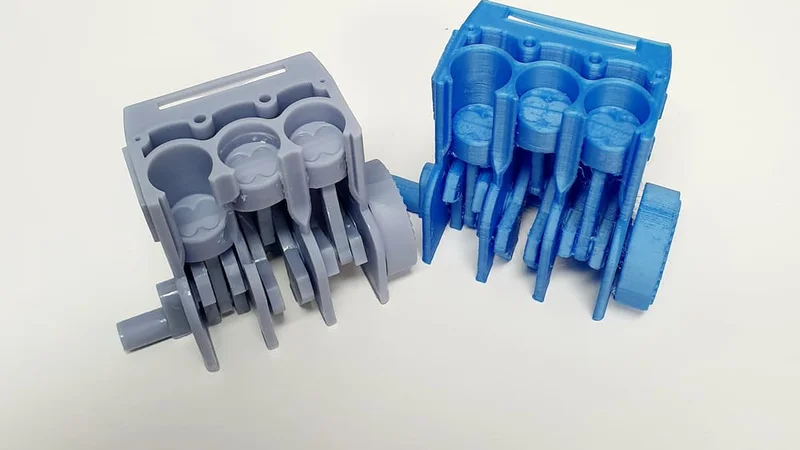
3D printing post-processing turns rough parts into usable ones
3D printing has revolutionized the world of manufacturing, enabling the creation of complex and customized parts with unprecedented speed and precision. However, the output from a 3D printer is often just the start of the process, since many parts can come off the printer with ridges from the layer-by-layer build, rough textures, and support structures still attached. This is where 3D printing post processing comes in.
In this article, we’ll explore the importance of post processing in 3D printing workflows and cover many of the commonly used post-processing techniques that enable makers, designers, and engineers to turn prints into functional and professional-looking parts.
The Importance of Post-Processing in 3D Printing
3D printing post-processing is an essential aspect of the 3D printing process, as it not only enhances the appearance of printed parts, but can also improve their quality and mechanical properties.
Here are some of the reasons that post processing is a vital part of additive manufacturing:
Enhances the appearance of printed parts | The layer-by-layer nature of additive manufacturing often produces visible layer lines on part surfaces. These ridges can make a part look rough or unfinished. Techniques like sanding and polishing can smooth out layer lines, giving a uniform finish. |
Improves surface finish | In some cases, surface roughness isn’t just an appearance issue, it can affect how the part is used. A part with a rough surface can cause friction or wear when in contact with other components. Processes like sanding and vapor smoothing can therefore improve the functionality of printed parts. |
Reinforces mechanical properties | Some post-process treatments can boost a part’s strength, durability, or heat resistance. For instance, annealing can relieve internal stresses and increase layer adhesion. Other techniques like resin infiltration can reinforce parts by filling micro-voids, and electroplating a plastic print with metal can add hardness and load-bearing capacity. |
Increases dimensional accuracy | Despite careful printing, you may find critical dimensions slightly off due to material shrinkage or printer limitations. Post processing provides a chance to fine-tune dimensions. Machining or sanding can be used to achieve tight tolerances, while small drilled holes, threads, or other features can be added after printing to achieve precision that printing alone could not. |
Supports standards compliance | In many industries, a printed part must meet specific quality standards before it can be put to use. Post processing can help ensure that printed parts meet and even exceed these standards when it comes to surface finish, mechanical properties, heat resistance, and more. For instance, manufacturers typically use either the ASME Y14.36 standard or the ISO 21920-1 standard for specifying surface texture.[1] |
Extends product lifespan and durability | Post-processing can improve a part’s durability and resistance to things like chemicals, temperature, and more. For example, painting or clear coating can add UV resistance, moisture protection, and wear resistance to plastic parts. |
Post-Processing for Polymer 3D Printing
In this section, we will explore various popular post-processing techniques that are applicable to a range of polymer 3D printing technologies. These methods can significantly improve the appearance, functionality, and durability of 3D printed parts, providing the desired characteristics for various applications.
Of course, different polymer 3D printing technologies have distinct characteristics that require specific post-processing techniques. In this section, we’ll cover key finishing techniques based on the type of technology: FDM, vat photopolymerization, and SLS.
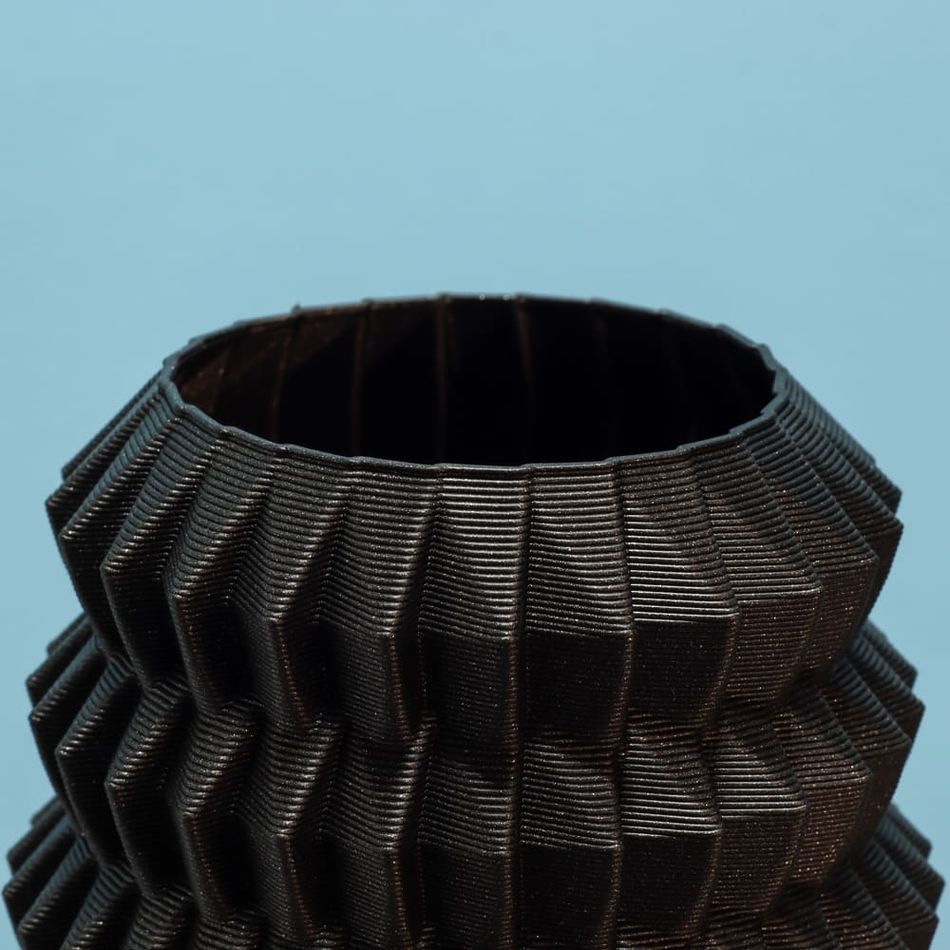
Post-processing techniques for Fused Deposition Modeling (FDM)
Fused Deposition Modeling (FDM) is a widely used 3D printing technology that creates parts by depositing thermoplastic filament layer by layer. Due to the nature of this printing approach, FDM parts often exhibit layer lines and support marks that require post-processing to improve their appearance and mechanical properties.
Support removal
Support removal is a critical step in the post-processing of FDM prints, as supports are often necessary for printing overhangs and complex geometries. The process can be manual or involve the use of specialized tools like pliers, tweezers, or flush cutters. In some cases, soluble supports (such as those made from PVA or HIPS) can be dissolved in water or a chemical bath, which helps avoid damage to delicate features. Care must be taken during removal to avoid snapping or scratching the printed part. Further post-processing can improve surface quality in areas previously supported.
Sanding
Sanding is a fundamental post-processing technique for FDM printed parts. By using progressively finer levels of grit sandpaper, you can reduce the visibility of layer lines and smooth out support marks on the part's surface. This method is time-consuming and labor-intensive but can significantly improve the surface quality of FDM printed parts.
Recommended reading: Surface Roughness in 3D Printing
Priming and painting
Priming and painting is another technique commonly used to enhance the appearance of FDM printed parts. After sanding, a primer can be applied to the part to fill in small imperfections and create a uniform surface for painting. Once the primer has dried, the part can be painted using acrylic, enamel, or spray paint, depending on the desired finish and appearance.
Chemical smoothing
Chemical smoothing is a common post-processing technique that can be employed to improve the surface finish of FDM printed parts, particularly those made from ABS plastic. This method involves exposing the part to a chemical — acetone, in the case of ABS — which partially dissolves the surface layer of the plastic, smoothing out layer lines and surface imperfections. Chemicals can either be applied in liquid form or in a gaseous state, as is the case in vapor smoothing. It is essential to use proper safety precautions and ventilation when working with chemicals like acetone.
Recommended reading: ABS Smoothing: Acetone Vapor Baths & Other Ways to Remove Layer Lines
Annealing
Annealing is a post-processing technique that involves the controlled heating and cooling of a 3D printed part to improve its mechanical properties, dimensional stability, and overall performance. This process is particularly useful for parts made from thermoplastic materials, such as FDM-printed components. One of the primary benefits of annealing is the relief of internal stresses within the printed part, since heating the part to a temperature below its glass transition temperature allows for this release. In 2021, researchers studying the effects of annealing on 3D printed PLA found that the mechanical properties of the parts could be improved by 4.88 % to 10.26 % using annealing temperatures up to 110 °C.[3]
Post-processing techniques for Vat Photopolymerization
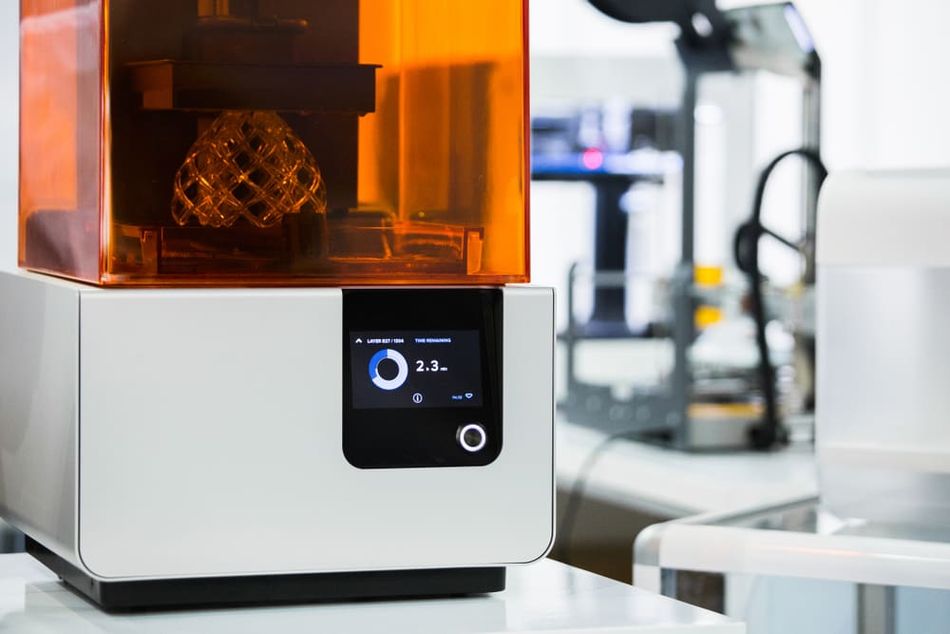
Vat photopolymerization technologies, including stereolithography (SLA) and digital light processing (DLP), are 3D printing processes that use UV light to selectively cure liquid photopolymer resins layer by layer. Cured resin printed parts often have a higher resolution and smoother surface finish compared to FDM printed parts, however, they still require post-processing to achieve the desired appearance and mechanical properties.
Washing
One of the first post-processing steps for SLA and DLP 3D printed parts is washing. Immediately after printing, parts remain coated in a layer of uncured resin, and this excess material needs to be removed to ensure a clean surface finish. Typically, the parts are submerged in a solvent, such as isopropyl alcohol (IPA) or a proprietary cleaning solution, to dissolve and remove the residual resin. Proper safety precautions and personal protective equipment (PPE) should be used when handling chemicals during this process.
Post-curing
After washing, SLA printed parts may require post-curing, which involves exposing the part to UV light to fully cure the remaining resin and ensure optimal mechanical properties. Post-curing can be performed using a specialized curing chamber or by placing the part under direct sunlight. The duration and intensity of UV exposure should be adjusted according to the specific resin used and the end-use of the final part.
Support removal
Support removal is another important post-processing step for SLA and DLP printed parts. SLA printers produce supports made from the same material as the printed part, and removing them requires careful cutting or breaking to avoid damaging the part. Once the supports have been removed, any remaining support marks can be sanded or filed down to ensure a clean surface finish.
Post-processing techniques for Selective Laser Sintering (SLS)
Selective Laser Sintering (SLS) is a 3D printing technology that uses a laser to selectively fuse particles of polymer powder layer by layer. SLS printed parts exhibit high strength and durability, making them suitable for functional applications. However, SLS parts typically have a porous and rough surface finish that necessitates post-processing. In this section, we will discuss several post-processing techniques specifically designed for SLS printed parts.
Part cleaning
One of the initial post-processing steps for SLS printed parts is powder removal. After printing, the parts are surrounded by unsintered powder, which must be removed. This process typically involves brushing or blowing away the excess powder using compressed air. It is crucial to wear appropriate PPE and use proper ventilation during this step, as the fine powder can be hazardous if inhaled.
Media blasting
Media blasting is a common post-processing method for SLS parts used to remove excess powder and improve surface finish. It involves directing a stream of abrasive material, such as glass beads or plastic media, at the part’s surface. This process smooths rough textures, enhances appearance, and prepares the part for dyeing or coating.
Media tumbling
Media tumbling is a post-processing technique where parts are placed in a rotating or vibrating chamber filled with abrasive media. For 3D printed parts, especially from SLS, tumbling smooths surfaces, removes powder residue, and enhances appearance. It’s effective for batch processing, offering uniform surface finishing with minimal manual labor, though fine details may be softened.
Dyeing
Dyeing is a common post-processing technique for SLS printed parts, especially those made from nylon. Due to the porous nature of SLS parts, they can easily absorb dyes, allowing for a wide range of color options.[2] The dyeing process involves submerging the part in a heated dye solution for a specific duration, which depends on the desired color intensity. After dyeing, the part is rinsed and dried to remove any residual dye.
Infiltration
Infiltration is another post-processing method used to improve the mechanical properties and surface finish of SLS printed parts. By impregnating the part with a low-viscosity material, such as epoxy or cyanoacrylate, the part's porosity can be reduced, resulting in increased strength, stiffness, and a smoother surface finish. Infiltration can be performed using vacuum, pressure, or simple dipping methods, depending on the specific requirements of the part.
Post-Processing for Metal 3D Printing
Metal 3D printing encompasses technologies such as powder bed fusion (LPBF, EBM), direct energy deposition (DED), binder jetting, and metal extrusion. Like polymer AM processes, each of these metal AM approaches comes with its own set of post-processing steps, which we will cover in this section.
Recommended reading: Metal 3D Printing Technology Report
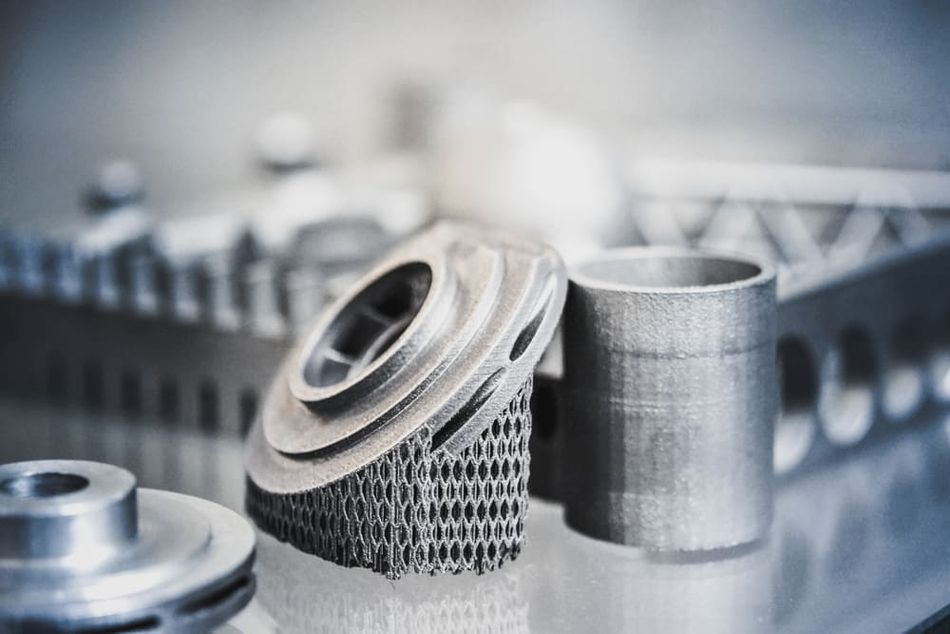
Post-processing techniques for Powder Bed Fusion (PBF)
Powder Bed Fusion (PBF) is a metal additive manufacturing process that builds parts layer by layer by selectively melting metal powder using a laser or electron beam. Common variants of the technology include Selective Laser Melting (SLM) and Electron Beam Melting (EBM). PBF offers high resolution and is widely used for complex, high-performance components in aerospace, medical, and industrial applications. PBF enables precise geometries but requires careful handling of fine metal powders. Below are the common post-processing techniques to both finish and optimize the performance of metal PBF parts.
Support Removal
Support structures are mechanically or thermally separated from the printed part using tools like bandsaws, grinders, or Electrical Discharge Machining (EDM). Since metal supports are strong and fused tightly, removal must be done carefully to avoid damaging the part. Complex geometries may require specialized tooling or multi-axis machines to reach and remove all support material.
Heat Treatment
Heat treatment relieves residual stresses caused by rapid thermal cycling during printing. It can also improve mechanical properties like strength and ductility. Depending on the alloy, processes like annealing, stress relieving, or solution heat treating may be used.[4] This post-processing step is crucial for parts used in critical applications like aerospace or medical implants.
Hot Isostatic Pressing (HIP)
HIP involves subjecting the part to high temperature and pressure in an inert gas environment. This process eliminates internal porosity, improves fatigue strength, and enhances mechanical properties of metal printed parts. It is especially beneficial for parts with critical structural demands. HIP is often used in aerospace, energy, and medical industries where flawless integrity is essential.
Surface Finishing
PBF parts often have rough surfaces, not unlike plastic SLS parts. Surface finishing processes like bead blasting, electropolishing, chemical etching, or CNC machining are used to smooth surfaces, improve aesthetics, and meet tight tolerances. The choice of method depends on material, part complexity, and required surface finish. Finishing also improves corrosion resistance.
Machining
Machining is typically used after metal PBF to achieve precise dimensions, critical surface finishes, or functional features such as threads and sealing surfaces. Post-print CNC milling or turning is common, especially for mating components. Because PBF parts can warp slightly during printing, machining also helps correct dimensional deviations and ensure parts meet tight engineering specifications.
Post-processing techniques for Direct Energy Deposition (DED)
Direct Energy Deposition is a metal additive manufacturing process that uses focused thermal energy—typically from a laser, electron beam, or plasma arc—to melt metal feedstock as it is deposited. The material, in powder or wire form, is fed through a nozzle and melted onto a surface to build up a part layer by layer. DED is known for its ability to repair or add material to existing components and fabricate large, complex parts with excellent material deposition rates. It is widely used in aerospace, defense, and heavy industry due to its versatility, scalability, and ability to process high-performance alloys.
CNC Machining
DED parts are typically net-shaped and rough, requiring CNC machining to meet dimensional accuracy and surface finish requirements. Critical features like holes, threads, and flat surfaces are machined post-build. Since DED is often used to repair or add material to existing parts, precision machining ensures proper fit and functionality of the final component.
Heat Treatment
Heat treatment is essential to relieve residual stresses caused by rapid thermal gradients in DED. It also refines the microstructure and improves properties like toughness and fatigue resistance. The specific treatment varies by material but may include annealing, normalization, or solution heat treatment. This step improves performance and dimensional stability of the part.
Grinding and Polishing
Due to the typically coarse surface finish of DED prints, especially from wire-fed systems, grinding and polishing are often required. These processes improve aesthetics, reduce friction, and meet tight surface roughness specifications. They are especially important for sealing surfaces, bearing interfaces, or other functional areas needing a smooth finish.
Surface Coating or Treatment
DED parts may undergo additional treatments like thermal spraying, anodizing, or surface hardening (e.g., carburizing or nitriding) to enhance wear resistance, corrosion protection, or aesthetic appearance. These treatments are especially useful when functional surface properties are required. Surface coatings may also improve part longevity in harsh environments or industrial applications.
Post-processing techniques for Metal Binder Jetting
Metal Binder Jetting is a powder-based additive manufacturing process where a liquid binder is selectively deposited onto a bed of metal powder, layer by layer, to build a “green” part. The part is then cured, debound, and sintered to achieve final density and mechanical properties. Unlike fusion-based processes, Binder Jetting doesn't use heat during printing, allowing faster build speeds and larger batch production. This makes it ideal for producing complex geometries, low-cost tooling, and mid-volume parts in industries such as automotive and consumer goods. However, post-processing is crucial to transform the printed green part into a functional metal part.
Curing and Debinding
After printing, the green part is cured to harden the binder and stabilize the shape. Then, during debinding, the polymer binder is removed through thermal or solvent-based methods. This step is essential to prevent distortion during sintering and ensure structural integrity. Careful control is required, as rapid heating can lead to cracking or deformation.
Sintering
Sintering densifies the debound part by heating it just below the melting point of the metal. This fuses the metal particles and gives the part its final strength and mechanical properties. Shrinkage occurs during sintering, so compensation must be made in the design. Accurate temperature control is vital to maintain dimensional precision and part quality.
Infiltration
For some binder-jetted parts, especially those with residual porosity, infiltration is an optional post-processing step that involves filling voids with a secondary metal (e.g., bronze into stainless steel). This enhances strength, wear resistance, and appearance of the part. Infiltration is typically used when full sintering is not achievable or economical. The process can change material properties and is often tailored to specific applications.
Machining
Post-sintering, parts may undergo machining to achieve tight tolerances or critical surface finishes. Standard operations include milling, drilling, or tapping. Additionally, finishing processes like tumbling, blasting, or polishing are used to improve aesthetics and functionality. These steps help parts meet specific engineering requirements and prepare them for end-use or further coating processes.
Post-processing techniques for Metal Extrusion
Metal Extrusion is a metal 3D printing process inspired by FDM, where metal powder is mixed with a polymer binder to form a filament or rod, which is extruded to create a “green” part. The process is safe, affordable, and ideal for office or low-labor environments. After printing, the part must go through debinding and sintering to become solid metal. While the resolution is lower than other metal AM methods, it is suitable for producing functional prototypes, tooling, and low-volume production parts. The simplicity and low cost make it accessible for small businesses and engineering teams.
Debinding
Debinding is a critical step in metal extrusion removes the polymer binder from the printed green part, either chemically or thermally. This step is essential to prevent defects like bloating or cracking during sintering. The process creates a fragile “brown” part composed of loosely packed metal particles. Controlled conditions are important, as uneven debinding can compromise part geometry or structural integrity.
Sintering
In the sintering step, the brown part is heated in a furnace to just below the melting point of the metal, allowing the particles to fuse and densify. Sintering causes 15–20% shrinkage, so printed parts are intentionally oversized. The process gives the part its final strength, hardness, and durability. Uniform heating and inert atmospheres ensure consistent microstructure and mechanical performance.
Machining
After sintering, machining may be needed to meet precise tolerances, functional dimensions, or high-quality surface finishes. Because shrinkage is predictable but not perfectly uniform, critical features such as threads, holes, and mating surfaces are often post-machined when making a metal extrusion part. Standard milling, drilling, and tapping techniques are used, depending on the final material and geometry.
Surface Finishing
Metal extrusion prints often have rough surfaces due to extrusion lines and sintering artifacts. Surface finishing methods like abrasive blasting, tumbling, or polishing can improve aesthetics and reduce friction or wear. In some cases, electropolishing or coating is used for corrosion resistance or to enhance appearance. These treatments depend on application-specific surface requirements.
Advanced Post-Processing Techniques for 3D Printing
While the aforementioned processes for polymer and metal AM processes are fairly standard across professional and industrial AM users, there are also more advanced finishing techniques that are used in a more limited capacity. We’re highlighting a selection of them below:
Electropolishing
Electropolishing is an electrochemical surface finishing process that removes a thin layer of material from the surface of metal 3D printed parts, resulting in a smooth, mirror-like finish. In this process, the part is immersed in an electrolytic bath and connected to the positive terminal of a direct current power source, while a conductive cathode is connected to the negative terminal.
During electropolishing, the applied electric current dissolves the surface irregularities preferentially at peaks, creating a smoother surface with reduced roughness. In addition to improving the surface appearance, electropolishing also enhances the part's corrosion resistance by removing embedded contaminants and passivating the surface.
Hydrographics
Hydrographics, also known as water transfer printing or immersion printing, is an advanced post-processing technique used to apply intricate patterns and designs onto 3D printed parts. This technique involves dipping the part into a water-soluble film containing the desired pattern, which adheres to the part's surface as it is submerged.
In this process, a hydrographic film is placed on the surface of a water-filled tank, where it dissolves, leaving the ink pattern floating on the water surface. A chemical activator is sprayed onto the ink, causing it to liquefy and allowing it to adhere to the part's surface. The part is then slowly and steadily immersed in the water. The part is then lifted out of the water, and the newly applied pattern is allowed to dry. Finally, a clear coat is applied to protect the pattern and provide a glossy or matte finish, depending on the desired appearance.
Electroplating
Electroplating is a post-processing technique used to add a metallic layer to 3D printed components. This method leverages the principles of electrolysis and can be used in industries such as aerospace, medical, and microelectronics.
During the electroplating process, the 3D printed part is immersed in a liquid electrolyte solution. The part functions as the negatively charged cathode, while a metal bar functions as the positively charged anode. An electric current is applied to the solution, causing metal ions to migrate from the metal bar to the surface of the 3D printed part, forming a new metallic layer. Electroplating results in an aesthetically impressive metallic surface finish while also increasing a part’s strength and durability. The process may also be used to make a plastic part electrically or thermally conductive. Furthermore, selective electroplating can give a part an impressive range of functions. For example, a magnetic metal such as nickel and a conductive one such as copper could be deposited onto the same part.[5]
Challenges of 3D Printing Post-Processing
While post-processing is an essential part of any 3D printing workflow, it can present challenges, particularly when it comes to efficiency.
Across polymer and metal AM processes, post-processing adds cost, time, and complexity to the production cycle. It often requires specialized equipment and skilled labor, making it a bottleneck in high-throughput manufacturing. Furthermore, there is no universal post-processing solution—each material and printing method demands a tailored approach. Many AM post-processing methods are also based largely on manual intervention, which minimizing the largely automated printing process.
Now, as AM technologies advance and themselves become more automated, developing more efficient, automated, and standardized post-processing workflows is crucial for broader industrial adoption.
Conclusion
Post-processing techniques play a crucial role in enhancing the quality, appearance, and functionality of 3D printed parts. As the field of 3D printing advances, a wide variety of post-processing methods have emerged to cater to the diverse needs of different industries and applications. From basic techniques like sanding, priming, and painting to advanced processes such as hydrographics and electroforming, these methods provide valuable solutions to address the limitations of 3D printing and ensure that printed parts meet the required specifications and standards.
By understanding and implementing the appropriate post-processing techniques, engineers, designers, and manufacturers can unlock the full potential of 3D printing, creating high-quality parts that are suitable for a broad range of applications. The knowledge of these techniques is essential for anyone working with 3D printed parts, as it ensures the successful integration of 3D printing technology in various industries and fosters continued innovation in the field.
Frequently Asked Questions
Q: What is post-processing in 3D printing?
A: Post-processing refers to the steps and techniques applied to 3D printed parts after they have been produced by a 3D printer. These techniques are used to improve the surface finish, appearance, mechanical properties, and functionality of the printed parts.
Q: Why is post-processing important in 3D printing?
A: Post-processing is important because it addresses limitations and imperfections in 3D printed parts, such as layer lines, support marks, and poor surface finish. By applying suitable post-processing techniques, the quality, appearance, and performance of printed parts can be significantly enhanced, making them suitable for a wide range of applications.
Q: What are some common post-processing techniques for plastic 3D printed parts?
A: Some common post-processing techniques for plastic 3D printed parts include sanding, priming and painting, vapor smoothing, support removal, and annealing. Each technique offers specific benefits and is chosen based on the desired outcome and the material used.
Q: Does post-processing vary by metal 3D printing technology?
Yes, each process—such as Powder Bed Fusion (PBF), Direct Energy Deposition (DED), Binder Jetting, or Metal Extrusion—has its own set of steps including support removal, heat treatment, machining, and surface finishing, tailored to address the unique characteristics of the printed parts.
Q: What are common post-processing steps for Powder Bed Fusion (PBF) metal parts?
A: Typical post-processing for PBF includes support removal, heat treatment to relieve stress and enhance properties, Hot Isostatic Pressing (HIP) to eliminate porosity, surface finishing to improve aesthetics and precision, and CNC machining for dimensional accuracy. These steps are especially important for high-performance applications in aerospace and medical fields.
References
[1] Citti P, Giorgetti A, Ceccanti F, Rolli F, Foith-Förster P, Brown CA. Design representations. Design Engineering and Science. 2021:117-65.
[2] Dizon JR, Gache CC, Cascolan HM, Cancino LT, Advincula RC. Post-processing of 3D-printed polymers. Technologies. 2021 Aug 25;9(3):61.
[3] Jayanth N, Jaswanthraj K, Sandeep S, Mallaya NH, Siddharth SR. Effect of heat treatment on mechanical properties of 3D printed PLA. Journal of the Mechanical Behavior of Biomedical Materials. 2021 Nov 1;123:104764.
[4] Laleh M, Sadeghi E, Revilla RI, Chao Q, Haghdadi N, Hughes AE, Xu W, De Graeve I, Qian M, Gibson I, Tan MY. Heat treatment for metal additive manufacturing. Progress in Materials Science. 2022 Nov 25:101051.
[5] Angel K, Tsang HH, Bedair SS, Smith GL, Lazarus N. Selective electroplating of 3D printed parts. Additive Manufacturing. 2018 Mar 1;20:164-72.