The Best Ender 3 Retraction Settings
The Creality Ender 3 is a reliable 3D printer, but it can still suffer from issues like oozing and stringing. Adjusting your Ender 3 retraction settings can help solve these problems.

Last updated on 23 Apr, 2024. 11 minutes read
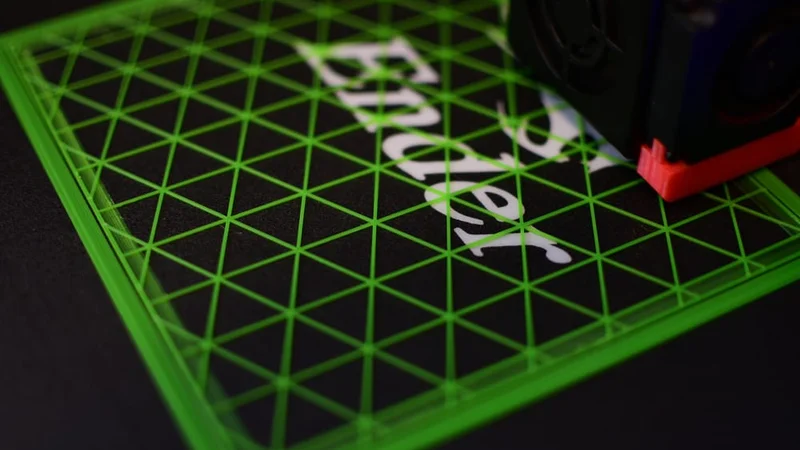
Improve your Ender prints by adjusting retraction settings
Thanks to its low price, reliability, and extensive community of users, the Creality Ender 3 has — along with related models like the Ender 3 V2 and Ender 3 Pro — become the go-to FFF/FDM 3D printer for beginners since its launch in 2017.
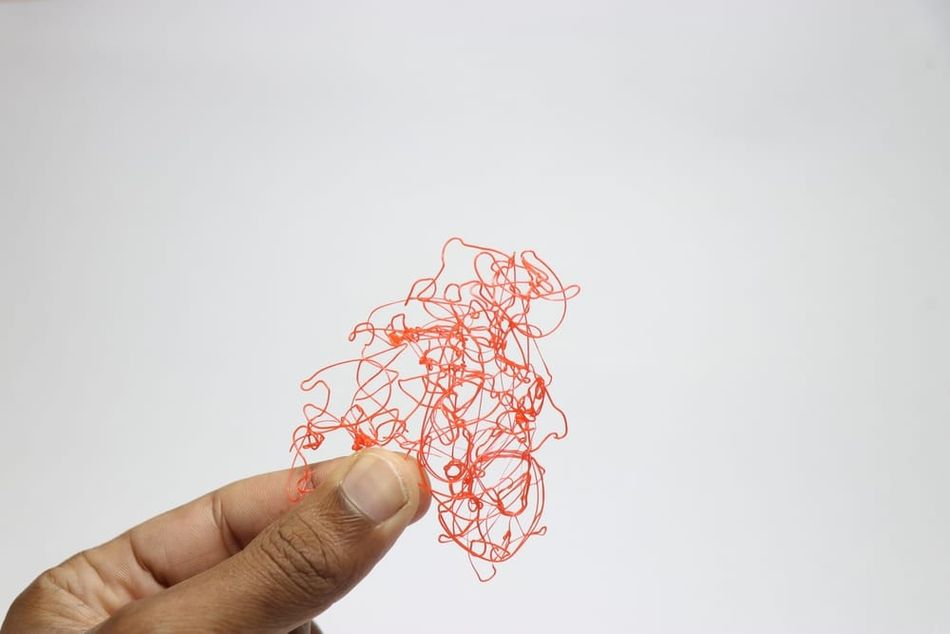
However, the Ender 3 is vulnerable to some common 3D printing issue. Many beginners struggle with Ender 3 manual bed leveling, while the printer can also suffer from bed adhesion issues. Two other common issues are oozing and stringing, which are related. Oozing is when excess molten filament leaks or drips from the nozzle, and stringing is when this dripping filament forms weblike patterns over the build during travel movements. While these issues can be partly fixed by manual post-processing techniques like sanding, most users would prefer to combat the problem at its source, preventing the nozzle from leaking altogether.
One of the best ways to mitigate oozing and stringing is to adjust Ender 3 retraction settings, which is easy to do using a slicer like Cura.[1] This article discusses the best Creality Ender 3 retraction settings available to users.
The Ender 3 and Retraction
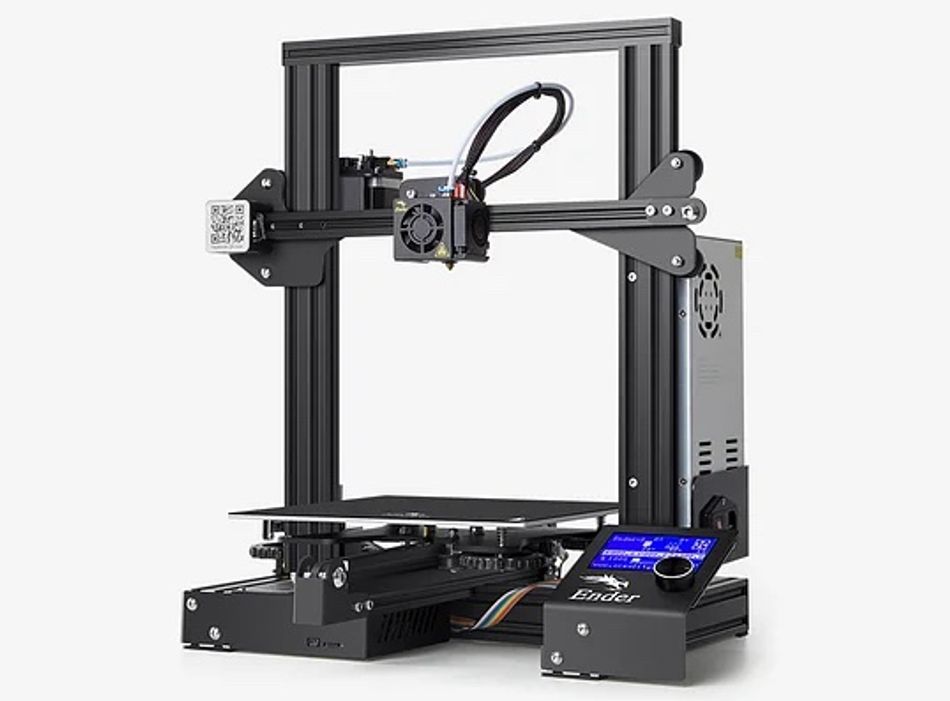
The classic version of the Ender 3 is the most popular 3D printer on platforms like Amazon, mostly thanks to its low price and large user community. The printer features a 100 °C heated bed, a stick-on magnetic build surface, and precision down to 0.1 mm. Although Creality has a very large catalog of FFF printers, the Ender 3 remains its best-selling machine.
The Ender 3 uses a Bowden extruder. This means the printer's drive gear and hot end are located separately, with filament fed through a tube from one to the other. There are pros and cons to using a Bowden extruder. For example, printers like the Ender 3 are not the best machines for printing squishy materials like TPU. On the other hand, they can print fairly quickly and accurately since the printhead is lighter.
In terms of retraction settings, the Ender 3 requires longer retraction than direct-drive printers. But it is not significantly better or worse than other budget FFF printers in terms of preventing oozing and stringing.
Before Adjusting Retraction Settings
Stringing Test Prints
Stringing is one of the easiest 3D printing defects to identify. It manifests itself as fine strands of loose filament spread over the surface of the build, particularly over areas where the printhead has made travel movements (movements on the X-Y plane when no filament is being extruded).
If your Ender 3 prints have been plagued by stringing, chances are you’ve already spotted and diagnosed the problem. Nonetheless, it can be useful to perform a controlled stringing test to gauge the extent of the problem and to see if it gets better or worse after adjusting retraction settings.
A good way to measure the severity of stringing is to print a stringing test print. This is a simple 3D model in STL format, usually consisting of two vertical towers. Because the two towers are spaced a short distance apart, the printhead must make travel movements between the towers — movements where it is likely to exhibit stringing.
To make the best use of a stringing test, you should adjust your Ender 3 retraction settings (explained in the following sections) in small intervals, printing a new stringing test model after each adjustment. You can then identify the test print with the least severe stringing, and use the settings that produced that print as your default print settings.
Popular stringing test prints on Thingiverse:
Recommended reading: How to find free STL files
Adjust Printing Temperature
Adjusting Ender 3 retraction settings is one way to mitigate oozing and stringing. However, before getting into these advanced settings, it is worth attempting a simple temperature adjustment in order to fix the problem.
Oozing is more likely to occur at high extrusion temperatures because hotter temperatures make the filament less viscous (more runny). If the filament is in a highly liquid state, it is more likely to drip out of the nozzle regardless of whether the extruder is applying pressure. Conversely, a lower extrusion temperature keeps the material more viscous and less likely to escape the nozzle.
That being said, a balance must be struck when setting the extrusion temperature. While overly high temperatures can lead to oozing and stringing — as well as over-extrusion issues like blobs and zits — insufficient temperatures can result in other problems like under-extrusion and filament jams.
Most 3D printing filaments have a window of suitable temperatures, with retraction more likely to be necessary at the higher end of that range. The Ender 3 offers a maximum printing temperature of around 240 °C.
Recommended reading: PETG temperature considerations
How Retraction Settings Can Fix Stringing
In FFF/FDM 3D printing, retraction and stringing are inextricably linked. In fact, one of the main purposes of retraction is to eliminate stringing.
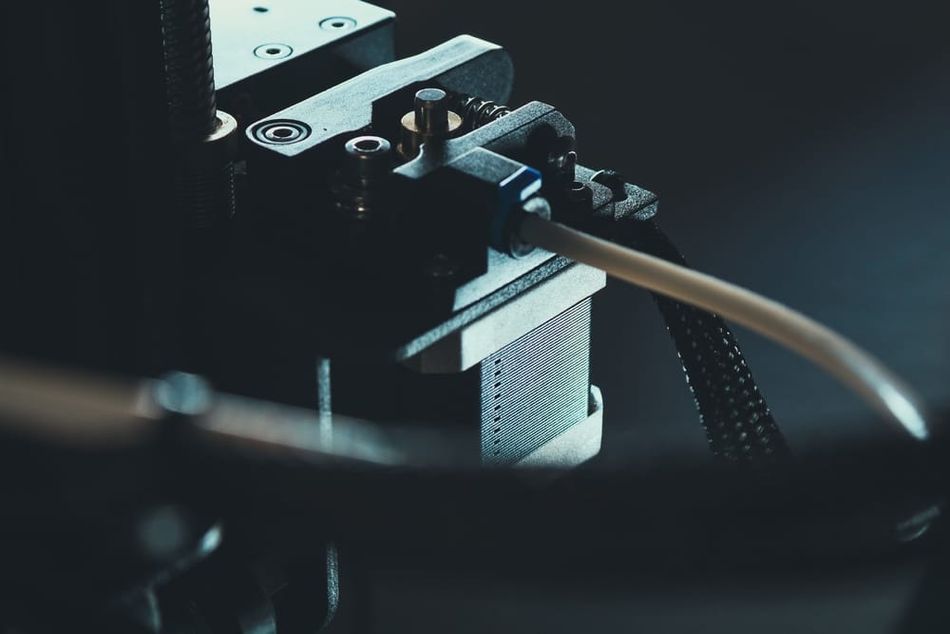
When a Bowden-style 3D printer like the Ender 3 extrudes material, small gears push the strand of filament toward the hotend via a PTFE tube. There, the filament is melted by the hotend before it passes through the nozzle and onto the build below. But the gears that push filament to the hotend can also reverse direction and pull the filament back away from the hotend. This is called retraction.
Although the already-melted section of filament cannot be retracted, the solid section of filament immediately above the hotend’s melt zone can be. Retracting the solid filament reduces the amount of pressure on the molten material, making it less likely to ooze out of the nozzle and cause stringing.
There are several different retraction settings, all of which can be tweaked to reduce the likelihood of stringing. Generally, however, faster and lengthier retractions are key to mitigating the issue.
Key Ender 3 Retraction Settings
Recommended slicers for the Ender 3 include Cura, Simplify3D, and Slic3r, all of which use slightly different terminology for their retraction settings. This article will discuss the best retraction settings, though some are only available on Ultimaker Cura, which has the greatest number of adjustable parameters. Note that Creality’s own slicer is built on Cura architecture, but most users report better experiences with Cura itself.
Where do I find retraction settings?
Cura settings: Under Material settings in Print Setup
Simplify3D settings: Under Ooze Control settings via the Extruder tab
Slic3r settings: Via the Extruder tab
Enable retraction
Enabling retraction — usually achieved by checking a box, regardless of which slicer you use — tells the 3D printer to perform retractions during travel movements. If this setting is disabled, no retraction will take place during travel movements, making oozing and stringing more likely to occur.
Retraction distance
Retraction distance (retraction length) refers to how much filament the extruder pulls back during the retraction process to relieve pressure in the melt zone. It is expressed as a value in millimeters.
In practice, this means that a retraction distance setting of 5 mm will lead to 5 mm of filament being pulled away from the hotend each time a retraction is made. That 5 mm length of filament will then be returned to the hotend once the travel movement is finished.
Severe stringing should be countered with a fairly high retraction distance, sometimes up to 15 mm. Because the Ender 3 uses a Bowden extruder — where the nozzle is some distance away from the extruder gears — rather than a direct-drive extruder, the required retraction distance may be fairly high.
Longer retractions are more likely to prevent stringing than shorter ones, but they also add more time to the print, so a balance must be struck. Users can fine-tune their retraction distance in increments of 1 mm to find the best value.
Another consideration is the type of filament. Some materials require greater retraction distances than others for best performance. The table below gives some indication of the variation.
Filament Type | Retraction Distance Range |
PLA | 5–7 mm |
ABS | 6–8 mm |
PETG | 6–8 mm |
TPU | 2–5 mm |
Nylon | 8–10 mm |
General recommended Ender 3 retraction distance: 5 mm, increasing in increments of 1 mm if stringing occurs
Retraction speed
Retraction speed refers to the speed at which the extruder pulls the filament back during the retraction process. It is expressed as a value in millimeters per second.
Faster retraction speeds can help prevent oozing and stringing while also reducing overall print times, but excessive speed can lead to other issues such as filament grinding. As with other FDM printers, the safest Ender 3 retraction speed is in the range of 30–50 mm/s.
Note that some slicers (e.g. Cura) will allow you to set different speeds for retraction (pulling the filament back) and priming (returning the filament to its original position). However, if these fields are left blank, then the overall retraction speed will apply in both situations.
Recommended Ender 3 retraction speed: 50 mm/s, decreasing in increments of 5 mm/s if filament grinding occurs
Maximum retraction count
Maximum retraction count refers to the maximum number of retractions that can be performed on a certain length of filament (see below). It is expressed as a whole number.
When printing a part that requires regular and extensive travel movements, it sometimes happens that the same specific section of filament gets retracted multiple times. For example, if the retraction distance is set at 5 mm, and only 1 mm of filament gets deposited in between two separate travel movements, then 4 mm of filament will have been retracted two times over. This can be a problem, because filament can get worn down if it is pushed and pulled too many times.
If the maximum retraction count is reached for a given length of filament, the printer will cease performing retractions until the length of filament has been deposited onto the build.
Recommended Ender 3 maximum retraction count: 20, decreasing in increments of 5 if filament is suffering from grinding or other damage
Minimum extrusion distance window
Minimum extrusion distance window refers to the length of filament that is subject to the maximum retraction count (see above). It is expressed as a value in millimeters.
As an example, if the maximum retraction count is set to 20 and the minimum extrusion distance window to 1 mm, then a given 1 mm length of filament can be retracted a maximum of 20 times before it must be deposited onto the build. To keep things simple, it is recommended to set this value equal to the extrusion distance, using the maximum retraction count as the main variable for altering the frequency of retractions.
Recommended Ender 3 minimum extrusion distance window: 5 mm (or equal to retraction distance)
Extra prime amount
Extra prime amount refers to how much additional filament is primed — pushed back to the hotend following a retraction — on top of the initially retracted length. This additional amount may be necessary in order to compensate for material that has oozed out of the nozzle during the retraction. It is expressed as a value in millimeters.
Materials more prone to oozing such as PETG may require a higher extra prime amount to ensure that the nozzle contains enough filament to prevent under-extrusion. However, this setting can be considered a Plan B, to be used only when the primary retraction settings (see above) are failing to prevent oozing and stringing.
Recommended Ender 3 extra prime amount: 0, unless other retraction settings have failed to prevent oozing
Other retraction settings
A handful of other retraction settings — generally less critical than those mentioned above — may be tweaked within the slicer. These include:
Retract at layer change: Refers to whether the printer should perform a retraction when moving from one layer to the next.
Minimum travel: Refers to the smallest distance the printhead must move during a travel movement in order to justify a retraction.
Combing: A technique that instructs the printer to make travel movements only within the perimeter of the build, making retractions less important, as any oozed material will fall within the interior of the build.
Vertical lift: Called Z-hop in Cura and Z lift in Slic3r, a vertical lift refers to the printhead lifting itself upwards when making a travel movement in order to avoid scraping against the build.
Best Ender 3 Retraction Settings Summary
Retraction settings may need to be adjusted depending on the material. A material like PLA is less prone to oozing and stringing than a material like PETG,[2] while a flexible material like TPU is more easily damaged by retractions. These factors will affect the ideal retraction settings. Nonetheless, here are some reliable default settings to use for the Ender 3, suitable for most prints and materials:
Enable retraction | Yes |
Retraction distance (length) | 5 mm |
Retraction speed | 50 mm/s |
Prime speed | 50 mm/s |
Maximum retraction count | 20 |
Minimum extrusion distance window | 5 mm |
Extra prime amount | 0 mm |
Key Takeaways
The Creality Ender 3 has earned its reputation as a reliable 3D printer with an incredibly low price tag. However, like all FDM 3D printers, it doesn’t always deliver perfect results from the get-go. Users hoping to carry out complex prints with a range of different filament types must learn to master retraction settings in order to avoid oozing and stringing while preventing their material from damage.
The most important things to remember when configuring Ender 3 retraction settings are to use a generous retraction distance to accommodate the Ender’s Bowden extruder, set the maximum retraction count well below the Cura default of 100 unless you’re using indestructible filament, and avoid using an extra prime amount unless you really need to. The resulting prints should — with any luck — be free of excessive stringing, resulting in a high-quality appearance.
Frequently Asked Questions (FAQ)
What is the recommended Ender 3 retraction distance?
The recommended retraction distance for the Ender 3 (V2, Pro) is around 5 mm. However, the optimal value may vary depending on the filament type and other factors. Try increasing the value in increments of 1 mm if you experience issues like stringing.
How do I calibrate my retraction settings?
To calibrate your retraction settings, you can use calibration models like a stringing test or temperature tower. These models help you find the optimal retraction distance and temperature for your specific filament and printer setup.
What should I do if I experience stringing or oozing despite having adjusted my retraction settings?
If you still experience stringing or oozing after calibrating your retraction settings, you may need to lower your printing temperature.
Can I use the same retraction settings for all filament types?
Different filament types may work better with individual retraction settings. For example, flexible materials like TPU or TPE generally require shorter retraction distances and slower speeds, while abrasive materials like carbon fiber or metal-filled filaments may need longer retraction distances and slower speeds.
What Ender 3 hardware upgrades can I consider to improve retraction performance?
It is possible to replace the Ender 3 extruder with a direct drive extruder and install an all-metal or high-performance hotend. These modifications can help address hardware limitations and enhance overall print quality.
References
[1] How to fix stringing [Internet]. Ultimaker Support. [cited 2022 Sep 7].
[2] Holcomb G, Caldona EB, Cheng X, Advincula RC. On the optimized 3D printing and post-processing of PETG materials. MRS Communications. 2022 May 12:1-7.