How Long Does It Take to 3D Print Something? Complete Engineering Guide 2025
Just how long does it take to 3D print something these days? Here we discuss how technologies and parameters affect production time in modern additive manufacturing.

01 Jul, 2025. 15 minutes read
When planning a 3D printing project, one of the first questions engineers ask is: “How long does it take to 3D print something?” The answer can range from minutes to days. On average, printing an object can take anywhere from 30 minutes up to 12 hours, and large or high-detail models might even require several days to complete.
Print duration is a key consideration in rapid prototyping and batch manufacturing alike. Reducing the 3D print time can accelerate design iterations and lower costs, but rushing a print can compromise quality and reliability. This guide dives into the main factors that determine 3D printing duration—and how to optimize them. While our practical tips for readers will focus on FDM, we will also compare other major polymer 3D printing technologies, including resin-based SLA/DLP, powder-bed SLS/MJF, and continuous printing like CLIP, to understand which is fastest for different part types.
Beyond theory, this guide provides practical insights for professionals. We explore real-world use cases across industries, and we offer tips on tuning printers and slicer settings to shave hours off print jobs. Common pitfalls—such as quality issues at high speeds—are addressed with troubleshooting advice.
Factors Affecting 3D Print Time
Several key factors determine 3D printing speed and how long a given print will take. Understanding these factors allows engineers to estimate print duration and adjust settings for faster results when needed. Here we break down some of those factors.
Printing Technology
The type of 3D printing technology used plays an important role in determining print speed. Even among polymer-based technologies, significant differences exist in how layers are deposited or cured, and some of these methods are speedier than others.
Fused Deposition Modeling (FDM), otherwise known as Fused Filament Fabrication (FFF), builds objects layer by layer using an extruded thermoplastic filament. It is widely accessible but often slower due to its point-by-point deposition. Each contour, infill pattern, and travel move contributes to overall print time.
Stereolithography (SLA) and Digital Light Processing (DLP) cure photosensitive resin layer by layer using light. SLA uses a laser to trace cross-sections, while DLP projects an entire layer simultaneously. As a result, DLP can be substantially faster for prints with large, flat cross-sections.
Selective Laser Sintering (SLS) uses a laser to fuse powdered polymer. While individual layer times may be long due to the scanning process, SLS allows dense part nesting and batch printing, which can drastically improve throughput for multiple parts.
Part Size and Geometry
Unsurprisingly, larger parts require more time to print. Not only do they involve more layers, but the nozzle or laser must travel greater distances within each layer. However, geometry and complexity can be just as influential.
Designs with intricate details, internal channels, lattice structures, or varying wall thicknesses often increase printing time. These features typically require more precise toolpathing and additional motion planning. Furthermore, support structures—required for overhangs, bridges, or steep angles—extend print duration and require additional post-processing time for removal.
Part orientation also matters. A tall model printed upright may take significantly longer than the same part printed on its side due to the increased number of layers.[1]
Recommended reading: How to Design 3D Prints: Software, DfAM, Advanced Strategies
Hardware Capacity
The capabilities of the printer itself—both mechanical and thermal—play a major role in how quickly a print can be completed without sacrificing quality.
Motor speed and precision: Printers equipped with high-quality stepper or servo motors can move faster while maintaining positional accuracy. Cheap or underpowered motors may require slower print speeds to avoid missed steps or artifacts.
Motion systems: CoreXY or delta systems often allow for faster and smoother motion compared to simple Cartesian setups, especially when combined with high acceleration firmware tuning.
Heating and temperature control: Heated beds and high-power hot ends reduce warmup times and allow consistent extrusion, particularly with engineering-grade materials. Enclosed build chambers stabilize temperature, enabling faster printing without warping or layer splitting.
Extrusion system and cooling: Direct drive extruders may offer better control over retractions and faster print recovery. Cooling fans also affect how quickly layers can be deposited, especially for small or intricate sections.
Nozzle diameter (FDM): A wider nozzle (e.g., 0.6–1.0 mm) can deposit more material per second than a standard 0.4 mm nozzle, reducing print time—especially useful for large, low-detail parts. However, this comes at the cost of resolution and surface finish. For finely detailed models, smaller nozzles (0.2–0.3 mm) increase time but enhance quality.
Laser spot size (SLA/SLS): Smaller spot sizes yield better resolution but require more passes or slower scanning speeds to cure or sinter material accurately. Larger spot sizes speed up the process but limit detail and may lead to over-curing or lower dimensional precision.
Multi-extruder systems: Printers with dual extruders or independent dual extruder (IDEX) systems can reduce time for multi-material prints or parts with complex supports by minimizing tool changes and enabling simultaneous printing of mirrored parts.
In short, print time isn’t just a function of the part—it’s a function of what your machine can handle efficiently.
Print Settings
Print speed can be dramatically altered through slicing software by tweaking various settings. However, faster settings often come at the cost of strength or visual quality.
Layer height: Thinner layers (e.g., 0.1 mm) result in smoother surfaces and better detail but require more passes. Thicker layers (e.g., 0.3 mm or more) reduce time at the expense of resolution.
Infill density and pattern: Denser infill takes longer to complete. Pattern choice also matters—honeycomb or gyroid infill prints faster than more complex structural patterns like 3D cubic.
Shells and wall thickness: Extra perimeters improve durability but slow down the print. Similarly, more top/bottom layers increase print time.
Print speed: Raising print speed (e.g., from 50 mm/s to 80 mm/s) reduces time but can introduce vibration artifacts or under-extrusion unless the printer is well-tuned.
Acceleration and jerk: Advanced users can tune these settings to reduce pauses and optimize head movements between features.
Slicer defaults are often conservative, so users with quality printers can save time by carefully pushing these limits.
Materials
Material properties also influence printing speed, though usually to a lesser extent than geometry or technology.
PLA is easy to print quickly due to its low melting point and minimal warping.
ABS, PETG, and ASA require slower speeds and more cooling management to avoid cracking or stringing.
TPU and other flexible filaments necessitate very slow speeds to prevent issues (as well as refinement of other parameters).[2].
High-performance polymers like nylon, PC, or PEEK often demand slow speeds and strict thermal conditions to maintain part integrity.
Material choice can set upper or lower bounds on how fast the print can proceed reliably.
Other Factors
Several secondary factors also contribute to total print time:
First-layer behavior: Slower speeds and thicker lines are often used for the first layer to ensure adhesion, delaying the start.
Support material and brims: These increase total volume and toolpath complexity, especially for overhanging parts.
Post-processing steps: SLA and SLS prints typically require washing, curing, or powder removal, which adds to overall production time (and cost).[3]
Environmental conditions: Cold or drafty environments increase warmup and risk part failure mid-print, costing valuable time through reprints.
Comparing 3D Printing Technologies
The type of 3D printing technology employed has a huge influence on how long prints take. Different processes build objects in very different ways, leading to varying throughput, especially as part size or quantity scales up. Here we compare some of the major plastic 3D printing technologies, focusing on their relative speeds and their main strengths and weaknesses.
In general, the fastest printers for a single part (shortest time to finish one object) are the resin-based systems that cure whole layers at once (MSLA/DLP), while highest throughput for a batch of parts is often achieved by powder bed fusion (SLS/MJF) which can print a full chamber of parts in one job. FDM is usually the slowest for complex or large objects since it traces every detail with a single nozzle, but it can be quick and cost-efficient for simple, small items. The table below summarizes these differences:
Technology | Overall Speed | Fastest For | Slowest For |
FDM (Fused Deposition Modeling) | ❌ Slow–Moderate | Simple, small parts; prototypes | Large parts with detail or supports |
SLA (Stereolithography) | ❌ Slow | High-detail small parts | Large, flat parts (laser traces each layer) |
mSLA (Masked SLA) | ✅ Fast | Flat layers, multiple small parts | Very tall prints (many layers) |
DLP (Digital Light Processing) | ✅ Very Fast | Broad, flat parts with consistent cross-section | Parts with fine Z-axis resolution |
SLS (Selective Laser Sintering) | ⚠️ Moderate–Slow (per part), Fast (per batch) | Dense batches of functional parts | Single large part or low nesting efficiency |
MJF (Multi Jet Fusion) | ✅ Fast | Functional prototypes, small batch production | Single large part with cosmetic detail |
PolyJet | ⚠️ Moderate | Multimaterial models, smooth surfaces | Large models with complex geometry |
CLIP (Continuous Liquid Interface Production) | ✅ Very Fast | Small to mid-sized continuous prints | Large, complex prints needing full layer cure |
Real-World Case Studies & Print Times
As we have discussed, many variables affect 3D printing time, so it can be tricky to estimate the exact printing time of your newly designed part on whatever 3D printing hardware you happen to have set up. This section looks at a few publicly available case studies published by 3D printer manufacturers showing the speed capabilities of their machines in real-world settings.
SLA Architectural Models
A large-scale historical reconstruction project used SLA 3D printing to create over 650 detailed model segments representing German medieval cityscapes. Each segment measured 12 × 12 cm and featured intricate architectural elements like buildings and cathedrals, printed at a 1:1000 scale. The team employed seven Formlabs SLA printers working continuously, using White Resin for its fine detail and matte finish.
Print times varied based on complexity and height, with each segment taking 12 to 24 hours to complete. Heights ranged from about 0.8 cm up to 8.8 cm. After printing, parts underwent careful post-processing including washing, support removal, sanding, and painting to preserve delicate details.
SLS Robotic Grippers
The BMW Group has used SLS 3D printing to make customized robot grippers, among many other parts. These lightweight, durable grippers are tailored to specific production tasks, such as handling carbon fiber roof assemblies and chassis components. Although BMW did not disclose the exact dimensions of the grippers, they are described as “large.”
By automating complex bionic structure designs, BMW has reduced gripper manufacturing time to just 22 hours, significantly faster than traditional methods. This accelerated production cycle increases manufacturing flexibility and lowers costs, while also cutting CO2 emissions by 60%. The project also used AI-driven design to improve product quality and streamline additive manufacturing workflows.
FDM Automotive Enclosures
Joe Gibbs Racing, a NASCAR specialist, outsourced the production of 30 heater control component enclosures using Stratasys Fused Deposition Modeling (FDM) with ABS material. Each part required approximately 30 to 35 hours of print time. The entire batch was completed and delivered within one week, meeting a tight deadline of 10 days. No additional post-processing was necessary, as the parts had an acceptable surface finish straight from the printer.
This approach allowed the team’s internal FDM printers to focus on other projects while ensuring timely delivery of functional parts. The case highlights how outsourcing FDM printing can accelerate production schedules for complex, durable components requiring long print times.
Optimizing FDM Speed: Hardware, Firmware, and Slicer Strategies
Achieving faster print times isn’t just about turning up the “speed” knob. It requires a holistic approach across hardware tuning, firmware capabilities, and smart slicing strategies. In this section, we outline how to optimize each aspect of FDM/FFF printing to reduce print duration while maintaining acceptable quality.
Hardware Upgrades and Tuning
Modern 3D printers are improving in hardware to allow higher speeds. Key hardware considerations include:
Motion System & Frame: Printers with sturdy frames and high-quality linear motion can handle higher acceleration and travel speeds without excessive vibrations. For example, CoreXY machines can often print faster than typical Cartesian designs because of reduced moving mass. Linear rail guides and well-tensioned belts help maintain precision at speed. Ensure your printer is well-calibrated, with no wobble or loose bolts, before attempting high-speed printing.
Hotend and Nozzle: A high-flow hotend (all-metal designs, longer melt zones, special nozzle geometries like the Bondtech CHT) can push more filament through per second. Upgrading to such hotends can raise the volumetric flow ceiling (e.g. from ~10 mm³/s to 25+ mm³/s on some hotends), meaning you can use higher speeds or thicker extrusions without under-extrusion. Hardened steel nozzles may heat slower than brass, slightly limiting flow, so consider brass or plated copper nozzles for high speed (if abrasive filaments aren’t needed).
Extruder: A robust dual-gear extruder with strong grip (and possibly direct-drive rather than Bowden) can push filament more reliably at high speeds, especially for flexible materials. If the extruder slips, you can’t maintain speed. Ensuring proper extruder calibration (steps/mm, tension) is fundamental before increasing print speeds.
Cooling: When printing fast, the deposited plastic may not cool and solidify as quickly, potentially causing smearing or poor layer stacking on small features. Upgrading part cooling fans or ducts to direct airflow better can mitigate this, especially for PLA which likes strong cooling. For very high-speed printers, sometimes additional cooling or even active cooling between layers is employed.
Multiple Nozzles or Parallel Printing: One way industries speed up output is by printing with multiple independent extruders in parallel (though this is advanced). Some experimental systems (like Autodesk’s Project Escher) had multiple heads working on one part simultaneously. More commonly, machines like the Prusa XL with toolchanger or IDEX printers can print multiple copies at once (each head printing a separate part). While not speeding a single part, this improves throughput for multiple parts.
Firmware and Motion Control
Firmware plays a critical role in pushing speeds safely. Traditional 8-bit controller firmware (Marlin on older machines) could become a bottleneck at extreme speeds due to limited processing of step instructions. Newer approaches include:
Klipper Firmware: Klipper enables higher step rates and advanced algorithms for faster printing. Many high-speed enthusiasts run Klipper with features like input shaping (to cancel out resonance vibrations at certain frequencies) and pressure advance (to manage extrusion flow at acceleration changes). Input shaping is a game-changer; by reducing ringing, it lets you print fast without getting wavy echoes on the surface. Marlin firmware now also supports input shaping and linear advance in latest versions, though tuning is needed.
Acceleration and Jerk: In firmware or slicer, increasing acceleration (how fast the printer reaches full speed) can shorten print time, especially for small features where the head is constantly stopping and starting. Many printers ship with conservative acceleration (e.g. 1000–2000 mm/s²). Some CoreXY machines can handle 5000+ mm/s². Higher acceleration will make the printer shake more if it’s not robust, so tune carefully. Jerk (or instant speed change) settings also impact how snappy direction changes are—too high can cause ringing.
S-Curve or Junction Deviation: Modern firmware uses motion planning tricks to smooth out motion (S-curve acceleration, junction deviation replacing classical jerk). These can allow a good compromise of speed and quality, enabling faster moves without shocking the mechanics as much.
Slicer Strategies for Speed
The slicing software gives you a lot of control over speed vs. quality trade-offs. Here are some strategies:
Adaptive Layer Height: Some slicers can vary layer height throughout the print—thicker layers in low-detail areas, thinner layers where needed for small curves or top surfaces. This way, you save time on sections that don’t benefit from high resolution. For example, the base of a model could be printed at 0.3 mm layers, while near the top where fine features exist, switch to 0.1 mm.
Variable Infill & Wall Thickness: Similar idea: use dense infill only where structurally needed (slicer can increase infill around holes or stressed areas, but keep it low elsewhere). You can also sometimes print fewer perimeters (shells) in parts that don’t need thick walls, saving time on each layer. Many slicers allow different settings for different model regions (modifier meshes) to fine-tune this.
“Draft” Profile Settings: Slicer presets often include a “draft” or low-quality profile which essentially maxes out layer height, lowers infill, and prints a bit faster. Use these when you just need a quick and dirty prototype for form/fit, not final use. For instance, a part that would be 5 hours on normal quality might print in 2 hours in draft mode. You can later reprint a refined version in high quality if needed.
Support Structure Optimization: Supports can greatly bloat print time (they are often slow to print to ensure stability). By orienting the part cleverly, you can minimize required supports and thus save a lot of printing. Also consider using tree supports or custom support blockers to reduce the support material. Less support = less print time and less post-processing.
Combine Infill and Solid Layers: Some slicers have features like infill before perimeters or coasting that can optimize toolpaths to reduce time. For example, infill-before-perimeter can allow continuous infill deposition without start/stop for each section, which can be faster in some cases.
Finally, always double-check the slicer’s time estimate after any major setting change. It’s a quick way to see if a change actually made a difference. For instance, switching infill from 20% to 10% might shave off 30 minutes in a 5-hour print, which you’d see reflected in the estimate.
Recommended reading: What is Slicing in 3D Printing? A Guide for Engineers
Common Pitfalls and How to Avoid Them
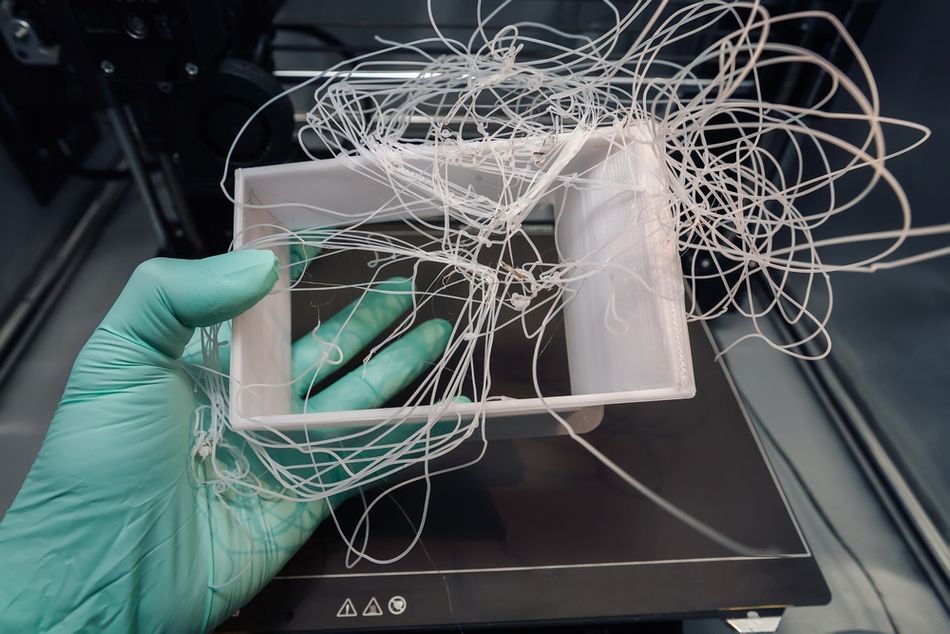
While chasing faster print times, you may encounter some pitfalls. Here are common issues and their solutions:
Issue | Cause | Solution |
Poor Layer Adhesion / Weak Parts | High speed, low infill, or inadequate temperature | Use higher temps (within limits), avoid low infill on load-bearing parts, don’t rush the first layer, ensure good cooling and bed adhesion |
Warping / Curling | Fast printing with shrink-prone materials (e.g. ABS), poor bed adhesion | Use heated enclosure, slow first layers, add brims/rafts, ensure good surface adhesion |
Ringing / Ghosting | Vibrations from rapid direction changes | Enable input shaping or vibration compensation, lower acceleration, stabilize printer frame or surface |
Under-Extrusion at High Speeds | Exceeding hotend’s flow rate, filament feed issues | Slow down, raise temp, upgrade hotend/nozzle, check filament path and spool tension |
Overheating on Small Layers | Layers printed too quickly on small cross-sections | Use minimum layer time, add a second object to allow cooling time, maximize part cooling fans |
Print Pauses or Failures | Thermal limits, stepper skips, insufficient power supply | Improve hotend/electronics cooling, slow print slightly, check power capacity and connections |
Time Estimate Errors | Slicer misjudgment, firmware slowdowns, pauses during print | Add buffer time, split long prints, run in parallel, calibrate slicer estimates using real print comparisons |
Overnight / Unattended Risks | Fire risk, detachment, failure mid-print | Use firmware safety features, monitor first layers, install smoke detector or webcam for remote monitoring if running long prints unattended |
Recommended reading: 3D Print Warping (PLA, PETG, ABS): 6 Simple Fixes
High-Speed 3D Printers to Consider
As 3D printing pushes toward true production speeds in 2025, several machines stand out for their ultra-fast capabilities. These systems use technologies like CLIP, High Speed Sintering (HSS), and FFF with advanced motion control to drastically cut build times while maintaining quality. They are designed for large-scale output and may be ideal for automotive, consumer goods, or medical production.
Ultra-Fast 3D Printers in 2025:
Carbon M3 Max (CLIP): Delivers continuous DLS printing with large build volume and up to 5–10x faster than traditional resin printers.
Voxeljet VX1000 HSS: High-speed sintering of polymers at 10,000+ cm³/hr with industrial throughput.
Nexa3D QLS 820: SLS alternative using quad-laser scanning; up to 8,000 cm³/hr.
Bambu Lab X1 Carbon: Desktop CoreXY FDM system reaching 500 mm/s travel speed with input shaping.
HP Jet Fusion 5420W: MJF system for white parts, optimized for fast batch production.
Conclusion: Future Trends in 3D Printing Speed
As we head deeper into the latter half of the 2020s, efforts to speed up 3D printing are gaining momentum. High-speed FDM printers are becoming more common, with machines like the Bambu Lab X1 and Creality K1 offering travel speeds of 500 mm/s out of the box. Lightweight gantries, rigid frames, input shaping, and high-flow hotends are pushing practical print speeds past 200 mm/s without major quality loss. Future developments may include ultrasonic-assisted extrusion and dynamic volumetric feeders to maintain consistent flow at high speeds.
In industrial systems, speed gains are coming from parallelization. SLS machines now often use multiple lasers to scan different areas simultaneously, while multi-jet systems are expanding print head arrays or build volumes. Nexa3D, for instance, has reached up to 8000 cm³/hour using these techniques. Parallel printing—whether through multiple nozzles or overlapping print engines—is a clear strategy for faster output.
Meanwhile, material science is catching up. Fast-curing resins and filaments designed for high-speed printing are being developed, helping layers solidify more quickly. Some systems even explore UV-assisted filament extrusion to speed up cooling. Beyond print speed, automation is reducing downtime—automated part removal, print farms, and belt-fed printers allow continuous or back-to-back production.
Other innovations, like non-planar printing and hybrid CNC/3D print setups, aim to reduce post-processing time. Altogether, the future points toward faster, smarter, and more automated 3D printing well-suited for scalable manufacturing.
Frequently Asked Questions (FAQ)
How long does it take to 3D print a part?
It depends on many factors, but it can take less than an hour or several days. Small, simple parts print fast; large or detailed parts take much longer.
What affects print time the most?
Part size, layer height, infill percentage, print speed, and the type of 3D printer (e.g., FDM vs. SLA) all have a major impact.
Are faster printers always better?
Not always. Printing too fast can reduce quality or cause failures. Balance speed with reliability and the level of detail needed.
Can I speed up a print without ruining it?
Yes—try thicker layers, larger nozzles, or lower infill. But test first to make sure quality remains acceptable for your use.
Why does my slicer say one time, but the print takes longer?
Slicers often underestimate print time. Real-world variables like acceleration limits, pauses, or temperature changes can extend duration.
References
[1] Salmi M, Ituarte IF, Chekurov S, Huotilainen E. Effect of build orientation in 3D printing production for material extrusion, material jetting, binder jetting, sheet object lamination, vat photopolymerisation, and powder bed fusion. International Journal of Collaborative Enterprise. 2016;5(3-4):218-31.
[2] Rodríguez L, Naya G, Bienvenido R. Study for the selection of 3D printing parameters for the design of TPU products. InIOP Conference Series: Materials Science and Engineering 2021 Oct 1 (Vol. 1193, No. 1, p. 012035). IOP Publishing.
[3] Dizon JR, Gache CC, Cascolan HM, Cancino LT, Advincula RC. Post-processing of 3D-printed polymers. Technologies. 2021 Aug 25;9(3):61.
in this article
1. Factors Affecting 3D Print Time2. Comparing 3D Printing Technologies3. Real-World Case Studies & Print Times4. Optimizing FDM Speed: Hardware, Firmware, and Slicer Strategies5. Common Pitfalls and How to Avoid Them6. High-Speed 3D Printers to Consider7. Conclusion: Future Trends in 3D Printing Speed8. Frequently Asked Questions (FAQ)9. References