3D Printing VFA: Vertical Fine Artifacts and How to Control Them
Vertical fine artifacts (VFA) are microscopic ridges that can degrade the appearance of 3D printed parts. This article explains how to mitigate them.

03 Mar, 2026. 10 minutes read
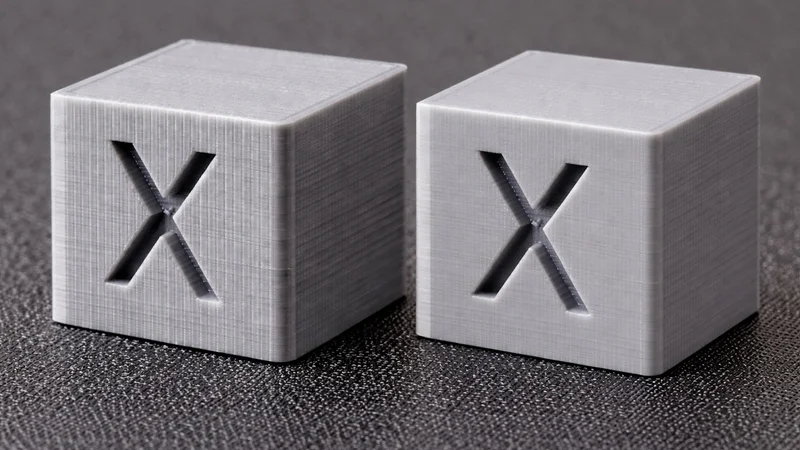
3D printing VFAs affect the surface appearance of parts
Modern additive manufacturing offers rapid prototyping and custom production, but nothing takes the shine off a printed part faster than mysterious vertical lines that mar an otherwise smooth surface. These lines, known as vertical fine artifacts (VFAs), may only measure tens of micrometers, yet they draw the eye and can compromise mechanical performance.
Fused filament fabrication (FFF/FDM) has enabled engineers to iterate designs rapidly. However, the demands for speed, accuracy, and smooth surface finishes push the limits of printers’ mechanical systems. When motion control is not perfectly balanced, the print head or frame can resonate, belts can introduce periodic errors, and motors can leave subtle ripples. 3D printing VFAs are the visible trace of these imperfections.
This article demystifies 3D printing VFAs for digital design engineers, hardware engineers, and electronics engineering students. It combines theoretical insights with practical guidelines for diagnosing and mitigating the problem. The discussion draws on recent research, manufacturer updates, and community experience to provide an authoritative resource.
What Are Vertical Fine Artifacts?
Vertical fine artifacts are subtle ridges or bumps that appear on vertical surfaces of 3D printed parts. 3D printer company Sovol notes that these lines are typically 10–40 µm wide and occur at regular intervals of about 2 mm along the Z‑axis.[1] They often manifest as straight or slightly diagonal lines, with uniform spacing that remains constant from top to bottom.
Because they are so small, VFAs may require bright light or magnification to see; however, they become obvious on glossy or polished materials. In some cases, a user may notice both 2 mm‑spaced lines and other patterns with different spacing.
VFAs primarily affect extrusion‑based systems, i.e., fused filament fabrication (FFF) or fused deposition modeling (FDM) 3D printers. The problem is most visible on vertical or near‑vertical surfaces where the toolpath remains consistent from layer to layer. On curved or sloped surfaces the artifacts may blend into the natural layer lines. VFAs can also arise in resin printers if the build plate vibrates or the resin vat exhibits resonance, but such cases are less common.
VFAs are distinct from other surface defects like ringing or ghosting. Ringing occurs when the nozzle oscillates after a sharp direction change, causing ripples that fade away with distance. VFAs, by contrast, persist across the entire part and do not fade. They often align with the stepper‑motor cycles or belt pitch, repeating in the same position on each layer.
Recommended reading: 3D Print Ghosting Causes and Solutions
Why Do Prints Get VFAs?
Vertical fine artifacts often stem from a single dominant mechanical or motion-control source. While multiple factors can interact, most VFAs can be traced to one primary driver—stepper motor resonance, structural vibration, or belt transmission error. Each mechanism produces a characteristic spacing and behavior pattern on the print surface.
Stepper Motor Resonance
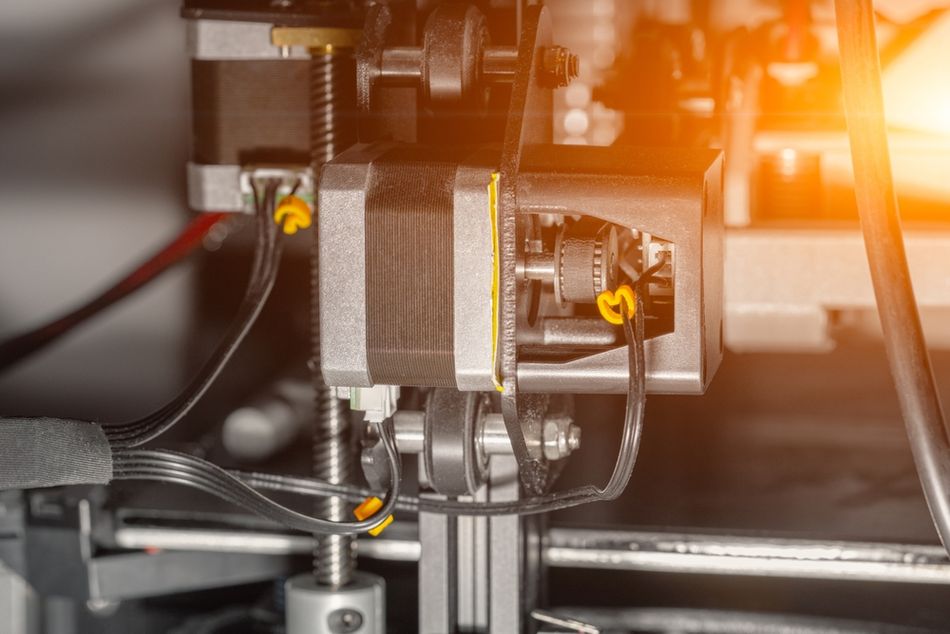
Most desktop 3D printers rely on hybrid stepper motors to translate electrical pulses into precise motion. A standard stepper motor has 200 full steps per revolution (1.8 ° per step). Each step involves accelerating and then decelerating the rotor. This discrete movement induces small overshoot/undershoot vibrations. When the frequency of these oscillations matches the motor’s natural frequency or the frame’s resonance, the vibrations amplify, causing the nozzle to deposit slightly more or less material at periodic intervals.
An article on Linear Motion Tips notes that microstepping—dividing each full step into many smaller increments—reduces these vibrations by smoothing current transitions.[2] A 1/256 microstep resolution guides the shaft smoothly to each position and minimizes the jerky movement seen in full‑step operation. Some printers use servo motors or closed‑loop stepper drivers to further improve motion smoothness.
Mechanical Resonance of Print Head and Frame
Another important contributor to VFAs is mechanical resonance in the printer’s structure. When the print head or build platform is accelerated or decelerated, inertial forces excite the frame and belts.
An MDPI study on vibration monitoring argues that vibrations of the print head and structural components can cause defects such as ghosting, ringing, and geometric inaccuracies. Traditional mitigation strategies like reducing print speed or reinforcing the frame improve surface quality but increase print time. The study also demonstrates that active vibration control using an accelerometer (ADXL345) to adjust the motion trajectory enhances geometric accuracy and reduces surface roughness.
Resonance is speed‑dependent; certain feed rates excite the natural frequencies of the printer’s axes. When the nozzle moves at these speeds, even small vibrations can leave a repeating pattern on the print. Because resonant frequencies depend on frame rigidity, belt length, and tension, each printer has its own “problem speeds.”
Belt Tension and Mechanics
Timing belts can generate VFAs because synchronous belt drives do not transmit motion perfectly uniformly. As belt teeth enter and exit mesh with the pulley, small transmission errors occur during the transition from pushing to pulling. These micro-variations in linear velocity repeat at a fixed spatial interval (e.g., ~2 mm for GT2 systems) and can accumulate layer by layer into visible vertical lines.
The effect is partly geometric. A toothed belt behaves like a many-sided polygon wrapped around the pulley: harder tooth sections and more compliant gaps bend differently as they engage, causing slight oscillations in effective radius and carriage speed. This “polygon effect” produces periodic extrusion width variation and a characteristic repeating surface pattern tied to belt pitch.[3]
Amplitude depends on belt stiffness, pulley tooth count, alignment, and especially tension. Belts that are too loose can introduce backlash and irregular meshing, while overly tight belts can transmit more vibration and amplify transmission error.
Diagnosis: Detecting and Categorizing VFAs
VFAs leave signatures. The spacing, consistency, and speed sensitivity of surface ridges act like a diagnostic fingerprint for the motion system. Before changing hardware or firmware, engineers should treat the print itself as a measurement tool, using controlled test parts and observation to determine whether the artifact is tied to belt pitch, motor resonance, or broader mechanical instability.
Visual and Tactile Inspection
An engineer should first inspect prints under a bright light. Holding the part near a window or lamp and rotating it makes it easier to spot repeating lines. Running a fingertip along the surface can also reveal fine ridges not immediately visible. Because VFAs often occur with consistent spacing, counting the number of ridges over a known length can help identify whether the pattern corresponds to belt pitch (≈2 mm) or another frequency.
Test Prints and Speed Towers
To systematically diagnose VFAs, engineers should print simple shapes like cylinders or tall towers. Consistent 2 mm spacing points to belt‑related VFAs, whereas irregular spacing may indicate mechanical resonance or loose components.
A VFA test or speed tower prints vertical columns at gradually increasing speeds. Observing where ridges become most pronounced helps identify resonant speeds. Firmware such as OrcaSlicer automates this test, providing an easy way to map the relationship between speed and artifact.
Identifying Root Causes
VFAs can be categorized by spacing:
VFA spacing | Likely cause | Diagnostic actions |
≈ 2 mm (belt pitch) | Belt meshing/pulley error | Check belt tension; inspect pulleys for wear; ensure idlers/pulleys are aligned. Use genuine high‑quality belts (e.g., Gates GT2). |
Non‑2 mm periodic pattern | Mechanical resonance | Identify problematic print speeds; adjust acceleration; enable input shaping or vibration compensation; stiffen frame. |
Random or multiple frequencies | Loose components or extruder gear slippage | Tighten belts and screws; replace worn bearings; check extruder gears. |
Eliminating VFAs might require tackling several causes simultaneously because frame resonance, belt meshing, and motor vibrations can interact.
Mitigation Strategies
Once the root cause of VFAs is identified, targeted changes such as belt adjustment, speed tuning, or hardware refinement usually resolve the issue without broad, trial-and-error modifications. However, some of these strategies can have positive effects regardless of the initial diagnosis.
Hardware Adjustments
Upgrade stepper motors and pulleys: Many users have reported that switching to 0.9‑° stepper motors and smaller pulleys (e.g., 16‑tooth pulleys) significantly reduces VFAs. These motors offer double the steps per revolution of standard 1.8‑° units, reducing torque ripple. Similarly, upgrading to genuine Gates belts, balanced idlers, and quality pulleys minimizes VFAs.
Stiffen the frame and isolate vibrations: A flexible frame amplifies resonance. Adding bracing, switching to thicker aluminum extrusions, or using vibration‑dampening feet can raise the printer’s natural frequency, pushing resonant modes outside normal print speeds. Placing the printer on a heavy, stable surface or using anti‑vibration pads also helps.
Tune belt tension and alignment: Belt tension influences how smoothly teeth engage. Too little tension allows slip; too much tension causes high forces. Ellis’s Print Tuning Guide recommends tuning belts to about 110 Hz for a 150 mm span and ensuring both belts in a CoreXY system have matching tension, while Prusa recently introduced new belt tuning assistance following an investigation into VFAs on its CORE One system.[4][5] Belts should not rub against idlers or frame. Using high‑quality pulleys and flipping belts (teeth facing inward or outward depending on path) can reduce resonance.
Use better motor drivers: Drivers capable of dynamic microstepping and active current control, such as Trinamic TMC2209 or STSPIN820, enable quiet and smooth operation. STMicroelectronics notes that microstepping up to 1/256th of a step greatly reduces vibrations and ensures precise, silent movement.[6] Some drivers offer automatic resonance compensation or stealthchop modes that further smooth motion.
Consider servo or closed‑loop systems: For critical applications, servo motors or closed‑loop stepper systems provide feedback and adjust motion to minimize errors. Servo‑driven printers can exhibit lower vibrations and higher positioning accuracy.
Firmware and Software Tuning
Enable input shaping and vibration compensation: Modern firmware for printers like Klipper, Marlin and Prusa includes input shaping, which pre‑shapes acceleration commands to cancel out resonance. Combined with resonance compensation in slicers, this can significantly reduce VFAs. Active vibration control using accelerometers (e.g., the ADXL345) to monitor vibrations and adjust motion has been shown to improve surface uniformity and reduce roughness.
Use dynamic microstepping: Drivers that support variable microstepping can switch between high resolution for fine features and lower resolution for long moves. This provides a trade‑off between vibration reduction and controller workload. Many slicers allow per‑move microstepping or dynamic jerk control.
Adjust acceleration, jerk, and speed: VFAs often peak at specific speeds. Conducting speed‑tower tests helps identify safe speed ranges. Reducing acceleration and jerk values lowers inertial forces on the frame, minimizing resonance. Slowing the print speed can hide VFAs by giving the extruder more time to stabilize.
Adjust extrusion settings: Inconsistent extrusion can amplify VFAs. Calibrate extrusion multiplier, temperature, and flow rate to ensure a steady filament stream. Some slicers offer pressure advance or linear advance that compensates for nozzle pressure changes and can complement input shaping.
Maintenance and Routine Checks
Regular maintenance prevents mechanical issues that contribute to VFAs. 3D printer company Sovol recommends checking belt tension, cleaning rails and lead screws, lubricating moving parts, and tightening frame screws.[1] Dust or dirt on rails can cause tiny hops that appear as artifacts. Lubrication reduces friction and helps the extruder move smoothly. After any upgrade or major change—such as switching filament or firmware—print a test piece and inspect for VFAs.
Post‑Processing
When VFAs persist or parts must meet strict surface‑finish requirements, post‑processing is a viable solution. Sanding and polishing, chemical smoothing, and media blasting are all viable techniques for improving surface consistency. Some post-processing techniques involve additional equipment and cost but can rescue high‑value parts.
Recommended reading: Vapor Smoothing 3D Printed Parts
Prusa Research and VFAs
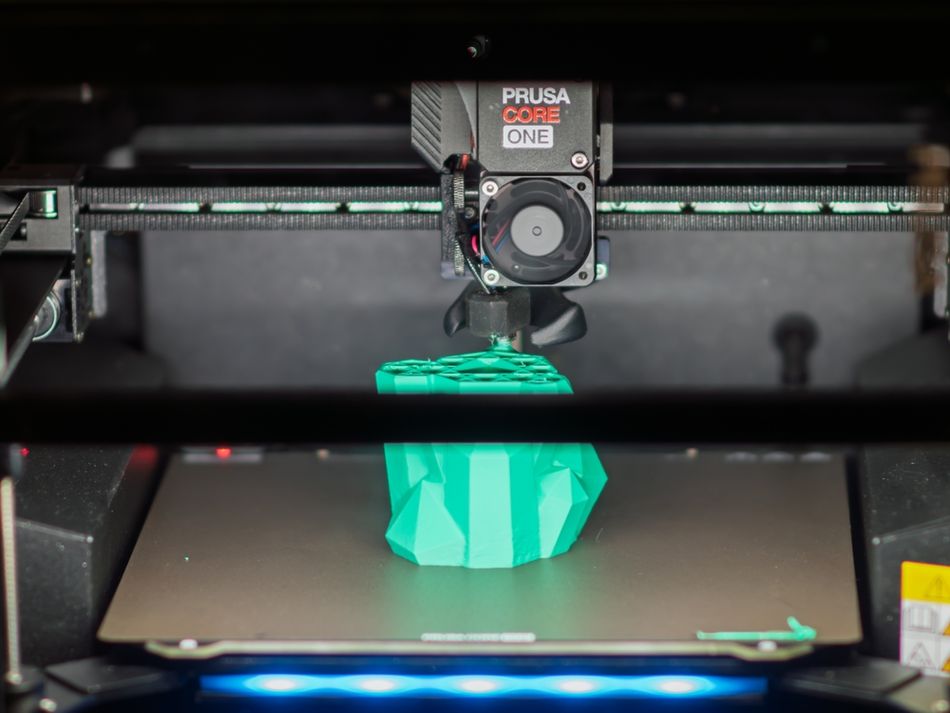
Vertical fine artifacts are not unique to Prusa machines; they affect many belt-driven FDM printers across brands and kinematic architectures. However, complaints surrounding the launch of the Prusa CORE One brought unusual visibility to the issue. Because Prusa Research has a technically engaged user base and a reputation for transparency, the issue became a major talking point in 2025.
In response to user feedback, Prusa Research conducted an in-depth investigation into belt dynamics, motor behavior, and slicer-driven speed variation. Rather than attributing the issue to a single defective component, their analysis framed VFAs as an interaction between belt transmission error, resonance, and speed modulation. The company released updated belt-tension guidance, refined calibration tools, and introduced slicer-level improvements such as “Consistent Surface” in PrusaSlicer to reduce speed-induced surface variation. Its analyses have benefitted the 3D printing community at large, revealing insights that also apply to non-Prusa machines.
Conclusion
Vertical fine artifacts (VFAs) are small-scale defects with a big impact. For digital design engineers, hardware specialists, and electronics engineering students, understanding and controlling VFAs is important for producing parts that meet aesthetic and functional requirements. Identifying the causes of VFAs requires careful inspection and systematic testing, while mitigation currently relies on a mix of mechanical upgrades, firmware tuning, process adjustments, and, where necessary, post-processing.
What is changing is the direction of travel. Real-time vibration monitoring, machine-learning models that classify printer states, smarter slicers that avoid resonant speeds, and improved belt or servo-driven motion systems all point toward printers that increasingly self-diagnose and self-correct. As these technologies mature, surface quality will shift from a manual tuning exercise to an embedded capability, turning VFAs from a persistent nuisance into a largely automated, design-level consideration rather than a shop-floor frustration.
FAQ
What are vertical fine artifacts in 3D printing?
Vertical fine artifacts (VFAs) are tiny, repeating ridges or bumps on the vertical surfaces of 3D printed parts. They typically measure 10–40 µm in width and occur at regular intervals—often about 2 mm apart—due to mechanical resonance or belt meshing.
How can I tell if my print has VFAs or ghosting?
Ghosting or ringing produces ripples that fade away from sharp corners, whereas VFAs persist along the entire height of the part. VFAs usually have uniform spacing and align with the printer’s Z‑axis.
Do VFAs affect part strength?
In some cases, yes. VFAs introduce surface roughness and potential stress concentrations.
Can software alone eliminate VFAs?
Software features such as input shaping, vibration compensation, and dynamic microstepping can reduce VFAs, but they cannot always fully eliminate them because mechanical factors (belt meshing, frame rigidity) may be the root cause.
Will upgrading to 0.9‑° stepper motors fix VFAs completely?
Switching to 0.9‑° stepper motors increases resolution and reduces torque ripple, which can lower the amplitude of VFAs. Many users report substantial improvements.
How often should I check for VFAs?
After any significant change—such as switching filament, upgrading hardware or altering firmware—print a small test piece and inspect for VFAs. Regular checks help catch issues early before they affect important prints.
Are VFAs specific to FDM/FFF printers?
VFAs predominantly affect extrusion‑based systems because they result from the interaction between stepper motors, belts and mechanical structures. Resin printers can exhibit similar artifacts if the build plate or VAT vibrates, but such cases are less common.
Why do VFAs show up on Bambu Lab 3D printers?
On fast Bambu Lab CoreXY printers, VFAs often appear at very high speeds (300+ mm/s). Rapid motion on the X-axis and high acceleration can create repeating surface lines. Try slower outer walls (100–150 mm/s), lower acceleration, and tuned pressure advance. Running outer walls at different speeds than infill usually improves high quality surfaces.
Do PLA, ABS, and PETG change how visible VFAs are?
Yes. PLA shows VFAs clearly, PETG can exaggerate them, and ABS sometimes hides them slightly. Using matte filaments helps make prints look more VFA free because the surface diffuses light and masks vertical lines.
Do hotend upgrades or mods fix VFAs?
A new hotend rarely fixes VFAs on its own. They are usually motion-related.
Better results come from simple mods like belt tension checks, pulley alignment, and stable printer placement.
References
[1] Wang E. VFAs (Vertical Fine Artifacts) in 3D printing explained [Internet]. Shenzhen: Sovol3D; 2024 [cited 2026 Feb 26].
[2] Collins D. What is stepper motor resonance and how can it be avoided? [Internet]. Linear Motion Tips; 2021 [cited 2026 Feb 26].
[3] Prorifi3D. Technical details: motor resonance rippling (VFA) and polygon effect [Internet]. Prorifi3D; 2026 [cited 2026 Feb 26].
[4] Ellis’ Print Tuning Guide. VFAs (Vertical Fine Artifacts) [Internet]. Ellis’ Print Tuning Guide; [cited 2026 Feb 26].
[5] Prusa J. New in PrusaSlicer: consistent surface finish and nerfing VFAs [Internet]. Prusa Research Blog; 2024 [cited 2026 Feb 26].
[6] Cucchi D, Poli E. Spinning the world of 3D printers [Internet]. Geneva: STMicroelectronics; 2018 [cited 2026 Feb 26].