3D print post-processing steps: supports, sanding, smoothing, more
To get the most out of your FDM parts, you’ll need to apply some finishing touches. This can involve support removal, sanding, vapor smoothing, and other steps.

20 Mar, 2023. 13 minutes read
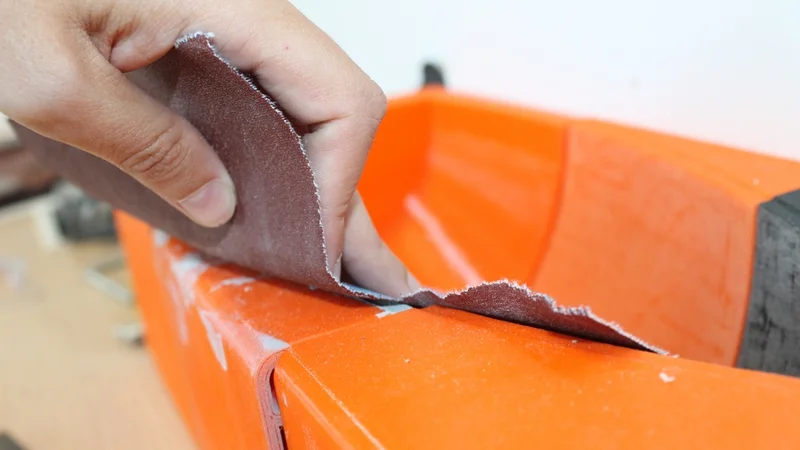
Post-processing steps may include manual sanding
Fused deposition modeling (FDM) 3D printing is a fast and economical way to make plastic parts and prototypes. Most of the time, however, printed parts can’t be used straight from the bed of the 3D printer. Instead, a series of post-processing steps must be taken to prepare the part for its end use.
Post-processing is an important part of the 3D printing workflow. It may involve removing excess material or altering the surface finish of the printed parts, and it typically gives the parts a more professional, “finished” appearance.
But 3D print post-processing varies depending on the function and material of the part. Rough prototypes require minimal post-processing, while marketable products require careful finishing. And some post-processing steps will only work on certain thermoplastics and not others.
This article goes over the basics of FDM post-processing, looking at the most common techniques and why they are used.
Why post-process 3D printed parts?
3D printing or additive manufacturing technology has many advantages. For instance, it allows users to make custom parts within a matter of hours at a very low cost per unit, and these parts can have virtually any shape.
However, 3D printing isn’t perfect. Although it uses many of the same thermoplastics as injection molding, it falls far behind when it comes to surface finish. The biggest culprit here is layer lines. Because 3D printing deposits material in successive layers, it produces a stepped effect on the surface of parts, with post-processing usually required to minimize the appearance of these lines.
There are other reasons to post-process 3D printed parts too. For example, parts might need to have a smooth or high-shine finish, either for aesthetic reasons or to minimize friction. Other parts might need to be colored. Some may require special coatings to protect them from damage during use.
Additionally, many parts require support structures — vertical strips of material that prevent a part from collapsing during printing — and this support material needs to be disconnected from the printed object once printing is complete.
Types of post-processing techniques
There are many ways to post-process FDM parts, only some of which are discussed here. Post-processing techniques can generally be classified into three broad categories, although there may be some overlap between them:
Support removal, in which the support structures are removed from the part with tools, solvents, or water
Textural post-processing, in which the texture of the surface is altered via sanding, smoothing, polishing, coating, etc.
Cosmetic post-processing, in which the parts are given coloration, coating, or other visual adjustments
Support removal
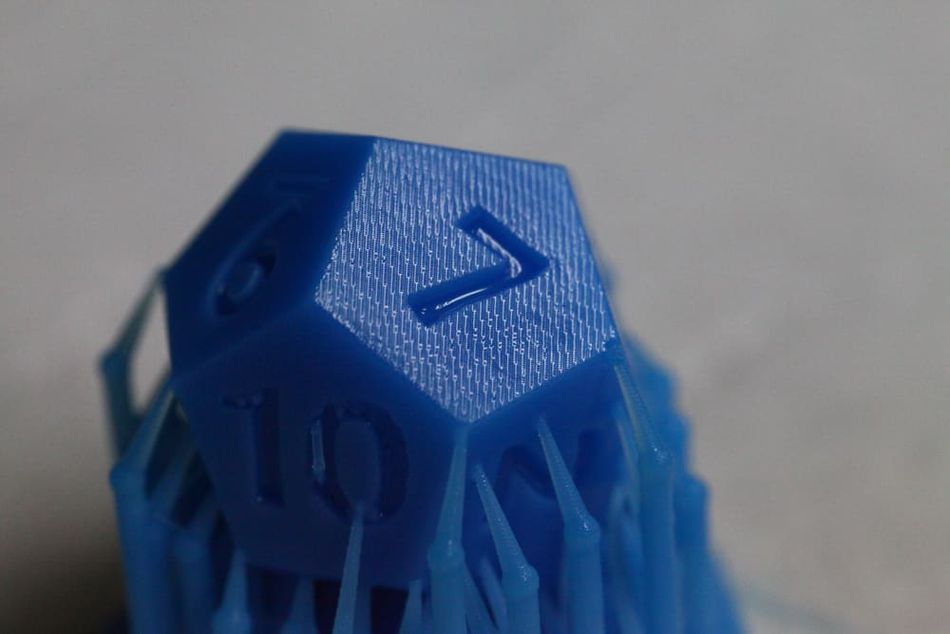
During the FDM 3D printing process, support structures are required to hold up overhanging sections of material and prevent collapse of the printed object. Support structures typically have the appearance of thin towers or walls, and they are printed by the printhead just like areas of the part itself.
The material of the support structures depends on the type of 3D printer. Single-extruder 3D printers must print the supports in the same material as the rest of the part, but dual-extruder 3D printers can print the supports in a dedicated support material which is easier to break or dissolve than the main printing material. All supports must be removed before any further post-processing can be done.
The method of support removal largely depends on whether the printer has used a dedicated support material. If not, the supports must be manually removed using tools like pliers and a knife.
Insoluble supports
Most entry-level 3D printers only have one extruder, which means support structures must be printed in the same material as the part itself.
When this is the case, support structures must be removed manually with pliers. Placement of insoluble supports is important, because removal with pliers will leave a small blemish on the part. However, the appearance of these blemishes can be minimized with other post-processing techniques like sanding.
Soluble supports
Soluble supports — those printed in a dissolvable support material by a second extruder — are very easy to remove. Two common materials used for this purpose are PVA and HIPS, which are strong enough to support a printed part but which dissolve in tap water or a weak solvent.
Soluble supports are removed by soaking the parts in liquid, leaving behind minimal marking on the part surface. A sink or tub will suffice for water-soluble supports, while a glass container is preferable for other types.
Support material | Printing material | Dissolving agent |
PVA | PLA, nylon | Tap water, hydrogen peroxide[1] |
HIPS | ABS | D-limonene |
Breakaway supports
Some dedicated support materials are not soluble but are intentionally weak and brittle and can therefore be removed by hand without the use of tools or fluids. These are commonly referred to as breakaway support materials.
Sanding

After support removal, sanding is the next most common post-processing step for FDM parts. Manually applying sandpaper to the surface of parts helps to eliminate blemishes, remove excess material, and create a more even surface texture. Although time-consuming, sanding is also one of the most cost-effective types of post-processing.
To achieve a high-quality finish, a range of coarse-grit and fine-grit sandpaper is required. Typically, a coarse grit (150–400) will be followed by at least four consecutively finer grits (up to 2000). Electric sanders are not recommended as they can damage parts and cause excessive heat buildup.
When sanding FDM parts, rub the surface of the part in gentle circular motions, taking care to apply pressure evenly over the surface of the part. Applying uneven pressure or focusing too much on one area will excessively alter the geometry of the part. Clean the part with soapy water after each round of sanding to remove excess buildup.
Sanding is often performed before other post-processing steps rather than as a final finish, though sanding alone may suffice for prototypes and non-cosmetic parts.
Polishing
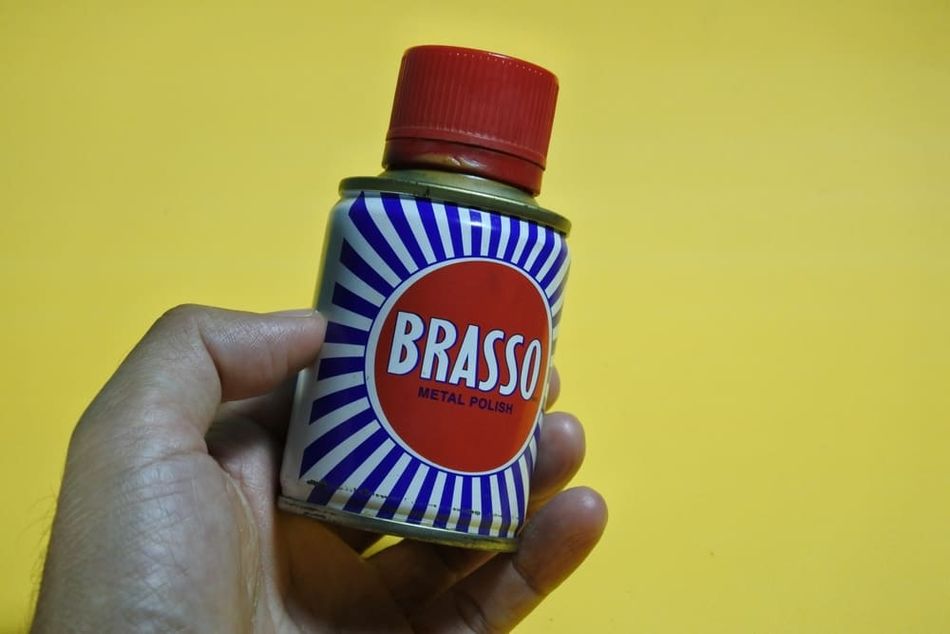
For parts that require a high-shine finish — items like toys and display models, for example — polishing may be performed immediately after sanding with a high-grit sandpaper.
The simplest way to polish FDM parts is to use a microfiber cloth and a polishing compound from a common brand like Dremel or Brasso, applying a small amount of the compound in circular motions.
Those with more experience may prefer to use a buffing wheel — a small felt disc that can be added to a rotary tool like a power drill — to polish their plastic parts. In this scenario, the compound is applied to the wheel itself, which then transfers it to the part. Caution should be exercised when using this method, as excess buffing in one area can deform the part.
Smoothing
One of the main limitations of sanding and polishing is the difficulty of achieving an even finish on all areas of the part surface. Because these techniques require manual application, there will always be some discrepancy in surface finish between different areas of the part.
A solution to this problem is to use a chemical smoothing technique, in which a chemical substance dissolves a fine layer of the entire surface. When timed properly, this technique can remove the uneven and blemished outer layer of a part without damaging what lies underneath. It can also produce a high-shine finish to rival a polished surface — but without the time-consuming manual labor.
Disadvantages of chemical smoothing include reduced dimensional accuracy, as the level of smoothing can be difficult to control. Tight tolerances cannot easily be met. Choosing a chemical also depends on the printing material, with ABS by far the most suited to this method.
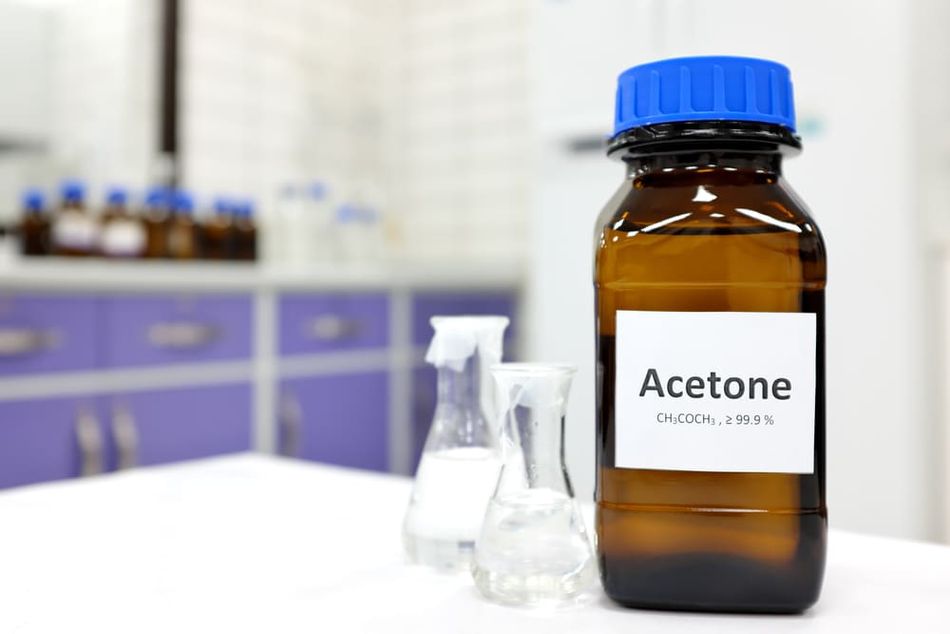
Acetone
Many FDM users print with ABS (acrylonitrile butadiene styrene) over PLA because of its durability and heat resistance. But the plastic is also very easy to smooth using an organic solvent called acetone, which dissolves the plastic upon contact. For this reason, acetone can also be used to “weld” multi-component ABS parts together, creating a stronger bond than gluing.
Acetone can be rubbed onto ABS parts like a polishing compound, but a much more consistent finish can be achieved via vapor smoothing or dipping. Both methods require gloves and a facemask and should be carried out in a ventilated area.
Recommended reading: ABS smoothing: Acetone vapor baths & other ways to remove layer lines
Vapor smoothing
Using acetone vapors to smooth ABS parts might seem like a complex and labor-intensive process. However, once mastered, it is one of the most efficient techniques for achieving a smooth surface.
The vapor smoothing process requires a clear, sealable container made from glass or PP, paper towels soaked with acetone, and a small metal platform (such as a foil-wrapped saucer) on which to place the ABS part. The towels should be stuck to the inside walls of the container, using magnets if the wetness alone does not suffice.
The acetone-soaked paper towels will release acetone vapors, which will gently penetrate the entire exposed surface of the part. Because the container is sealed, the vapors will not escape. Additionally, by leaving a small window between the paper towels, it is possible to watch as the part gets gradually smoothed by the solvent then unseal the container when the desired level of smoothness has been achieved.
One disadvantage of vapor smoothing is that the bottom of the part touching the platform will not get evenly smoothed. However, this is acceptable for parts which have a flat bottom. Better results may be achieved with a standalone desktop smoothing device.[2]
Dipping
A faster but less precise method of acetone smoothing involves dipping the ABS part in a bath of liquid acetone. The best way to carry out this method is to fill a small PP container with acetone, submerge the part until fully smoothed, then drain the solvent without touching the part — ideally by making a drainage hole in the underside of the container.
Dipping is less effective than vapor smoothing. It uses up a far greater amount of acetone, and the wet part may continue to dissolve slightly after removal from the bath.
Other
Non-ABS parts can also be smoothed using chemicals, although less easily. For example, PLA can be smoothed with ethyl acetate, a solvent found in nail polish remover, but often with average results. More powerful chemicals like methyl ethyl ketone (MEK), tetrahydrofuran (THF), and dichloromethane (DCM) can also dissolve PLA, but their levels of toxicity and flammability make them hazardous for home use.
Some 3D printing materials have been developed specifically so they can be smoothed. For example, Polymaker’s Polysmooth PVB material is optimized for smoothing in isopropyl alcohol.
Recommended reading: Dissolving PLA: How to melt PLA and smooth 3D prints
Coloring
FDM is a simple 3D printing process that prints parts in a single color unless dual extruders are used. In terms of colorization, it is a world away from technologies like Stratasys PolyJet printing. Because of this, FDM users often color their parts during the post-processing stage, either by painting or dyeing.
Priming
Before parts can be painted, they must be sanded (up to a medium grit) then primed to create an even surface onto which the paint can adhere. The best primers for FDM parts are those in aerosol form.
If possible, suspend the FDM part from a string so that the primer can be sprayed all over the part surface in a thin layer. Apply two coats, allowing enough time for the first coat to dry before beginning the second. Once the final coat is fully dry, sand the part very lightly with fine-grit sandpaper. The primer will give the parts a light gray appearance upon which other colors can be applied.
Painting
The easiest way to add color to a primed part is with paint. Acrylic paints and spray paints are both suitable for coloring printed models. Acrylic paints require less surface preparation as they create less mess; however, spray paints provide more consistent coverage.
Several layers of paint may be needed to achieve the desired appearance. Typically, an undercoat in a neutral color like white is followed by several further layers and finally by a topcoat. When using spray paint, apply layers quickly from a short distance, and use masking tape if using different colors in different sections. Adding a clear topcoat after painting creates a glossy shell over the color.
Dyeing
For the majority of 3D printing polymers, painting is the best way to apply color during the post-processing stage. However, when using nylon filament — which is hygroscopic and easily absorbs water — it is also possible to dye the printed parts.
The dyeing process is simple. It involves filling a disposable container with a solution of boiling water and fabric dye such as Rit (typically with a 5:1 ratio) then submerging the nylon part for between one and 10 minutes, depending on the level of coloration desired. The part can be removed with tongs or a string and should then be rinsed in cold water to remove excess dye.
The container of leftover dye can be reused, but the solution should be reheated to above 60°C in a microwave before the next round of dyeing.
Outer shell
Adding a protective outer layer to 3D printed parts can improve part strength and scratch resistance. It can also give parts a completely different appearance. Two methods for adding a protective outer shell are epoxy coating and metal electroplating.
Epoxy coating
Epoxy resins are versatile materials that can be used as adhesives, composite materials, and coatings. In FDM 3D printing, the application of epoxy resin to a part creates a smooth surface finish that is usually more durable than the bare polymer underneath. Another advantage of epoxy is its ability to penetrate porous substrates, making parts more waterproof.
In most cases, epoxy can be added to the surface of parts like paint. A two-part epoxy — like Smooth-On’s XTC-3D or LOCTITE’s Hysol E-20HP — consists of a resin and a hardener, which should be mixed thoroughly just before application. After sanding and cleaning the part, the epoxy mixture can be applied using a sponge, brush, or putty knife, before letting it dry then adding a second coating. After 24 hours, perform a final round of sanding with a fine-grit sandpaper.
Metal plating
One of the most advanced post-processing techniques for FDM parts is metal plating or electroplating. This method adds a protective metal coating — typically copper or nickel — to polymer parts using the process of electrolysis, improving a part’s mechanical properties and creating a stunning cosmetic finish. It also creates a thinner shell than epoxy coating, maintaining dimensional accuracy.
The electroplating process can only be carried out on parts painted with a conductive paint. It requires three main components: an electrical device called a power rectifier, a liquid electroforming solution, and a sacrificial anode, i.e. a small piece of metal that is the same material as the electroforming solution.
When the 3D printed part is submerged in a container of the electroforming solution, the process of electrolysis transfers metal from the anode to the conductive surface of the part, creating a thin and consistent metal coating.
Post-processing for other 3D printing technologies
3D printing processes other than FDM have their own unique post-processing requirements. Unlike FDM post-processing, most of the steps are carried out in professional or industrial environments.
Stereolithography (SLA) post-processing requires part washing to remove excess resin and optional part curing in a heated chamber to finalize the polymerization process. Parts may also be subject to support removal, sanding, and coloring.
Selective laser sintering (SLS) post-processing involves depowdering the finished parts to remove excess material, manually or by tumbling, followed by optional steps like smoothing and dyeing.
Binder jetting post-processing requires curing of the green metal parts in an oven, sintering to burn away binder, then infiltration to fill gaps.
Powder bed fusion (DMLS/SLM) post-processing may involve cutting parts from the build plate, support removal, abrasive blasting, and heat treatment to improve part strength.
Key takeaways
Users of FDM 3D printers will get the best results from their machine once they have mastered the various stages of post-processing. Although some post-processing steps can take a long time (e.g. sanding and painting) and others are difficult to master (e.g. electroplating), post-processing turns rough prototypes into functional, aesthetically pleasing end-use parts.
References
[1] Park SJ, Lee JE, Park JH, Lee NK, Lyu MY, Park K, Koo MS, Cho SH, Son Y, Park SH. Enhanced solubility of the support in an FDM-based 3D printed structure using hydrogen peroxide under ultrasonication. Advances in Materials Science and Engineering. 2018 Jan 1;2018.
[2] Xu K, Xi T, Liu C. Design of the desktop vapor polisher with acetone vapor absorption mechanism. InJournal of Physics: Conference Series 2019 Aug 1 (Vol. 1303, No. 1, p. 012061). IOP Publishing.
in this article
1. Why post-process 3D printed parts?2. Types of post-processing techniques3. Support removal4. Insoluble supports5. Soluble supports6. Breakaway supports7. Sanding8. Polishing9. Smoothing10. Acetone11. Vapor smoothing12. Dipping13. Other14. Coloring15. Outer shell16. Post-processing for other 3D printing technologies17. Key takeaways18. References