Infill Percentage: Best Infill for TPU 3D Prints and More
Understanding the basics of infill densities and patterns will allow you to optimize your final 3D print and printing process efficiency.

Last updated on 06 May, 2024. 10 minutes read
The infill percentage setting in slicer programs controls how dense the internal geometry of a part will be.
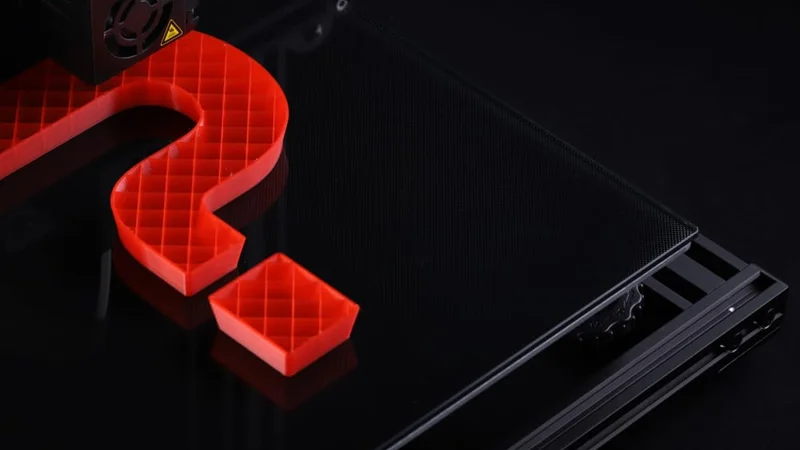
If you are new to FDM 3D printing, you might have noticed that the term “infill” keeps coming up alongside 3D models and in 3D printing tutorials. What is infill? In the simplest terms, infill refers to the density of plastic inside the 3D printed object. In the FDM 3D printing process, parts are not necessarily made solid. Instead, makers can generate an infill in their slicing software, which creates a pattern inside the solid outer shell of the printed part.
In fact, additive manufacturing is one of the only manufacturing processes that gives such a high degree of control when it comes to the inside of a part: most other manufacturing processes simply allow for a solid or fully hollow construction.
There are many reasons why makers use infills. For one, infills are a great way to reduce material usage (and costs) and create more lightweight parts. However, it is important to choose the right infill parameters like pattern and infill percentage. These slicer settings influence the integrity and strength of the final printed object as well as other factors like material consumption and print speed. In this article, we are focusing on infill percentages to understand what different percentage values mean and what the best infill percentages are for different materials like PLA, ABS, and TPU.
What is Infill Percentage?
As we saw, infill refers to the structure inside a 3D printed model. Infill percentage, for its part, controls the density of this structure and is represented by a percentage value. For example, a 3D print with 100% infill will have a solid internal structure, while a 3D model with 0% infill will be printed as an empty shell. In other words, a higher infill percentage will increase the amount of material inside the 3D printed component.
The infill percentage directly influences the infill density, but it also has an impact on many other properties, including the final 3D part’s strength, flexibility, and weight, as well as overall 3D print time. In general, a higher infill percentage will increase part strength (though this is highly dependent on the infill pattern), weight, and 3D printing time.[1] Choosing the right infill percentage for a particular 3D print job is therefore important in meeting design and performance goals.
To adjust 3D printing infill density in Cura slicer software, simply open the program’s infill settings (found in the main print settings menu). Infill density should be the first option in the drop-down menu, and it is represented as a percentage. The process is similar in other slicer programs like Simplify3D and PrusaSlicer.
Recommended reading: Infill 3D printing: All you need to know
Recommendations for Infill Percentage
While most slicer programs come with a default infill percentage of about 20%, there is no one-size-fits-all answer for choosing the right infill percentage. The optimal infill density will depend on several factors, including what the purpose of your 3D print is (i.e. is it a prototype, visual model, or functional part) and what the design goals are (i.e. producing a lightweight part or a dense and strong component). Below you’ll find some helpful tips for choosing infill percentage based on what type of part you are 3D printing.
Best infill percentage for non-functional 3D prints
For non-functional 3D prints—this includes visual prototypes and end-use prints that do not require strength or load bearing properties—a low infill percentage should be sufficient. Depending on the part geometry, you can select an infill between 0% and 15%. Choosing a low infill density will enable you to print your part rapidly and with minimal material cost.
Best infill percentage for flexible 3D prints
When it comes to choosing an infill density for 3D prints made from flexible filaments such as TPU, TPA, and TPC, the main thing to consider is how the percentage will influence part flexibility. Ultimately, the lower the infill percentage, the higher the flexibility. By the same logic, choosing a higher infill density will result in a less flexible part. This means that when printing with TPU, you can adjust the flexibility properties of your 3D print by tuning the infill percentage. Like with more conventional filaments such as PLA and ABS, print time, material usage, costs, and weight will also increase with a higher infill percentage.
Best infill percentage for standard 3D prints
For standard 3D prints, which will undergo light usage and require some strength, an infill percentage between 15% and 50% is suggested. This range of infill density will provide a limited degree of strength and reinforce the part’s structure without adding significant weight or print time. The lower the infill percentage, the less material will be used and thus the cheaper the cost of 3D printing will be.
Best infill percentage for functional 3D prints
Functional parts, such as brackets or components that must withstand forces and loads, typically require a higher infill density to ensure they won’t break under pressure. The minimum infill percentage for functional 3D prints should be 50%. While it is possible to choose 100% infill density, this will take the longest to print and use the most material. It will also result in the heaviest part, which can minimize the benefits of the solid structure.
Recommended reading: How to Remove Supports from 3D Prints
Advanced infill percentage
For even greater control over a 3D print’s final properties, it is possible to integrate different infill percentages within a single print. This is typically known as “variable infill density” or “infill gradient”. Using this technique, it is possible to vary the infill density in different regions of the print based on load distribution. More specifically: higher infill percentages can be assigned to areas of the part that will be subjected to greater forces, while lower percentages can be used in less critical regions to speed up the print time, reduce part weight, and save on materials. Adjusting variable infill density settings vary depending on the slicer program you are using. In Cura, this advanced technique can be achieved by using support blockers on certain parts of the 3D model and modifying the infill percentage for those parts.[3]
All that said, infill percentage is not the only factor that will influence how strong your 3D print is. The right infill pattern can help you optimize weight and strength without drastically increasing density. Let’s take a look.
Choosing an infill pattern
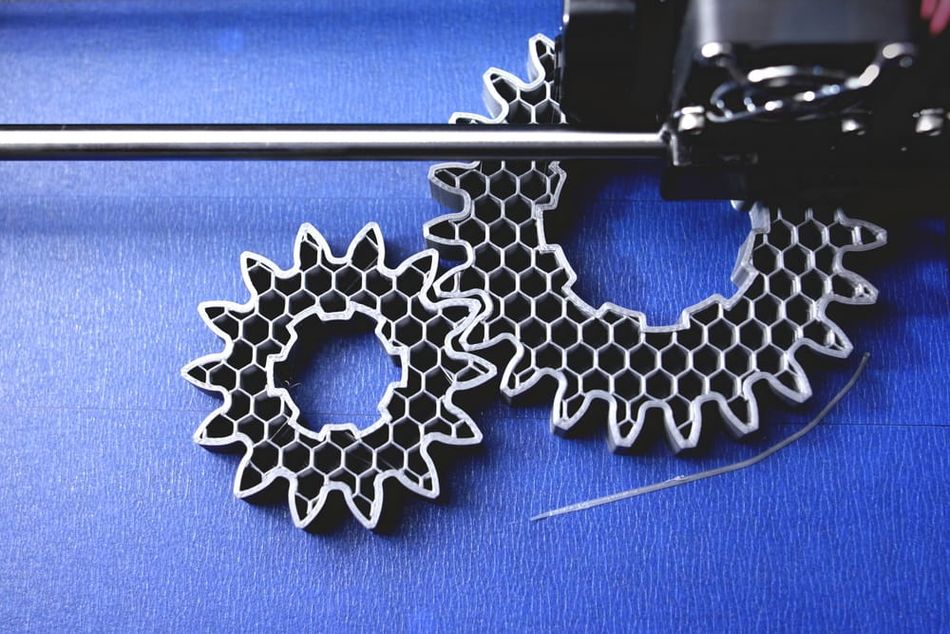
Infill pattern is a setting in 3D printing slicer programs, such as Cura and Simplify3D, that determines the geometry of the internal infill structure. Today, there are several different infill patterns available, each of which ranges in complexity and has benefits in terms of part strength and printing time. Among the most common types of infill patterns are lines, grid pattern, triangles, cubic, concentric, zig-zag, honeycomb, and gyroid.[2] Here are our recommendations for infill patterns depending on your 3D printing application.
Recommended reading: Understanding the Gyroid Infill in 3D Printing
Best infill pattern for non-functional 3D prints
Non-functional 3D prints are models that do not require high strength or resistance. They include visual prototypes, decorations, and other objects that will not come under mechanical force. These types of 3D prints can fulfill their function with lower infill density (0-15%) and with the simplest infill patterns, such as lines or grid. These two patterns provide adequate strength in only two dimensions, and can be printed quickly. Lines are the fastest infill pattern to print and use the least amount of material, though they are less strong than grid, which provides strength in two directions.
Best infill pattern for flexible 3D prints
The best infill patterns for flexible 3D prints made from TPU and other rubber-like filaments are concentric, cross, and cross 3D. Concentric infill consists of internal rings that follow the perimeter of the part’s walls. This pattern is great for flexible filaments because it provides little reinforcement to the walls and thus allows for flexible movement. As the names imply, cross and cross 3D are made up of 2D and 3D cross structures, respectively. Because the crosses are made up of short horizontal lines (compared to longer lines characteristic of line or grid), they provide less strength and better flexibility. Cross 3D, for its part, also reduces the vertical strength, promoting flexibility in all directions.

Best infill pattern for standard 3D prints
For standard 3D prints that have some physical function but do not need a high level of strength, slightly more complex infill patterns like triangle and honeycomb are suitable. The triangle pattern provides strength in the direction of the part’s outer walls, while honeycomb offers good strength in all directions. Honeycomb is also known to have one of the best strength-to-weight ratios. These patterns do use more material and will extend your print time compared to the simplest infill patterns.
Best infill pattern for functional 3D prints
For functional 3D prints, the strongest infill patterns are recommended. Generally speaking, the strongest infill patterns are three dimensional patterns, such as cubic, octet, and gyroid. The cubic infill pattern consists of repeating 3D cubes oriented on their corner. This orientation results in high strength in all directions. The octet pattern consists of a combination of 3D tetrahedrons and cubes, which provides very high strength. Last but not least, the gyroid infill is a complex and unique geometric structure made up exclusively of continuous wavy lines. The gyroid infill is very strong in all directions as well as shear resistant. It also requires less material to achieve greater strength than many infill patterns and can be printed rapidly due to its curvy lines.
Recommended reading: Cura infill patterns: What they are and when to use them
Other Infill Settings
There are many other infill settings other than infill density and infill pattern. While we won’t do a deep dive on those here, we will quickly cover some notable Cura infill settings you should be aware of.
Infill line density: this setting can be used as an alternative to the infill density percentage. Rather than set the density as a percentage, it will be determined by the distance between each infill line.
Infill XY offset: This setting enables you to shift the center of the infill pattern within the 3D model. This setting is controlled using either positive or negative values (the former moving the infill pattern to the right, the latter moving it left).
Infill layer thickness: Just as you can control the layer thickness of the outer shell, you can also control the layer thickness of the infill. For example, thicker infill layers can be used to speed up print times. Infill layer thickness must, however, be multiples of the model’s layer height in order to work.
Infill before walls: In Cura, this setting can be activated so that the infill is printed before the shell. This can offer benefits in terms of overhang quality, however it can also result in a less smooth surface.[4]
Conclusion
Infills are an important part of extrusion-based FDM 3D printing and understanding how the different densities and patterns influence your final 3D model is vital. Why? Because choosing the right infill percentage and pattern allows you to optimize not only the performance of your printed object but also time and cost efficiency of the printing process.
In this article we covered the basics of choosing an infill percentage and pattern depending on the type of object you are 3D printing. Here are some of our key takeaways:
Your choice of infill settings will influence the strength, resistance, and flexibility of your 3D print, as well as print times and material usage.
A higher infill percentage corresponds to a greater infill density. A part with 100% infill will be a solid part, while a part with 0% infill will be hollow.
There is a correlation between higher infill density and greater tensile strength.
While non-functional 3D prints can be printed with a low infill density (0-15%), functional components should have an infill percentage of at least 50%.
3D infill patterns, such as cubic, octet, and gyroid provide high strength in all directions. Simpler infill patterns, like lines or grid, are faster to print but provide limited strength in 1-2 directions.
Frequently Asked Questions (FAQs)
Q: What is infill density?
A: Infill density is a slicer setting that determines how much material will be printed inside the 3D model. Typically, infill density is represented by a percentage: 100% infill will print a solid part, while 50% infill will print a part that is 50% filled and 50% hollow.
Q: What is the recommended infill percentage for functional parts?
A: For functional parts that require high strength and durability, a higher infill percentage (minimum 50%) is generally recommended. However, the optimal infill percentage may vary depending on the specific application, load requirements, and material properties.
Q: What is the best infill for TPU and flexible materials?
A: The best infill patterns for TPU are concentric, cross, and cross 3D. In terms of best infill percentage for TPU, it depends on the specific application at hand: a higher infill percentage will result in a stiffer part, while a lower infill percentage will result in a more soft and flexible print.
Q: How does infill percentage affect print time and material usage?
A: Higher infill percentages result in longer print times and increased material usage, as more material is required to fill the internal structure of the object. Lower infill percentages can significantly reduce print time and material consumption but may compromise strength and durability.
Q: Can I use different infill percentages for different regions of the same object?
A: Yes, many slicer software offer advanced features that allow you to vary the infill percentage within different regions of the same object. This technique, known as infill gradients or variable infill density, can optimize the strength-to-weight ratio and improve stress distribution.
References
[1] M Rismalia et al. Infill pattern and density effects on the tensile properties of 3D printed PLA material. Journal of Physics: Conference Series, Volume 1402, Issue 4. 2019.
[2] Infill settings [Internet]. Ultimaker Support. Ultimaker; 2020 [cited 2022 Sept 7]. Available from: https://support.ultimaker.com/hc/en-us/articles/360012607079-Infill-settings
[3] Tech Overhaul. Variable Infill Density | Cura 5 | 3D Printing [Internet]. Youtube, December 13, 2022. Available from: https://www.youtube.com/watch?v=tk7XhV1tSpE
[4] Infill settings [Internet]. UltiMaker Support, November 14, 2022. Available from: https://support.ultimaker.com/s/article/1667411002588