Vapour Smoothing: An Effective Surface Finish Process in 3D Printing
With its ability to transform rough, layered surfaces into sleek, professional-grade finishes, vapour smoothing emerges as a game-changing post-processing technique in the realm of 3D printing. This article will dig into its specificities, benefits and applications.
06 Oct, 2023. 6 minutes read
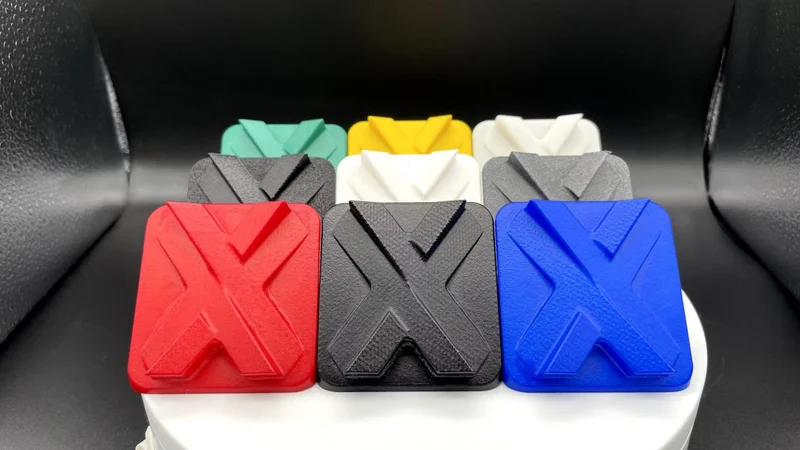
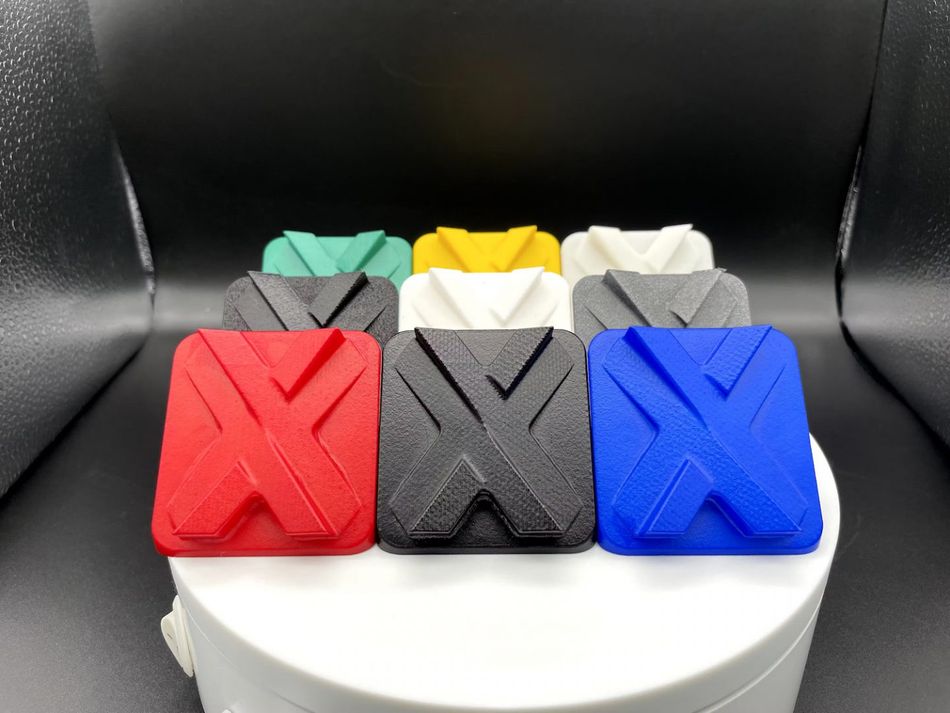
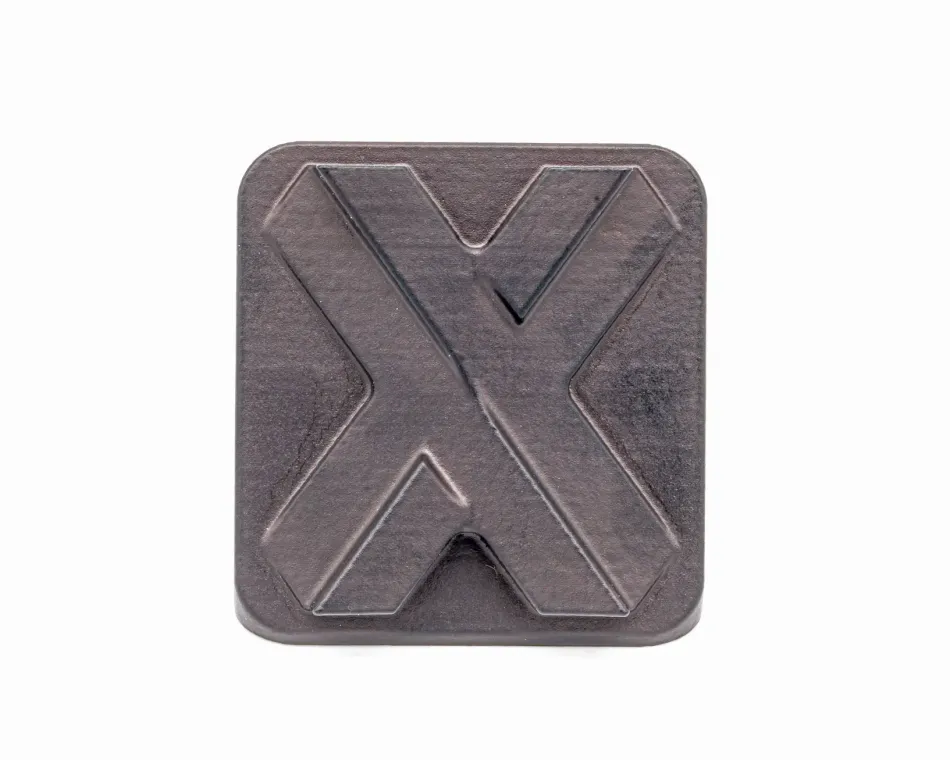
Vapour smoothed coloured SLS and MJF parts
This article was first published on
xometry.euAs the demand for 3D printed parts grows, achieving a high-quality surface finish has become essential. Hence the importance of post-processing techniques for 3D printed objects to enhance the aesthetic and mechanical properties. By solving the common problem of visible layer lines and rough surfaces on 3D prints, vapour smoothing is an effective option for achieving professional-quality results.
What is vapour smoothing in 3D printing?
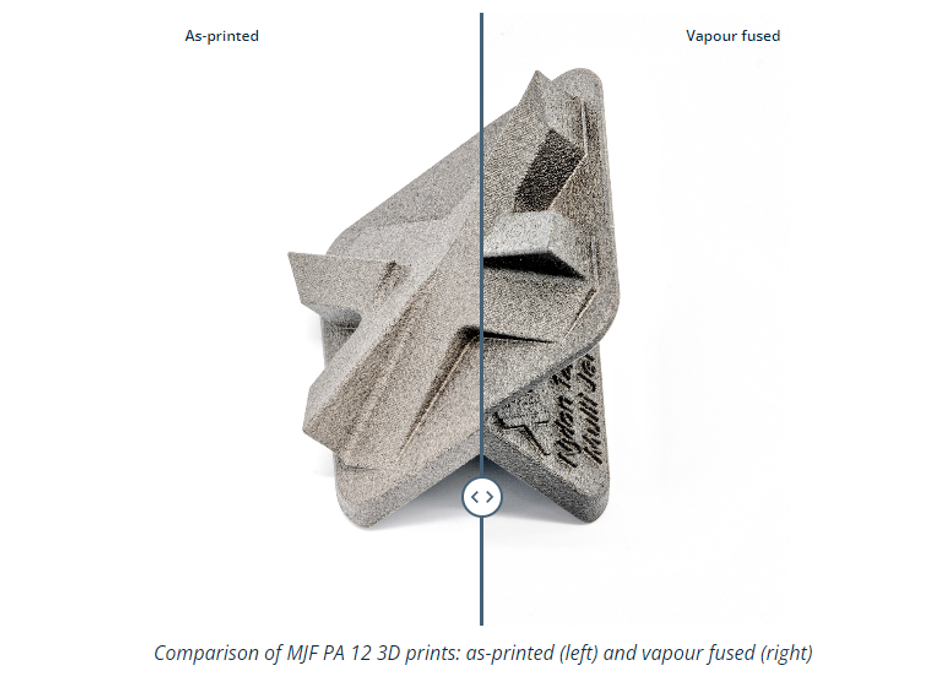
Vapour smoothing is a finishing technique for 3D prints that involves exposing the printed parts to vaporised solvent. The process is also known as “chemical vapour smoothing”, “vapour polishing” or “vapour fusion”, and helps eliminate the sugar cube-like finishes and the unsightly layer lines often associated with 3D prints.
The chemical vapours used in the process react with the material’s surface, causing it to melt and partially dissolve, resulting in a smoother finish. By using this technique, 3D printed parts can get a smooth and glossy surface that looks more professional.
Vapour smoothing can be seen as an excellent finishing option that adds significant value to 3D printing. The technique is widely used in the automotive and aerospace industries, where parts must be as smooth and perfect as possible for optimal function and aesthetics.
How does vapour smoothing work?
Vapour smoothing is a highly effective and efficient way to achieve smooth surface finishes on various materials without any material removal. It employs a finishing agent and controlled chemical melt to achieve the desired outcome. Maintaining proper temperature and pressure control during the process is essential to achieve the desired outcome while avoiding any damage to the workpiece.
Here is a step-by-step guide on how a fully automated smoothing process works:
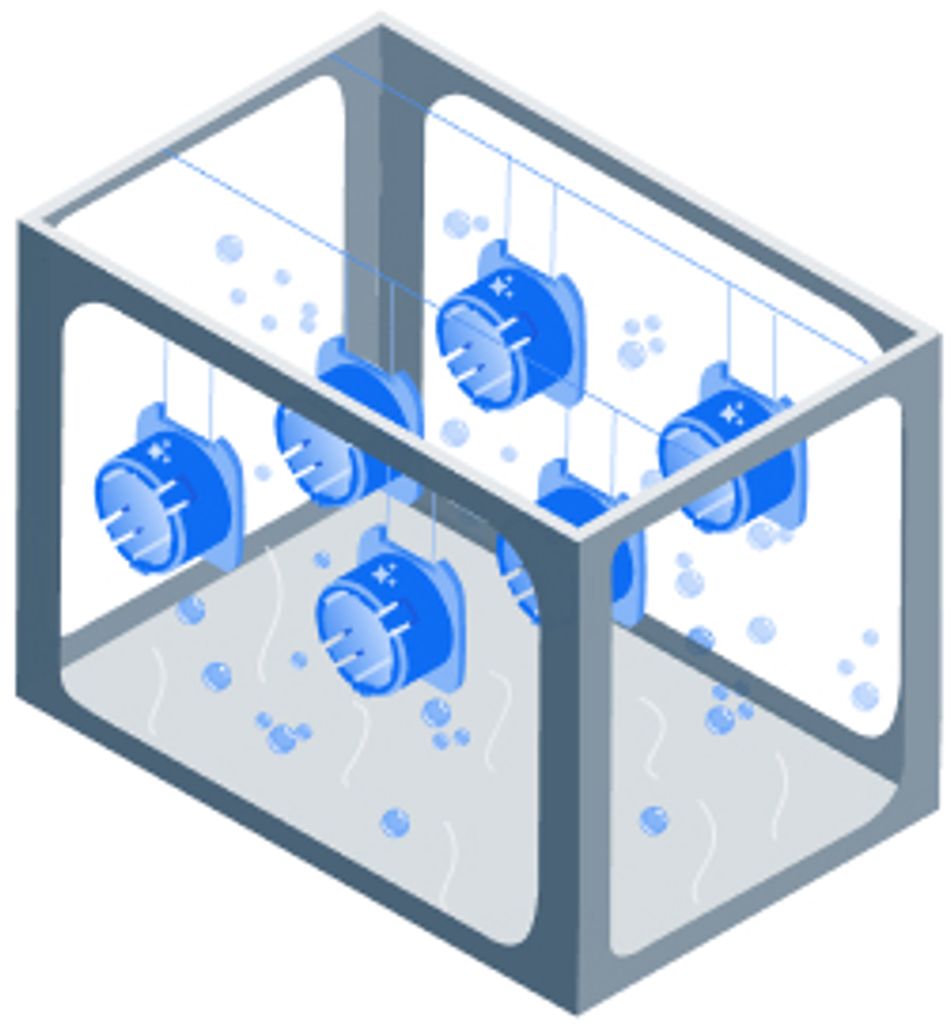
- Step 1 – The workpiece is placed in a sealed processing chamber with a finishing agent, typically FA 326. The agent is commonly used for various plastic materials, but different agents may be utilised depending on the material being worked on.
- Step 2 – With the workpiece inside the smoothing chamber, the agent is heated to a specific temperature to create a vapour surrounding the part. Maintaining temperature and pressure control is critical to ensure the vapour is uniformly distributed across the surface.
- Step 3 – The vapour clings to the part’s surface, creating a controlled chemical melt. This melt reduces the peaks and valleys of the surface by liquefying and redistributing the material to create a smoother surface.
- Step 4 – The chemical melt also enhances the lustre and shine of the material. The degree to which the shine is enhanced depends on the processing parameters and the finishing agent.
- Step 5 – Once the agent has done its job, the smoothing chamber is heated to remove the vapour and finishing agent, which are then collected in a vat. The workpiece is left residue-free, and no material is removed during the process.
- Step 6 – After the smoothing process is complete, the workpiece can undergo a secondary process like dyeing, spray painting, or any other surface treatment.
Technology and types of materials available
Vapour smoothing is extensively used across various 3D printing technologies, polymers and elastomers. The technique can be applied to a vast range of 3D printing materials, with the most commonly used ones being PA 12 and PA 11. The vapour fusing post-processing technique can be combined with dyeing in order to get part with a smooth and coloured surface.
Benefits of vapour smoothing
3D printing has revolutionised manufacturing, enabling the production of complex parts with intricate geometries. However, as the technology evolved, improving the surface finish of printed parts remained a challenge. That’s where this post-processing technique significantly enhances the surface of 3D printed parts. Its major benefits are listed below.
Improved surface finish
Compared to standard SLS parts, which typically have a surface roughness greater than 8 μm Ra, chemical vapour smoothing can achieve a surface finish below the 3 μm Ra threshold.
Enhanced performance
An improved surface finish considerably impacts the mechanical performance of a printed part. When it comes to additive manufacturing, surface roughness directly affects the part’s tensile strength, elongation at break, and flexural performance. Whereas a poor surface finish can create stress concentrations and reduce the part’s fatigue life, causing the part to fail prematurely.
Moisture resistance
This surface finish significantly reduces the moisture absorption of the part’s surface. Moisture can lead to the degradation of the part and affect its mechanical properties. By sealing the part’s surface, vapour smoothing prevents moisture absorption, making the printed part more durable.
Non-line-of-sight features
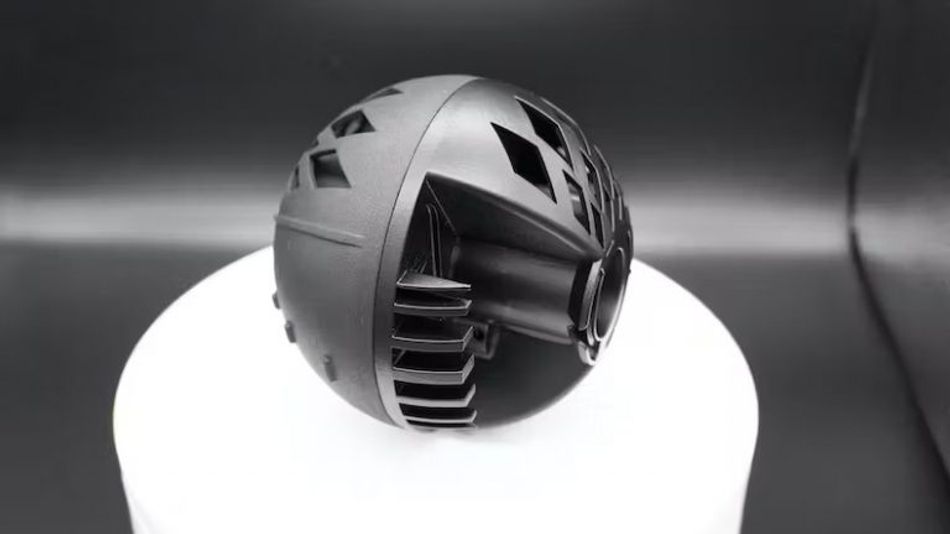
One of the most significant advantages of this process is its ability to polish non-line-of-sight features. The technique can reach deep recesses and internal cavities inaccessible to traditional polishing or sanding methods. Therefore, parts with complex geometries can still achieve a high-quality surface finish.
Dimensional accuracy
Vapour smoothing preserves the printed part’s geometries and dimensional accuracy while enhancing its surface finish. Unlike traditional machining or sanding processes, which can deform or modify the printed part’s dimensions, vapour polishing is non-abrasive and maintains the part’s original shape. This is especially important for high-precision parts that require strict dimensional tolerances.
Design tips to follow for vapour smoothing 3D parts
When designing CAD files for parts that will be vapour smoothed after printing, you should keep specific design tips in mind. Take a look at these guidelines to ensure your parts turn out beautifully and with a perfect finish.
- Include fillets, curves, edges, or lines connecting two surfaces to create a rounded edge. This allows the smoothing process to be more effective and even.
- Avoid geometry with acute edges or sharp internal corners, as these parts can accumulate chemicals and hinder the smoothing process’s effectiveness.
- Ensure proper surface preparation including blasting and cleaning before vapour smoothing, to allow the vapour to settle evenly on the surfaces.
- Keep the wall thicknesses uniform to allow the vapour to penetrate the component more evenly, thus ensuring a smooth surface texture.
- Design parts with sufficient mass to allow for a longer exposure time to the vapour. Thin sections may have difficulty retaining heat.
- Utilise support structures in areas with intricate features to ensure they do not warp during the smoothing process.
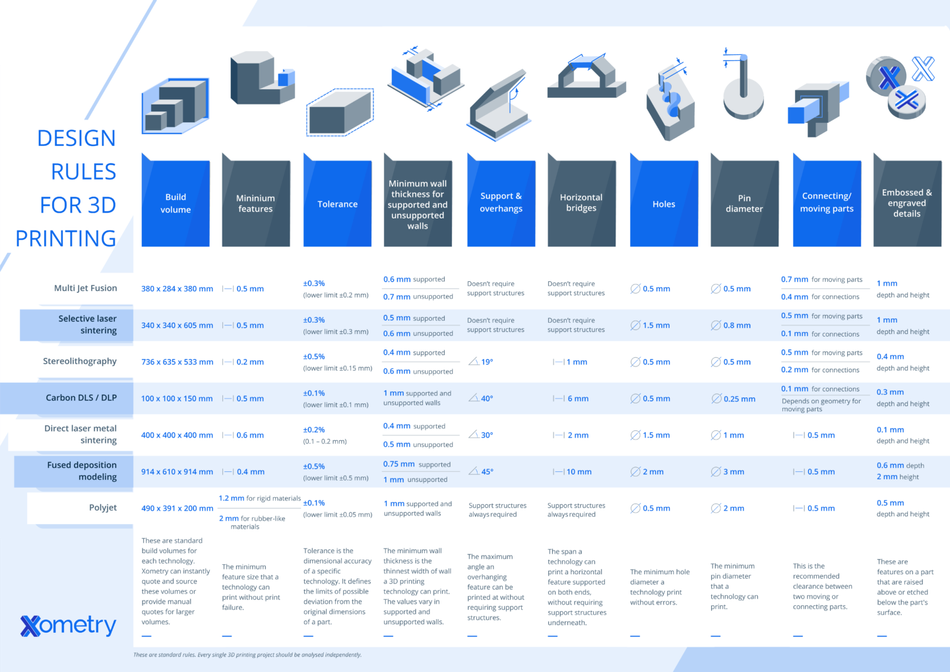
The creation and design phase of a part is an essential step, especially in 3D printing. That is why it is important to follow certain design guidelines. This infographic details all the essential guidelines for 7 technologies.
Applications of vapour smoothing
Vapour polishing is a robust finishing process that can significantly enhance the performance and aesthetics of 3D prints. Some applications where this technique can be used to create superior, end-use parts are as follow:
- Medical devices: Custom medical devices require high precision, durability, and biocompatibility. Vapour smoothing enables the fabrication of smooth, non-porous, and easy-to-clean medical parts that are comfortable to wear and sweat-proof.
- Wearables: Wearable technology is a growing market that demands lightweight, durable, and comfortable components. Vapour smoothing 3D prints can provide high-quality aesthetics and wearability. With soft-touch finishes, easy-to-clean surfaces, and integrated features, customized wearable parts with these finishes can meet the industry’s stringent requirements.
- Fluid flow components: Fluid transfer and handling components require high levels of precision, leak-proof operation, and ease of maintenance. Vapour smoothing can create liquid reservoirs and tanks, fluid transfer pipes and manifolds, and ducts with smooth and sealed surfaces that prevent bacteria growth, making them ideal for skin and food contact environments.
- Automotive and industrial machinery: Vapour smoothing is an ideal finishing process for parts such as valve covers, oil sumps, and other critical components that must be leak-proof and corrosion-resistant. These parts’ smooth, tactile, and durable surface can improve their aesthetics and provide increased functionality.
Source your vapour fused 3D prints at Xometry
Vapour smoothing is a highly effective and efficient technique for finishing 3D printed parts that eliminate visible layer lines and improve surface roughness. With its ability to preserve the part’s original features and geometries, it is an excellent solution for parts with complex geometries that require strict dimensional tolerances.