How to 3D Print Snap-Fit Joints
A comprehensive guide to 3D printing snap-fit joints, from the basics to troubleshooting common issues.

21 Aug, 2025. 9 minutes read
Snap‑fit joints are ubiquitous in product design. From backpack clasps, to mobile‑phone enclosures, to tupperware: these self‑locking connectors enable fast assembly and disassembly without screws or adhesives. In recent years, as 3D printing has become an increasingly indispensable technology for product developers and designers—enabling accelerated design iterations, testing and product roll-outs—the ability to 3D print snap-fit joints has also risen in importance.
With 3D printers, designers now have more freedom to iterate complex geometries quickly, experiment with flexible materials, and customize connections for specific applications. That said, successfully 3D printing a snap-fit joint does require some specialized know-how, particularly when it comes to materials, print technologies, and settings. In this article, we’ll cover the basics of snap-fit joints, including the most common types of snap-fit joint, and then dive into how to 3D print snap-fit joints and troubleshoot common issues associated with the printable fasteners.
What is a snap-fit joint
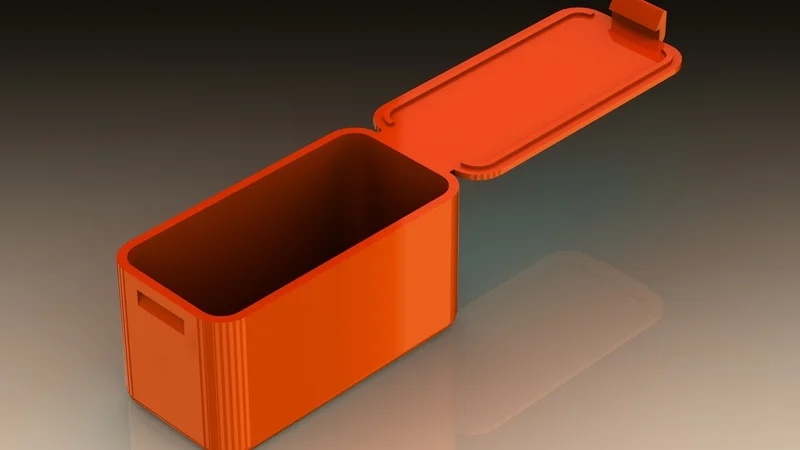
First off, what is a snap-fit joint? A snap-fit joint is a type of connection that uses flexible features to "snap" two parts together. When assembled, one part deflects temporarily to allow the other to slide in and then returns to its original position, locking the two pieces in place.
Think of the back cover of a remote control, the battery case of a toy, or the lid on a Tupperware container—these are all examples of snap-fit joints in action.
These joints rely on elastic deformation: a controlled bending or flexing of a part that springs back after installation. In most cases, snap-fits are designed to be non-permanent, allowing for disassembly and reassembly. However, some are designed for one-time use where a strong, tamper-resistant joint is needed.
Common types of snap-fit joints
Snap-fit joints come in several styles depending on the function, required strength, and available space. Here are the most common types[1]:
Cantilever Snap-Fit
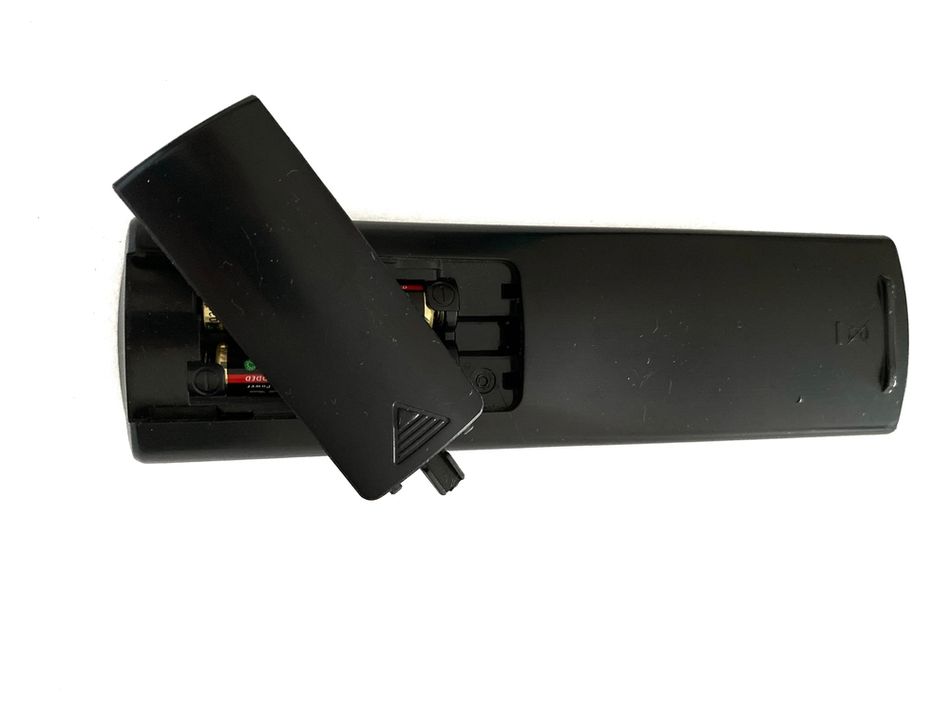
A cantilever snap-fit joint uses a flexible projecting arm that bends when inserting one part into another. Once fully inserted, the arm snaps back into place, securing the components. This type is simple, cost-effective, and widely used in plastic housings, electronic covers, and small consumer product assemblies.
Pros: Simple, effective, and easy to design.
Common uses: printer cartridges, battery holders, and small consumer electronics housings.
Annular Snap-Fit
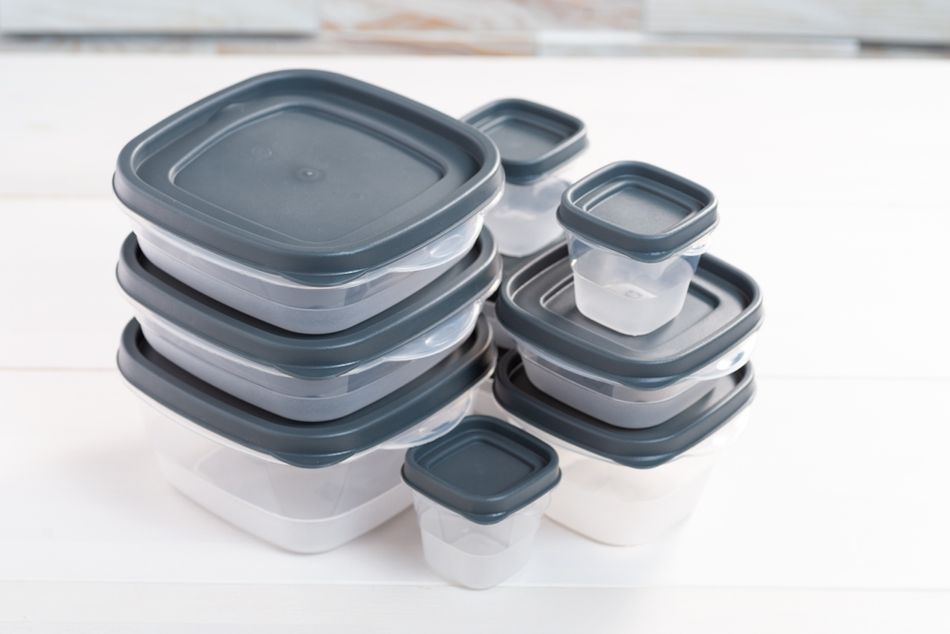
An annular snap-fit features a circular or ring-shaped ridge on one part that snaps into a matching groove on another part. As parts are pressed together, the ridge flexes and then locks in place. This joint provides uniform stress distribution and is often used in caps, lids, and containers.
Pros: 360-degree locking, strong hold.
Common uses: Lids (i.e. foot containers), caps, and cylindrical assemblies.
Torsional Snap-Fit
A torsional snap-fit involves a twisting or rotating motion to engage or disengage the joint. It uses a flexible component that twists under torque, allowing parts to lock together. When the torque is released, the part returns to its original position. It’s useful in compact, rotational locking mechanisms.
Pros: Works well in rotating parts.
Common uses: Hinged covers, rotating clips, childlocked medicine bottles.
Each of these types has unique design considerations when it comes to 3D printing, especially regarding strength, flexibility, and tolerance.
Why 3D print snap-fit joints?
Traditionally snap-fit joints are injection molded, since most snap-fit products are mass produced. However, 3D printing (also known as additive manufacturing) allows for rapid prototyping, custom geometries, and cost-effective production without needing molds or expensive tooling, opening up more possibilities for developing and producing products with integrated snap-fit joints.
Here are a few reasons why 3D printing snap-fits can be beneficial:
The technology enables rapid prototyping, meaning users can design, print, test, and revise 3D models in hours.
The technology is suited to making custom parts or small-batch parts, which gives users the freedom to tailor the design to their exact needs without worrying about tooling.
3D printed parts can be consolidated at the design stage, meaning no extra hardware (like screws, nails, or glue) are needed.
That said, 3D printed snap-fits do require some special attention, since movement and assembly considerations must be taken into account. Without careful design and appropriate print settings, the joint may break, be too loose, or simply not work.
How to 3D print snap-fit joints
Choosing a technology
Different polymer 3D printing processes come with varying resolutions, strengths, and material properties. Here’s how they stack up for snap-fit joints:
Fused Deposition Modeling (FDM)
Fused Deposition Modeling (FDM) is the most widely used and accessible 3D printing technology. It extrudes melted thermoplastic layer by layer to form parts. It offers a wide selection of materials, but layer adhesion, orientation, and brittleness can affect snap-fit performance.
Best for: Prototypes, functional parts, budget builds.
Pros: Affordable, accessible.
Cons: Layer lines reduce strength, especially along the Z-axis.
Tips: Print the snap-fit features horizontally to maximize strength and flexibility.
Stereolithography (SLA)
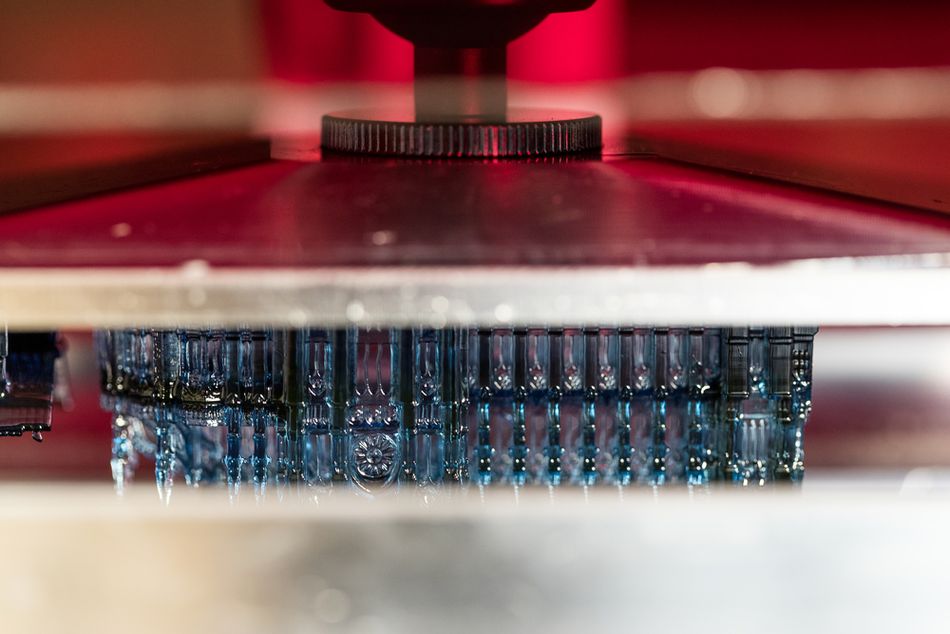
Stereolithography (SLA) uses resin cured by a UV laser, producing very high-detail prints with smooth surfaces.[2] However, most standard SLA resins are brittle, making them a poor choice for snap-fit joints—unless you're using specialty formulations.
Best for: High-detail parts, small snap features.
Pros: Excellent resolution.
Cons: Brittle unless flexible resin is used.
Tips: Use engineering or flexible resins designed for durability.
Selective Laser Sintering (SLS)
Selective Laser Sintering (SLS) fuses powdered materials (usually nylon-based) with a laser, creating strong, flexible, and isotropic parts. With SLS, there is no need for support structures to realize complex geometries.
Best for: Complex geometries and production-grade parts.
Pros: Strong and flexible nylon prints, no support structures.
Cons: More expensive and less accessible.
- Tips: Ideal for snap-fit joints due to consistent mechanical properties.
Recommended reading: SLA vs SLS: Choosing the Right Laser 3D Printing Technology
Choosing a Material
The success of a snap-fit joint depends heavily on the material it’s printed with. Since snap-fits rely on elastic deformation (i.e., bending and springing back), your material must strike a careful balance between flexibility and strength.
But not all materials behave the same across different 3D printing technologies. Let’s break it down by method.
FDM 3D Printing
Filament | Overview | Pros | Cons | Notes |
PP | Great for living hinges and repeated bending |
|
| Best for functional, high-stress snap-fits requiring durability |
PETG | Great flexibility, decent impact resistance, and easier to print than ABS. |
|
| Best for reusable snap-fits, enclosures, clips that need repeated bending. |
ABS | Moderate flexibility, strong, can deform slightly without cracking. |
| Prone to warping (thus an enclosed print bed is beneficial) | Best for medium-duty snap joints, structural parts |
PA (Nylon) | Excellent flexibility, impact resistance, and toughness |
| Can be difficult to print (requires dry storage, higher temps) | Best for functional prototypes, hinges, snap-fit mechanisms under stress |
TPU | Highly elastic, allows deformation and rebound |
| Not suitable for precision snap-fits that require a tight, rigid lock | Best for soft closures, cushioning features, flexible grips |
NB: PLA is not a suitable material for 3D printing snap-fit joints. While it is easy to print and rigid, PLA is very brittle and doesn’t tolerate bending, meaning that snap-fit joints can crack or snap on their first use.
SLA
Material | Overview | Pros | Cons | Notes |
Tough Resin (ABS-like) | Mimics the strength and toughness of ABS with better elasticity than standard resins |
|
| Best for durable snap-fits, high-detail clips, and hinges |
Durable Resin (PP-like) | Provides excellent elasticity and low modulus, similar to PP. |
| Low stiffness — won’t “snap” into place strongly | Best for soft latches, impact-resistant connections, living hinges |
Elastic Resin | Offers rubber-like flexibility and elongation | High stretchability and rebound | Not ideal for rigid locking snap joints | Best for seals, gaskets, flexible interfaces |
NB: Standard SLA resins are very brittle and are thus not suitable for snap-fit joints. The material may print with amazing detail but often cracks under stress or during the first bend.
Recommended reading: Selecting a Material for Stereolithography (SLA) 3D Printing
SLS
Material | Overview | Pros | Cons | Notes |
PA12 | Excellent mechanical strength and fatigue resistance |
| Best for any snap-fit application, from enclosures to automotive-grade clips | |
PA11 | Slightly more flexible than Nylon 12; ideal for parts that require higher impact resistance and ductility |
| Best for snap-fit parts with more extreme deflection or soft contact zones | |
Filled Nylons | Stiffer and stronger, better for high-load applications |
| Reduced flexibility — may be too rigid for delicate snap-fits | Best for tructural snap joints or high-performance applications |
When designing snap-fit joints, material behavior matters as much as geometry. A perfectly designed clip printed in the wrong material will fail, either by breaking, not snapping at all, or wearing out too quickly.
To this end, it’s a good idea to always prototype with your intended material and validate the snap-fit under real-world conditions. And don’t forget to design with proper tolerances and layer orientations, because even the best material can’t compensate for poor design.
Design guidelines
Designing for 3D printing is different from injection molding, and you need to tailor your snap-fit designs accordingly. Here are some critical elements to take into account when you are designing your model or preparing your snap-fit joint for printing:
Avoid Sharp Transitions
Sharp corners are stress concentrators and often lead to cracks. Use fillets to smooth transitions and distribute stress.
Control Deflection
Ensure that the deflection during snapping stays within the elastic limit of the material. Too much deflection can lead to breakage.
Typically, longer arms and thinner cross-sections are more prone to higher deflection, but less force required.
Print Orientation
Print orientation is very important when it comes to printing snap-fit joints, and varies depending on the technology you are using. For example, when it comes to FDM 3D printing, which results in anisotropic parts [3], always orient snap features flat on the bed so that the bending happens along the layer lines, not across them. This greatly increases strength and longevity. Since SLA 3D prints have isotropic properties (i.e. they have the same properties in all directions) the orientation is less important. The same is largely true for SLS, which produces parts with little difference between load directions.
Use Proper Tolerances
Snap-fit joints require precise clearances. Too tight, and they won’t fit. Too loose, and they won’t hold.
Typical clearance guidelines to ensure that snap-fit joints are functional are:
0.2 - 0.4 mm per side for FDM.
0.1 - 0.2 mm per side for SLA/SLS.
Limit Part Thickness
Thicker snap arms are harder to deflect. Aim for 0.8 to 2 mm thickness depending on material and use case.
Design for Assembly and Disassembly
Decide whether your snap-fit is meant to be taken apart. For reusable joints, add ramped features or finger grips for easy removal.
Recommended reading: How to Design 3D Prints: Software, DfAM, Advanced Strategies
Troubleshooting 3D printed snap-fit joint issues
Sometimes even a great design can run into problems. Here are common snap-fit joint issues that can arise when 3D printing and how to fix them:
Problem | Cause | Solution |
The joint is too loose | Overly large clearance or low material stiffness. | Reduce gap between parts, use stiffer material, or redesign hook geometry |
The joint is too tight | Not enough clearance or overhangs are not printing cleanly | Increase clearance, check overhang settings, and use support if needed |
Snap arm breaks | Layer separation, wrong orientation, or brittle material | Reorient part, increase fillets, or switch to a more flexible material |
Snap-joint doesn’t snap back | Incorrect print orientation or poor layer adhesion | Print with layers aligned along the bend direction |
Too much force needed to snap | Snap arm is too thick or short | Thin out the arm or increase its length to reduce stiffness |
Conclusion
Snap-fit joints are an incredibly efficient way to design assemblies that are clean, tool-free, and easy to manufacture, and 3D printing makes them more accessible than ever. Whether you’re building prototypes, enclosures, or functional products, integrating snap-fits into your design can reduce parts, cut assembly time, and enhance the user experience.
The key to success lies in understanding the interplay between material choice, print technology, and thoughtful design. FDM is great for budget-friendly functional parts using materials like PETG or Nylon, while SLA and SLS can offer the properties and tight tolerances needed for a functional snap-fit joint.
Remember: proper print orientation, generous fillets, and carefully calculated tolerances are just as important as the material itself. And don’t be discouraged if your first design doesn’t work perfectly: snap-fits often require a bit of iteration.
By following the guidelines and tips in this article, you’ll be well on your way to creating reliable, functional, and satisfying snap-fit joints that click just right.
FAQs
Q: Can I use PLA for snap-fit joints?
A: PLA is not an ideal material for snap-fit joints. PLA is brittle and tends to crack or snap when flexed, especially in tight-fitting designs. If you do use PLA, stick to very light-duty applications and use generous fillets to reduce stress concentration.
Q: What’s the best orientation for printing snap-fit arms for FDM?
A: Snap-fit features should be printed flat on the build plate, so that layers run along the direction of flex (i.e., the arm bends in-plane with the layers). This improves flexibility and minimizes breakage due to poor layer adhesion.
Q: How do I know how much clearance to add between snap-fit parts?
A: Clearance depends on your printer's precision and technology. As a rule of thumb:
FDM: 0.2 – 0.4 mm per side
SLA: 0.1 – 0.2 mm per side
SLS: 0.1 – 0.3 mm per side
Q: Which material works best for reusable snap-fit joints?
A: Nylon (especially with SLS or FDM) is the gold standard: it’s strong, flexible, and can withstand repeated bending. PETG is a good second choice for FDM users. For SLA printing, tough or durable resins are best suited for reusable snap fits.
Q: Why does my snap-fit joint break or not return to its shape?
A: This usually comes down to: using the wrong material (e.g., brittle resin or PLA), incorrect print orientation (particularly for FDM), or too much deflection beyond the elastic limit.
Try using a more flexible material, adding fillets to reduce stress, or adjusting the length/thickness of your snap arm to allow gentler bending.
References
[1] Snap-Fit Joints for Plastics: A Design Guide. Bayer Material Science. http://fab.cba.mit.edu/classes/S62.12/people/vernelle.noel/Plastic_Snap_fit_design.pdf
[2] Harlalka AD. Comparative Analysis of Additive Manufacturing Techniques for Snap-Fit Assembly: A Case Study.
[3] Klahn C, Singer D, Meboldt M. Design guidelines for additive manufactured snap-fit joints. Procedia Cirp. 2016 Jan 1;50:264-9.