How to Prevent 3D Print Blobs & Zits
Surface imperfections on a 3D print can be frustrating but they’re not insurmountable. Here is how to prevent and fix 3D print blobs and zits by adjusting 3D printer and slicer settings.

Last updated on 08 Jan, 2025. 10 minutes read
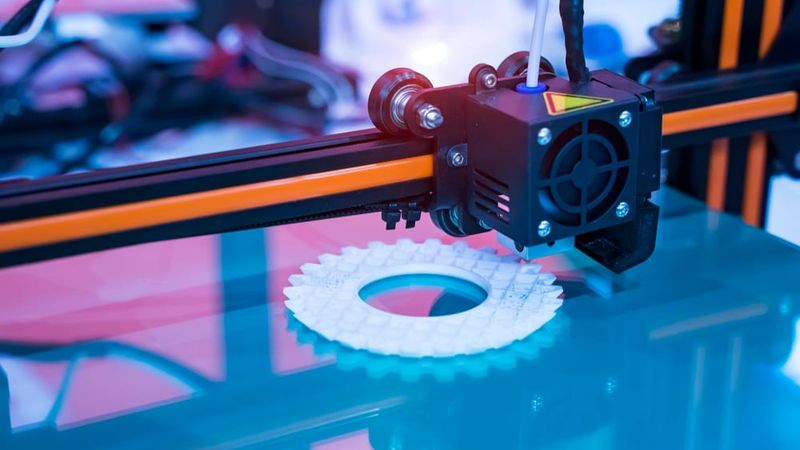
Prevent 3D print blobs and zits by adjusting temperature and slicer settings.
It is always discouraging when a 3D print comes off the build platform with visible defects and imperfections. Whether it’s a 3D print that has become unstuck from the print bed and suffered from warping, or a print with stringing or other surface irregularities: a ruined print amounts to wasted time and material costs. We’ve already addressed how to fix problems like poor first layer bed adhesion—which can lead to 3D print warping—so in this article we’ll be focusing on another type of defect: 3D print blobs & zits. Keep reading to understand what causes blobs and zits and how to prevent them from happening in the future.
Identifying Blobs & Zits on a 3D Print
In 3D printing, blobs (also known as zits) are extrusion irregularities that appear on the surface of a 3D printed part. Blobs and zits are distinguished from other surface defects, like Z-banding, by their inconsistency. Whereas Z-banding produces a ribbed pattern on the 3D print, blobs are quite literally bits of oozed filament that stick out from the print’s surface.
Blobs and zits can significantly degrade the quality of 3D prints, affecting both their appearance and functionality. These imperfections often create visible blemishes, detracting from the overall aesthetic value of the print. Furthermore, they can disrupt the fit and alignment of components, especially in cases where precision is essential, such as mechanical parts or modular designs. They key impacts of blobs and zits are:
Weakened Structure:
Blobs and zits can introduce inconsistencies in layer adhesion, reducing the strength and durability of the print.
They can also create stress points, making the print more prone to cracking or breaking under load.
Poor Aesthetics:
Surface imperfections like blobs and zits are especially noticeable on smooth or curved surfaces, diminishing the visual appeal.
These defects often require post-processing to correct, such as sanding, filling, or painting.
Potential for Part Failure:
Blobs and zits may interfere with moving parts, causing mechanical issues.
They can can disrupt tolerances, leading to misalignment or improper functioning of assembled pieces.
What causes 3D printing blobs and zits?
There are a number of potential issues that can be causing blobs and zits, all of which can be fixed by fine tuning printer settings.[1] Below are the leading causes of 3D print blobs and zits.
Over-extrusion
3D print blobs & zits are primarily caused by over-extrusion and the motion of the filament extruder. If, for example, you are printing a part with a circular perimeter, blobs can occur when the print head returns to its starting position. The material builds up at this point, which can result in the formation of a filament blob. Similarly, if the 3D printer extruder starts and stops several times over the course of a 3D print job, blobs and zits can also occur.
Retraction
Blobs and zits can also be caused by 3D printer nozzle retraction. In the FDM 3D printing process, retraction is a technique in which the hot end briefly pulls filament back instead of extruding it out. This method is used to reduce unwanted material extrusion, like stringing, as the print head moves to a new print location. However, if the retraction settings on your 3D printer are not optimized, the process may actually have a negative effect, causing blobs or zits.
Nozzle Temperature
Other 3D printer settings, such as nozzle temperature, can also increase the risk of blobs. For example, if the nozzle temperature is too high, filament can come oozing out too quickly and create defects on the print surface. (On the flip side, if nozzle temperatures are too low, it can cause other issues like clogs, poor layer bonding, poor dimensional accuracy, and structural weaknesses.)
Print Speed
Printing speeds can also be a factor if they are too fast and don’t allow for sufficient cooling time between layers. In other words, if new layers are deposited before the underlying layer of filament has had time to adequately solidify, it can be squished and deformed by the weight of the layers above it.
Recommended reading: What Causes 3D Print Warping and How to Prevent It
What can you do to prevent 3D printing blobs?
Fortunately, there are a number of ways to minimize the risk of blobs and zits in FDM 3D printing. Below are five key strategies you can try to prevent the 3D printing defects from occurring.
Adjust Retraction Settings
In slicer software, you can adjust retraction settings to control how much filament is pulled back into the nozzle and at what point this happens. Finding the right retraction settings can minimize material buildup either at the beginning of the print head’s path along the part perimeter or as it completes a layer and rejoins its starting position (for this, see coasting settings below).
In general, it is advisable to use a smaller retraction distance (this is the amount of filament pulled back into the nozzle). This is because if too much filament is retracted, air can also be pulled into the nozzle. When the printhead then goes to extrude filament, the air is heated along with the filament, which can cause extrusion inconsistencies, like blobs and bubbles on the print surface. Too little retraction, however, can lead to over-extrusion and defects like stringing and blobs and zits. It’s all about finding the sweet spot, so you might need to try out a few different retraction distance settings. The amount of retraction will also depend on the type of FDM 3D printer: systems with direct drive extruders only require a retraction distance between 0.5 mm to 2 mm. Bowden extruder systems, on the other hand, can require higher retraction values, as much as 15 mm.[2]
Retraction speed is also worth mentioning. This setting controls how quickly the filament is pulled back into the nozzle. If the retraction speed is too slow, your print may suffer from oozing filament. A standard range for retraction speed is between 20 mm/second and 100 mm/second.
Activate Coasting Settings
Coasting is a setting built in to most 3D printing slicer programs, including Simplify3D and Cura. Coasting is often found under retraction settings and controls if the print head stops extruding filament at the end of each layer perimeter. Coasting is therefore helpful in reducing blobs or zits that are caused by filament buildup when the extruder comes back to its starting point.
When you activate coasting, the slicing program will essentially tell the 3D printer nozzle when to stop extruding filament—usually this will be triggered a fraction of a millimeter before the printhead completes the part’s perimeter. Coasting therefore anticipates that there will be over-extrusion when the printhead stops extruding and stops the buildup of material at these starting/ending locations. Coasting also helps to relieve pressure inside the nozzle that causes over-extrusion. It is advisable to begin with a smaller coasting distance, such as 0.2 mm, and increase the value incrementally until you no longer see blobs appearing on the part’s surface.
Wiping and Shell Settings
Another group of slicer settings that can help minimize blobs and zits are the wipe parameters. With wiping activated, the 3D printer will drag the nozzle at the end of every printed layer along the outer wall of the printed part to remove any material buildup. With this setting, it is common for retraction to happen simultaneously, which can help prevent blobs and zits. A typical wipe distance—the length that the nozzle will wipe along the outer wall—is 0.4 or 0.5 mm. Wiping can also help to reduce the appearance of the z-seam.
Because 3D print blobs and zits are primarily an aesthetic issue on the outer shell of a part, tuning your 3D printer’s shell parameters can improve the overall print quality by preventing or covering up blobs and zits. For instance, simply activating the “outer before inner wall” setting in your slicer can improve the quality of the part’s outer shell. This setting tells the 3D printer to extrude the outer layers of a part before printing the inner structure and infill. Not only can this reduce the risk of blobs and blemishes, it can also improve the dimensional accuracy of your print.
Adjust Print Temperature and Speed
As we saw, a too-hot print head can lead to over-extrusion, and rapid printing speeds can lead to defects like blobs and zits due to lack of cooling. Therefore, lowering the print temperature and print speed can help to reduce the risk of blobs and zits. The temperature of your nozzle will depend on the type of filament you are 3D printing. For example, PLA filament typically requires a nozzle temperature of between 200-210 °C.[3] If blobs are still occurring in this range, try lowering the nozzle temperature in 5°C increments.
Reducing the print speed can also reduce the occurrence of blobs and zits. In general, a lower printing speed can improve print quality because the nozzle has more time to deposit the filament and the extruded layer has more time to cool before the next layer is applied. Try reducing your print speed by 5 to 10 mm/s to see if that helps minimize the appearance of blobs.
Recommended reading: ABS print temperature considerations: Nozzle, bed, enclosure
Adjust Fan Settings
In addition to finding the right print head temperature, you can also reduce the risk of 3D print blobs and zits by increasing your 3D printer’s fan speeds. (Or, if your 3D printer doesn’t have a built-in fan, it can help to integrate one.) A fan helps to regulate the temperature of the 3D printing environment and can help prevent overheating.
This, in turn, ensures that the layers of melted thermoplastic that are deposited onto the print bed are cooled and solidified at a controlled rate. Because over-extrusion and squished print layers are two potential causes of blobs and zits, increased cooling in the print chamber using fans can promote better quality prints. Of course, over-cooling your print environment can also impact layer adhesion—it’s all about finding a balance.
Here’s a table summarizing the five aforementioned strategies:
Strategy | Description | Adjustment Range/Notes |
Adjust Retraction Settings | Controls how much filament is pulled back into the nozzle to reduce material buildup. | Retraction distance: 0.5 mm to 2 mm for direct drive, and up to 15 mm for Bowden. Retraction speed: 20–100 mm/s. |
Activate Coasting Settings | Stops filament extrusion slightly before the printhead completes a layer perimeter to reduce buildup. | Start with 0.2 mm coasting distance and adjust as needed. |
Wiping & Shell Settings | Wiping removes excess filament from the nozzle; shell settings help cover blemishes. | Wipe distance: 0.4–0.5 mm. Shell before infill for improved finish. |
Adjust Print Temperature & Speed | Lower temperatures and slower speeds reduce over-extrusion and give filament time to cool. | Lower nozzle temperature by 5°C increments. Speed: Reduce by 5–10 mm/s. |
Adjust Fan Settings | Increased fan speed helps cool the print layers faster, preventing overheating and over-extrusion. | Increase fan speed but avoid over-cooling to maintain layer adhesion. |
Each of these strategies targets specific factors contributing to blobs and zits, improving overall print quality.
Conclusion
In the end, the first step to preventing 3D printing defects like blobs and zits is to understand where they come from. Factors like temperature, calibration, and slicer settings can be the cause and solution to blobs and zits. So if you’re experiencing imperfections in your 3D print’s outer shell, be sure to play with your retraction, coasting, and wipe settings, as well as adjust your nozzle print temperature. It may take some time to find the right combination of settings for a given material, so start out with a small test print. The results will be worth it!
Frequently Asked Questions (FAQs)
Q: How can I identify blobs and zits on a 3D print?
A: Blobs and zits appear as small, raised lumps of excess filament on the print's surface, which are often irregular in shape. Look for uneven layers, especially around corners, edges, or smooth surfaces, where the extruder may have released too much material.
Q: How do blobs and zits affect the quality of a 3D print?
A: Blobs and zits can weaken the print’s structure by causing poor layer adhesion, making it more prone to cracking or breaking. They also reduce the visual appeal of the print and can interfere with part alignment, potentially leading to mechanical issues or misfit components in assembled designs.
Q: What causes blobs and zits in 3D printing?
A: Blobs and zits in 3D prints are often caused by over-extrusion, improper retraction settings, high nozzle temperature, or excessive print speed. These issues can lead to excess filament being deposited at certain points, causing raised lumps or irregularities on the surface of the print.
Q: How does over-extrusion cause blobs and zits?
A: Over-extrusion happens when too much filament is pushed out during printing, especially at start/stop points or circular perimeters. This results in material building up and forming blobs or zits, particularly when the print head returns to its starting position or moves over areas multiple times.
Q: How do retraction settings affect blobs and zits in 3D prints?
A: Incorrect retraction settings can lead to blobs and zits when the nozzle pulls filament back too much or not enough during travel moves. If retraction is not optimized, excess material may be extruded at the wrong time, causing unwanted surface defects.
Q: What is coasting, and how can it help prevent blobs and zits?
A: Coasting is a setting that stops filament extrusion just before the printhead completes a layer. This prevents excess material from building up at the start/stop points of a print, minimizing blobs or zits. Start with a small coasting distance, such as 0.2 mm, and increase it incrementally until the surface imperfections are reduced.
Q: How can adjusting print temperature and speed reduce blobs and zits?
A: Lowering the print temperature and speed can help prevent blobs and zits. If the nozzle is too hot, filament may ooze out too quickly, causing defects. Try reducing the temperature in 5°C increments if blobs persist. Slower print speeds allow the material to cool properly, reducing the risk of squished layers or over-extrusion, both of which contribute to blobs and zits.
References
[1] MorCh N. Analysis of the Effects of Basic Printer Settings on PLA 3D Prints (Doctoral dissertation, Massachusetts Institute of Technology).
[2] Simplify3D, 2022. “Stringing or Oozing.” [Internet] https://www.simplify3d.com/support/print-quality-troubleshooting/stringing-or-oozing/ [Accessed April 20, 2022].
[3] Ultimaker, May 28, 2021. “How to Print with Ultimaker PLA.” [Internet] https://support.ultimaker.com/hc/en-us/articles/360011952740-How-to-print-with-Ultimaker-PLA [Accessed April 21, 2022]